Connect with us

Ice Cream Recipes

Dairy-Free Delight: Best Non Dairy Ice Cream Recipe!

Luscious and creamy, discover the secrets to crafting your own dairy-free ice cream that's so divine, you'll never settle for store-bought again!

Published

on

dairy free ice cream recipe

You're craving a creamy, dreamy dairy-free ice cream that's all your own! Start with full-fat coconut milk for a rich texture, and don't forget to add guar gum to maintain that creaminess when frozen. Then, get creative with mix-ins like nuts or fruit, and experiment with different flavors using extracts. Want more? Try swirling in sauces or adding crunchy toppings for a unique twist. With these tips, you'll be scooping up your new favorite dessert in no time – and the possibilities are endless from here!

Key Takeaways

  • Use full-fat coconut milk for a rich, creamy texture and subtle coconut flavor in your non-dairy ice cream recipe.
  • Experiment with different flavors and mix-ins, like nuts, seeds, fruit, or chocolate chips, to create unique and delicious variations.
  • Add guar gum to maintain creaminess when frozen and ensure a smooth, scoopable texture.
  • Opt for high-quality coconut milk brands to ensure the best results and avoid any unpleasant flavors or textures.
  • Don't be afraid to get creative and adjust sweeteners, flavors, and toppings to create your perfect dairy-free ice cream recipe.

Delicious Dairy-Free Ice Cream Recipes

Get ready to indulge in a world of creamy, dreamy treats with these delicious dairy-free ice cream recipes that cater to your unique tastes and dietary needs.

As a vegan or someone with dairy allergies, you don't have to miss out on the fun of enjoying a cold, sweet treat on a hot summer day. With plant-based milk like coconut milk as a base, you can create a variety of non-dairy ice creams that aren't only delicious but also healthy.

From classic vanilla to decadent chocolate, the possibilities are endless when it comes to customization. You can choose from a range of flavors and toppings to create your perfect scoop.

The best part? You have control over the ingredients, ensuring that your dairy-free ice cream is free from unwanted additives and preservatives. With these recipes, you can enjoy a guilt-free, healthy dessert that's perfect for hot summer days.

Benefits of Full-Fat Coconut Milk

rich creamy coconut milk

When you use full-fat coconut milk in your non-dairy ice cream recipe, you'll notice it creates a rich, creamy texture that's hard to resist.

Plus, it's a great option for those with dietary restrictions, as it's suitable for lactose-free, egg-free, and vegan diets.

Advertisement

Creamy Texture Benefits

With full-fat coconut milk as your base, you can indulge in a rich, velvety dairy-free ice cream that's both decadent and allergen-friendly.

The high fat content in full-fat coconut milk is the secret to achieving a creamy texture in your dairy-free ice cream. Additionally, the guar gum present in coconut milk helps maintain this creaminess even when frozen, ensuring a smooth and luxurious scoop every time.

As a lactose-free, egg-free, and vegan-friendly ingredient, coconut milk is an excellent choice for those with dietary restrictions. Opt for quality brands like Native Forest or Whole Foods 365 to secure the best results in your dairy-free ice cream recipe.

The subtle coconut flavor adds a unique twist to your ice cream without overpowering the other ingredients. With full-fat coconut milk, you can enjoy a creamy, dreamy dairy-free ice cream that's perfect for hot summer days or as a sweet treat any time of the year.

Suitable for Diets

You'll appreciate that full-fat coconut milk is a versatile ingredient that caters to various dietary needs, making it an ideal base for your dairy-free ice cream recipe. As a lactose-free, egg-free, and vegan-friendly option, it's perfect for those with dietary restrictions.

Advertisement

The guar gum present in coconut milk helps maintain the creaminess of your ice cream when frozen, ensuring a smooth and satisfying texture.

When choosing a brand, opt for quality brands like Native Forest or Whole Foods 365, which offer high-quality coconut milk that's rich in flavor and texture.

By using full-fat coconut milk in your dairy-free ice cream recipe, you'll enjoy a rich and creamy treat that's on par with traditional dairy ice cream. Plus, the subtle coconut flavor adds a delicious twist to your favorite flavors.

With full-fat coconut milk, you can indulge in guilt-free ice cream that's not only delicious but also caters to your dietary needs.

Customizing Your Non-Dairy Ice Cream

personalized non dairy frozen treats

Take your non-dairy ice cream to the next level by incorporating your favorite mix-ins, from nuts and seeds to fruit and chocolate chips, to create a unique flavor profile that's all yours.

You can also experiment with different flavors by adding extracts like mint, almond, or coconut to your ice cream base.

Advertisement

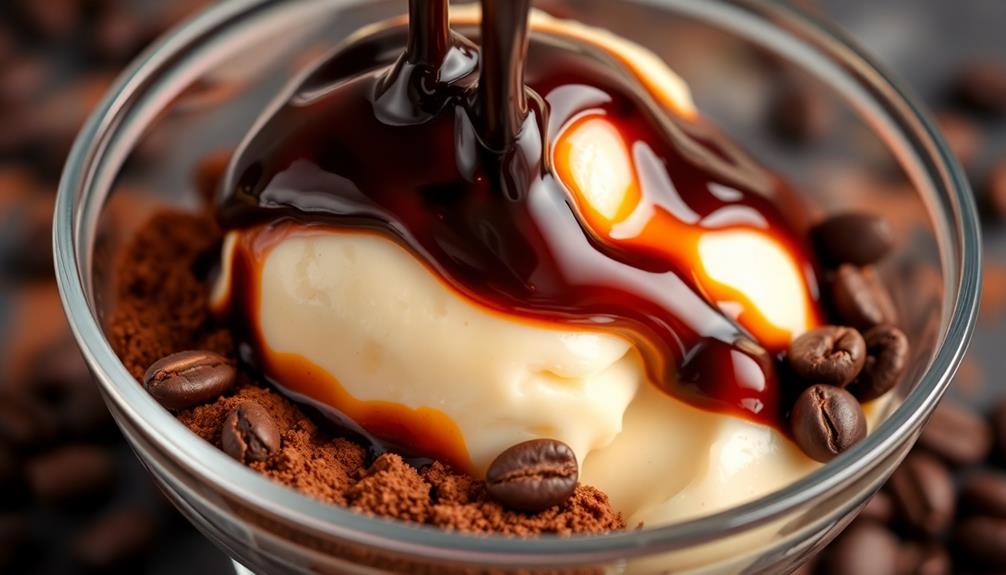
For added depth, swirl in sauces like caramel, chocolate ganache, or fruit purees to create unique combinations.

To enhance the texture, sprinkle on crunchy toppings like granola, cookie crumbles, or toasted coconut flakes.

Using coconut milk as your base, you can customize your non-dairy ice cream to your heart's content.

Want it sweeter? Adjust the amount of sweeteners like maple syrup, agave nectar, or date paste to tailor the sweetness level to your preference.

With endless possibilities, you can create a non-dairy ice cream that's truly one-of-a-kind.

Advertisement

Variations of Dairy-Free Ice Cream

dairy free frozen dessert options

You're ready to take your dairy-free ice cream game to the next level with some amazing variations.

From flavorful options like healthy cookie dough and paleo mint chocolate chip, to vegan recipes and dairy-free delights, you'll find a world of possibilities.

Now, let's explore these exciting variations and get creative with your non-dairy ice cream recipes!

Flavorful Ice Cream Options

Indulge in a world of creamy delights with dairy-free ice cream flavors that cater to every palate, from decadent treats to invigorating twists. You can experiment with different bases like coconut milk, almond milk, or cashew cream to create unique flavor profiles. Try adding cocoa powder or melted chocolate for a rich and decadent treat, or a hint of vanilla for a classic and creamy taste.

Here are some flavorful options to get you started:

FlavorDescription
Healthy Cookie DoughChocolate chips and coconut milk create a guilt-free delight
Paleo Mint Chocolate ChipEnergizing peppermint and dark chocolate chunks in a coconut milk base
Vegan Key LimeTart and tangy key lime juice mixed with creamy coconut milk

These dairy-free ice cream flavors offer a healthier alternative to traditional dairy ice cream, making them suitable for vegans and those with dairy allergies. Plus, they're easy to make and delicious to eat! With endless topping and flavor combinations, you can customize your dairy-free ice cream for a unique and delicious dessert experience.

Advertisement

Vegan Ice Cream Recipes

Explore the world of vegan ice cream recipes, where plant-based ingredients like coconut milk, almond milk, or cashew milk come together to create deliciously creamy and rich desserts.

You'll find that these recipes cater to various dietary preferences and restrictions, including vegan, lactose-free, and egg-free diets.

Get creative with popular variations like chocolate avocado ice cream, banana ice creams, mint chocolate chip sundaes, and fruit-based sorbets.

If you're a nut lover, you'll enjoy nutty vegan ice creams that feature ingredients like cashews, almonds, or coconut for a creamy texture and rich flavor.

With vegan ice cream recipes, you can easily customize flavors, toppings, and mix-ins to suit your taste buds.

Advertisement

Try adding different flavors like vanilla, strawberry, or caramel to create unique and delicious combinations.

Using plant-based ingredients, you can create non-dairy ice cream that's just as creamy and indulgent as traditional ice cream.

Dairy-Free Delight Variations

From decadent Healthy Cookie Dough to invigorating Paleo Mint Chocolate Chip, dairy-free ice cream variations offer a diverse range of flavors to tantalize your taste buds.

You can indulge in Vegan Key Lime, a zesty and invigorating twist on traditional ice cream. If you're craving something rich and satisfying, Nutty Ice Cream is a great option. Made with coconut milk, these dairy-free alternatives cater to different dietary preferences and offer a wide array of flavors to enjoy.

Fruit-based variations like Raspberry Delight and Strawberry Basil Creamsicles provide a revitalizing twist to traditional ice cream. You can also experiment with unique flavors like Coconut Milk Ice Cream or Paleo Mint Chocolate Chip.

Advertisement

The best part? These dairy-free delights are just as delicious as their traditional counterparts. With so many options to choose from, you're sure to find a flavor that suits your taste buds.

Making Your Own Vegan Ice Cream

vegan ice cream recipe

You can create a wide range of vegan ice cream flavors by experimenting with different plant-based milks and natural sweeteners. By making your own vegan ice cream, you'll have complete control over the ingredients, allowing you to customize the flavors and textures to your liking. This is especially important for those with dietary restrictions or preferences.

Some popular plant-based milks for making non-dairy ice cream include:

  • Coconut milk, which adds a rich and creamy texture
  • Almond milk, a lighter and more invigorating option
  • Cashew milk, perfect for creating unique and exotic flavors

With homemade non-dairy ice cream, you can try out new and innovative recipes, or recreate your favorite store-bought flavors. The non-dairy ice cream market has seen significant growth, and by making your own, you'll be part of this growing trend. Plus, you'll save money and reduce your environmental impact by avoiding packaging waste.

Tips and Tricks for Best Results

helpful advice for success

To achieve the perfect scoop, follow these expert tips and tricks for making non-dairy ice cream that's creamy, delicious, and tailored to your taste preferences.

First, use full-fat coconut milk for a rich and creamy texture. You can also experiment with different flavors and toppings to customize your ice cream to your heart's content.

If you want an extra creamy texture, consider adding a pinch of guar gum to your mixture before freezing. When it comes to coconut milk, opt for quality brands like Native Forest or Whole Foods 365 for a better taste.

Once your non-dairy ice cream is ready, store it in a freezer-friendly container to keep it fresh for a longer period. This will ensure that your ice cream stays creamy and delicious even after multiple scoops.

Advertisement

Frequently Asked Questions

What Is a Good Non-Dairy Substitute for Ice Cream?

You're looking for a good non-dairy substitute for ice cream? Well, you've got options! Coconut milk, almond milk, and cashew milk are popular choices, offering creamy textures and subtle flavors that'll satisfy your cravings!

What Is so Delicious Dairy-Free Ice Cream Made From?

You're wondering what's behind the creamy goodness of So Delicious Dairy-Free Ice Cream? Investigating the ingredients, you'll find it's made from a blend of coconut milk, organic cane sugar, and other plant-based ingredients, free from dairy and common allergens!

What Milk Is Used in Dairy-Free Ice Cream?

You'll find that dairy-free ice cream typically uses plant-based milks like coconut, almond, cashew, or oat milk as a substitute for traditional dairy. These milks provide a creamy texture and subtle flavor to your frozen treat.

Why Are Non-Dairy Milks Harder to Make a Creamy Soft Texture in Ice Cream With?

You'll find that non-dairy milks lack natural fats and proteins, making them harder to work with when creating a creamy texture in ice cream. They also have less fat content and more water, leading to ice crystals and a less smooth consistency.

What Are the Best Non-Dairy Alternatives for Making Ice Cream?

When it comes to the best dairy free ice cream, there are several fantastic non-dairy alternatives to choose from. Coconut milk, almond milk, and cashew milk all make creamy and delicious bases for dairy-free ice cream. For those with allergies, soy and oat milk are also great options.

Advertisement

Conclusion

You've made it to the end of this dairy-free delight journey! Now, it's time to put your newfound knowledge to the test. Get creative, experiment with flavors, and don't be afraid to try new things. Your taste buds are waiting, and the possibilities are endless.

But, be warned: once you take a bite of your creamy, dreamy, dairy-free ice cream, there's no turning back. You'll be hooked, and your taste buds will never forgive you if you go back to the boring, dairy-filled stuff again!

Mario's creativity shines through his ability to describe the sensory experience of enjoying ice cream. Whether he's discussing the velvety texture, the explosion of flavors, or the delightful combinations of toppings and sauces, his words transport readers to a world of mouthwatering sensations. His descriptive language allows readers to imagine and savor the flavors even before taking the first bite.

Continue Reading
Advertisement

Ice Cream Recipes

Churned Perfection: Best Vanilla Ice Cream Recipe With Ice Cream Maker!

Get ready to indulge in the creamiest vanilla ice cream recipe using an ice cream maker, and discover the secrets to churning perfection!

Published

on

By

perfect vanilla ice cream

Create the perfect vanilla ice cream with your ice cream maker by whisking egg yolks and sugar for a rich base. Combine half & half and essential heavy cream for that luxurious texture. Don't forget vanilla extract and vanilla bean for robust flavor. Chill the custard before churning to get that silky smoothness you crave. The churning process is key for creaminess, aerating for a light texture and flavor enhancement. Want to elevate your homemade ice cream game? Continue discovering mix-ins, toppings, serving ideas, storage tips, and more for the ultimate treat experience.

Key Takeaways

  • Rich custard base with egg yolks for velvety texture.
  • Optimal fat content in dairy products for creaminess.
  • Proper churning time for a well-balanced taste.
  • Experiment with mix-ins for enhanced flavor profiles.
  • Serve with creative toppings for a delightful twist.

Ingredients & Substitutions

recipe customization and alternatives

For a successful vanilla ice cream batch, make sure you have the necessary ingredients and understand potential substitutions.

When preparing your ingredients, be sure to include egg yolks for richness and a smooth texture. Opt for half & half with 11%-18% milk fat to achieve a balanced creaminess in your ice cream. Heavy cream, with at least 36% milk fat, is essential for a luxurious and creamy consistency in your dessert. Enhance the vanilla flavor by using granulated cane sugar for its pure sweetness.

To create a robust taste profile, consider incorporating both vanilla extract and vanilla bean into the recipe. These ingredients, when combined in the Cuisinart Ice Cream maker, will result in a delectable vanilla ice cream.

If you prefer a lower fat option, adjust the ratios accordingly while maintaining the essence of the vanilla flavor.

Recipe Preparation Steps

how to make quiche

Begin by whisking together the egg yolks and sugar until smooth to create a rich custard base for your vanilla ice cream.

Follow these steps to achieve the perfect homemade vanilla ice cream:

Advertisement

  1. Combine Ingredients: Heat the egg yolk and sugar mixture with half and half in a saucepan. Add the scraped vanilla bean to infuse the custard with a deep, aromatic flavor.
  2. Thicken the Custard: Cook the mixture over low heat, stirring constantly until slightly thickened. This step ensures a velvety and luxurious texture in your ice cream.
  3. Incorporate Cream and Flavorings: Remove the custard from heat and stir in the heavy cream, a pinch of salt, and vanilla extract. This combination adds richness and depth to your vanilla ice cream.
  4. Chill and Churn: Chill the custard thoroughly in the refrigerator before transferring it to the ice cream maker for churning. The churning process incorporates air into the mixture, creating a silky and creamy consistency for your delightful vanilla ice cream.

Homemade Ice Cream Process

making ice cream at home

You'll love how churning the ice cream mixture in the maker incorporates air, resulting in a creamy texture.

Adding mix-ins like chocolate chips or fruit enhances the flavor profile, making each scoop a delightful experience.

These simple steps are key to creating a homemade treat that will impress your friends and family.

Churning for Creaminess

To achieve a creamy texture in your homemade ice cream, churn the mixture until it reaches a smooth consistency. Churning plays an important role in creating that perfect scoop of ice cream. Here's why it matters:

  1. Aeration: Churning ice cream incorporates air into the mixture, giving it a light and airy texture.
  2. Fat Distribution: The churning process evenly distributes fats throughout the ice cream base, resulting in a rich and creamy mouthfeel.
  3. Ice Crystal Prevention: Churning helps break down ice crystals, preventing them from growing too large and ensuring a velvety smoothness.
  4. Flavor Development: Proper churning time allows the ingredients to blend well, enhancing flavor development and creating a well-balanced taste profile.

Mix-Ins for Flavor

Enhance the flavor and texture of your homemade vanilla ice cream by incorporating mix-ins like chocolate chips, caramel swirls, fruit chunks, or nuts during the churning process. Adding these mix-ins during the last 10-15 minutes of churning ensures they're evenly distributed, providing bursts of flavor in every bite.

Experimenting with different mix-ins allows for endless customization, creating unique combinations that cater to your preferences. Mix-ins like chocolate chips can add a delightful crunch, caramel swirls introduce a rich sweetness, while fruit chunks bring an invigorating burst of flavor.

It's crucial to balance the sweetness and texture of the ice cream by selecting mix-ins that complement the creamy vanilla base. By carefully choosing and combining mix-ins, you can create a harmonious blend that elevates the taste and visual appeal of your vanilla ice cream, making it a truly decadent treat.

Advertisement

Toppings & Variations

tasty topping variations included

Consider adding fruity compotes or fresh fruit to your vanilla ice cream for a burst of flavor. To elevate your vanilla ice cream experience, here are some delightful toppings and variations you can try:

  1. Fruity Toppings: Enhance your vanilla ice cream with a variety of compotes or fresh fruit such as strawberries, raspberries, or mango for a invigorating and tangy twist.
  2. Nutty Toppings: Add a crunchy texture and rich flavor by sprinkling some chopped almonds, pecans, or a drizzle of peanut butter over your vanilla ice cream.
  3. Chocolate Toppings: Indulge your sweet tooth by topping your vanilla ice cream with chocolate chips, chocolate shavings, or crumbled cookies for a decadent treat.
  4. Classic Toppings: Elevate your dessert with classic toppings like drizzles of caramel sauce, a dollop of whipped cream, or a sprinkle of rainbow sprinkles for a fun and traditional touch.

Experiment with these customizable mix-ins to create your own personalized vanilla ice cream masterpiece.

Serving Suggestions

unique ideas for plating

Enhance your vanilla ice cream experience with flavorful pairings and creative topping ideas.

Seasonal fruits, classic desserts, and unique toppings can take your dessert to the next level.

Experiment with different combinations to find your perfect sweet treat.

Flavorful Ice Cream Pairings

Looking to elevate your vanilla ice cream experience? Here are some flavorful ice cream pairings that will take your dessert to the next level:

  1. Warm Desserts: Pair your vanilla ice cream with warm desserts like apple pie or brownies for a comforting and indulgent treat.
  2. Sweet Sauces: Enhance the flavor of vanilla ice cream by drizzling it with caramel sauce or hot fudge for a rich and indulgent touch.
  3. Fresh Fruits: Add an invigorating twist to your vanilla ice cream by topping it with fresh fruits like strawberries or peaches, balancing out the creamy sweetness.
  4. Decadent Sundaes: Create a lavish sundae with nuts, whipped cream, and a cherry on top of your vanilla ice cream for a delightful and satisfying dessert experience.

Creative Topping Ideas

For a delightful twist on your vanilla ice cream, explore creative topping ideas that will elevate your dessert experience. Add a burst of freshness with fruity toppings like strawberry compote or fresh blueberries. The sweet and tangy flavors will complement the creamy vanilla base perfectly.

If you're a fan of nutty flavors, consider adding some crunch with crushed almonds or a luscious swirl of peanut butter. These nutty toppings won't only add texture but also a rich and indulgent taste to your vanilla ice cream.

For those with a sweet tooth, indulge in decadent chocolate toppings such as chocolate chips or crumbled cookies. The combination of chocolate and vanilla is a classic favorite that never disappoints.

Advertisement

For a touch of elegance, opt for classic toppings like caramel sauce or a dollop of whipped cream. These toppings will add a luxurious finish to your vanilla ice cream creation.

To customize your dessert even further, mix in chunks of fresh strawberries or more chocolate chips. These mix-ins will add a personalized touch and create a delicious surprise in every bite.

Experiment with different topping combinations to find your perfect match and enjoy a truly decadent treat.

Storage Tips & Tricks

organizing your living space

To maintain the freshness of your homemade vanilla ice cream, store it in a freezer-safe container and press plastic wrap directly onto the surface before sealing to prevent freezer burn.

Here are some essential storage tips & tricks:

  1. Use an airtight container: Opt for an airtight container to prevent ice crystals from forming on your delicious ice cream.
  2. Press plastic wrap: Make sure to press plastic wrap directly onto the ice cream's surface before sealing the container to avoid freezer burn.
  3. Keep away from strong-smelling foods: Store your ice cream away from strong-smelling foods in the freezer to preserve its original flavor.
  4. Soften before serving: Allow the ice cream to soften slightly at room temperature before scooping for easier serving and a creamier texture.

Ice Cream Maker Features

ice cream machine functions

You can enhance your homemade ice cream experience with the versatile features provided by ice cream makers like the Cuisinart 2-quart model.

The Cuisinart ice cream maker offers three settings for making ice cream, sorbet, or gelato, catering to various preferences. Its compact design allows for easy storage in the freezer, making it convenient for immediate use in dessert preparation.

Advertisement

The inner bowl of the ice cream maker must be frozen for at least 12 hours before churning to guarantee proper freezing and consistency in your vanilla ice cream recipe. Additionally, the Cuisinart machine is dishwasher safe, offering hassle-free cleaning post-use.

With the ability to churn out delicious ice cream in just around 30 minutes, this ice cream maker simplifies the dessert-making process and allows you to enjoy freshly made treats whenever the craving strikes.

Frequently Asked Questions

How to Make Ice Cream Using an Ice Cream Machine?

To make ice cream with an ice cream machine, freeze the bowl, mix ingredients, churn as directed, add mix-ins, and freeze for firmness. Enjoy your homemade treat in no time with these simple steps.

How Long Should You Churn Ice Cream in an Ice Cream Maker?

When churning ice cream in an ice cream maker, you should aim for approximately 25-30 minutes to get that creamy texture. Keep an eye on it to prevent graininess or a soft serve consistency. Adjust as needed for perfection.

How Do You Prevent Ice Crystals in No Churn Ice Cream?

To prevent ice crystals in no churn ice cream, use high-fat ingredients like heavy cream and sweetened condensed milk. Limit air incorporation during mixing, store in airtight containers with plastic wrap on the surface, or add a splash of alcohol.

Advertisement

What Are the Ratios for Homemade Ice Cream?

You'll mix 2 parts heavy cream with 1 part whole milk, adding sugar for sweetness. A common ratio: 2 cups cream, 1½ cups milk, ¾ cup sugar. Adjusting these ratios lets you craft a rich, creamy ice cream tailored to your taste.

Conclusion

To sum up, churned perfection awaits with this best vanilla ice cream recipe. From the creamy texture to the rich flavor, this homemade treat is sure to satisfy any sweet tooth.

So grab your ice cream maker, gather your ingredients, and get ready to indulge in a scoop of pure delight. With just a few simple steps, you'll be on your way to enjoying a delicious dessert that will have everyone coming back for more.

Continue Reading

Ice Cream Recipes

Egg-Enhanced Vanilla: Best Vanilla Ice Cream Recipe With Eggs!

Savor the ultimate indulgence in vanilla ice cream with eggs for a creamy, luxurious treat that elevates your dessert game.

Published

on

By

egg enhanced vanilla ice cream

For the creamiest and most decadent vanilla ice cream, incorporating eggs is key. The custard base with eggs gives a rich texture and luxurious taste. Don't miss out on the velvety outcome eggs bring. Customize with mix-ins and flavor variations to make it your own. Experiment with different flavors beyond vanilla for unique frozen treats. Properly storing the custard base enhances the shelf life. Share and adapt the recipe for a community-driven experience. Embrace the richness and flavor profile egg-enhanced vanilla offers for a truly indulgent treat.

Key Takeaways

  • Incorporating egg yolks creates a rich custard base for ultimate creaminess.
  • The ideal egg-to-milk ratio enhances flavor depth and luxurious texture.
  • Tempering eggs prevents curdling and ensures a velvety smoothness.
  • Experiment with different numbers of yolks for varying levels of richness.
  • Egg-enhanced vanilla ice cream surpasses store-bought options in flavor and creaminess.

Vanilla Ice Cream Recipe Details

perfecting homemade vanilla ice cream

Creating a rich and creamy vanilla ice cream involves mastering the classic custard base with eggs. This homemade recipe is all about achieving that decadent and luscious texture that makes your taste buds sing with delight.

By incorporating eggs into the custard base, you're adding a luxurious richness that sets this vanilla ice cream apart from the rest. The heavy cream plays a pivotal role in ensuring that your ice cream turns out creamy and velvety, making each bite a delightful experience.

When making your own vanilla ice cream, don't shy away from using eggs in the custard base. While eggless versions exist, they may not provide the same creamy texture and depth of flavor that a custard-based recipe offers.

To truly elevate your homemade vanilla ice cream to a decadent treat, embrace the classic method of creating a custard base with eggs for a dessert that's sure to impress.

Recipe Yield and Variations

recipe customization and quantity

To adjust the yield of the vanilla ice cream recipe or explore various flavor variations, consider the recipe's adaptability and the potential for customizing your frozen dessert experience.

The vanilla custard-based recipe makes 1 quart of delicious ice cream, perfect for a quart ice cream maker. If you have a larger 2-quart machine, simply double the ingredients for a bigger batch. This egg custard base guarantees a creamy texture and richness that sets well when frozen.

Advertisement

Experiment with different mix-ins like Oreos or try a Porto substitution for added flavor complexity. The recipe allows for easy customization, so feel free to multiply the ingredients for larger gatherings or to suit your preferences.

Whether you prefer a classic vanilla base or want to explore different flavors, this versatile recipe provides a solid foundation for creating your own personalized ice cream variations.

Additional Ice Cream Recipes

ice cream flavors galore

Now, let's discuss creating some invigorating ice cream flavors to expand your dessert repertoire.

From decadent chocolate to rejuvenating mint chocolate chip, the possibilities are endless for your culinary experiments.

Get ready to share and swap recipes with fellow ice cream enthusiasts for a fun and flavorful experience in the kitchen.

Flavorful Ice Cream Variations

Explore a delightful array of ice cream flavors beyond vanilla, including chocolate, mint chocolate chip, butter pecan, and blueberry cheesecake. When it comes to homemade ice cream, the possibilities are endless for creating unique and delicious frozen treats. Experimenting with different ice cream flavors allows you to cater to various preferences and cravings. Whether you prefer the classic taste of old-fashioned vanilla ice cream or the richness of custard ice cream made with egg yolks, there is a flavor for everyone to enjoy.

Advertisement

To showcase the diversity of ice cream flavors, here is a table highlighting some popular options:

Flavor Description Key Ingredients
Chocolate Rich and indulgent cocoa flavor Cocoa powder, cream
Mint Chocolate Chip Invigorating mint with chocolate chips Mint extract, chocolate
Butter Pecan Buttery and nutty goodness Pecans, butter, cream
Blueberry Cheesecake Creamy cheesecake with blueberry swirls Blueberries, cream cheese

Get creative with your ice cream making and have fun exploring these flavorful variations!

Community Ice Cream Creations

Engage with fellow ice cream enthusiasts to explore a variety of additional homemade ice cream recipes, including Cookies N Cream, Chocolate, and custom flavors. In the vibrant ice cream community, you can find inspiration for creating gluten-free frozen treats and experimenting with innovative flavors. Share your own unique recipes and variations with like-minded individuals using #yesalyonascooking on Instagram and Pinterest to showcase your delicious creations.

Homemade ice cream opens up a world of possibilities beyond traditional vanilla. Explore the endless creativity within the community, where individuals are constantly pushing the boundaries of flavor and texture. Whether you prefer classic recipes like Cookies N Cream or want to dive into rich Chocolate creations, there's something for everyone in this diverse and welcoming space.

Custard Base Storage and Freezer Shelf Life

custard storage guidelines review

You should take note of the recommended storage durations and methods for custard bases when preparing homemade ice cream.

It's pivotal to keep your ice cream in an airtight container to preserve its flavor and texture.

Advertisement

Storage Recommendations

For best results, the custard base for vanilla ice cream should be refrigerated for 3-4 days before churning. Once you have churned your homemade vanilla ice cream, proper storage is key to maintaining its delicious texture. It is recommended to store the finished ice cream in an airtight container to prevent ice crystals from forming. Placing a layer of plastic wrap directly on the surface of the ice cream before sealing the container can further help in preventing freezer burn.

To emphasize the importance of proper storage methods, here is a helpful table outlining some key storage recommendations for your vanilla ice cream:

Storage Method Recommendation
Refrigeration 3-4 days before churning
Freezer Up to 2 months in an airtight container
Homemade Ice Cream Texture Maintain by using plastic wrap directly on the surface

Freezing Guidelines

After refrigerating the custard base for 3-4 days before churning, the next step is to follow appropriate freezing guidelines for storing your homemade vanilla ice cream.

Once the mixture is churned into a creamy ice cream, transfer it into an airtight container. Make sure the ice cream is stored in the coldest part of the freezer to maintain its texture and flavor. Before sealing the container, cover the surface of the ice cream with plastic wrap to prevent the formation of ice crystals.

Whether you have made your ice cream from scratch or bought it from the store, storing it correctly is essential. Homemade ice cream can last up to 2 months in the freezer without compromising its quality if stored properly.

Advertisement

Community Interactions and Recipe Adaptations

community collaboration and cooking adaptations

In community discussions surrounding this vanilla ice cream recipe, various experiences with ice cream making methods and flavor adaptations are shared among enthusiasts. Users engage in conversations about perfecting vanilla ice cream, experimenting with flavors, and creating unique flavor combinations. They exchange tips on making ice cream without a churn and storing the custard base for best results.

Readers often request ingredient amounts and variations to tailor the recipe to their preferences, showcasing a shared passion for homemade ice cream within the community. Feedback highlights successful attempts at adapting the vanilla ice cream recipe, such as incorporating Oreos or experimenting with strawberry ice cream variations.

The interactions demonstrate a collaborative effort to enhance the recipe and explore new ways to enjoy delicious frozen treats. Participants in these discussions inspire one another to push the boundaries of traditional vanilla ice cream by embracing creativity and innovation in their culinary endeavors.

Recipe Benefits and Reviews

culinary evaluation and feedback

Enhance your ice cream experience with the rich and creamy texture of homemade vanilla ice cream made with eggs. The addition of egg yolks in the churning method results in a light and fluffy consistency, elevating the dessert to a decadent level. The use of egg yolks not only enhances the creamy texture but also brings out a rich flavor that surpasses store-bought options. The versatile nature of this vanilla ice cream recipe allows for a more pronounced vanilla taste, making it a go-to choice for dessert lovers.

Readers have raved about the egg-enhanced vanilla ice cream recipe, praising its superior taste and luxurious mouthfeel. The combination of egg yolks with the churning process creates a velvety smoothness that sets this homemade vanilla ice cream apart. The recipe's ability to deliver a creamy and rich flavor profile has made it a favorite for those seeking a truly indulgent treat.

Ingredients and Cooking Process

cooking instructions and ingredients

Let's now move on to exploring the ingredients and cooking process for preparing this delectable vanilla ice cream recipe with eggs.

Egg yolks play a vital role in creating a rich and creamy custard base for the ice cream. The ideal ratio of egg yolks to dairy is typically four yolks to three cups of milk and cream, resulting in a decadent texture. More yolks contribute to a richer and creamier ice cream, while fewer yolks lead to a lighter consistency.

The egg yolks not only thicken the base but also enhance its taste and texture, providing a smooth finish. To make sure the eggs blend smoothly without curdling, it's necessary to temper them. This process involves slowly mixing hot milk into the egg-sugar mixture to raise the temperature gradually.

Advertisement

Frequently Asked Questions

What Does Adding Eggs to Ice Cream Do?

Adding eggs to ice cream creates a rich and creamy custard base. Egg yolks thicken the mixture, contributing to a smoother texture. The fats in yolks enhance mouthfeel and richness, while also helping emulsify ingredients for a smooth consistency.

What Is the Role of Eggs in Quality Vanilla Ice Cream?

Eggs elevate vanilla ice cream, delivering a creamy texture and rich flavor. With emulsifying properties, yolks bind ingredients for a silky consistency. More yolks mean denser, custard-like ice cream. Their fat content creates a luxurious mouthfeel, thickening the base for a velvety finish.

Does Vanilla Ice Cream Have Eggs in It?

Vanilla ice cream often contains eggs for a rich, creamy texture. The yolks create a custard base that thickens the mixture, leading to a velvety consistency. Eggs contribute to a smoother mouthfeel and luxurious taste.

How to Make the Creamiest Ice Cream?

To make the creamiest ice cream, whisk egg yolks into the base for a velvety texture. Tempering eggs properly avoids curdling, giving you a smooth custard. Add richness and depth, creating a luxurious mouthfeel. Try it for the ultimate treat!

Conclusion

Indulge in the creamy goodness of homemade egg-enhanced vanilla ice cream, perfect for satisfying your sweet tooth cravings.

Advertisement

This recipe is like a scoop of sunshine on a hot summer day, bringing a burst of flavor and nostalgia with every bite.

So grab a spoon, dig in, and treat yourself to a taste of pure ice cream bliss!

Continue Reading

Ice Cream Recipes

KitchenAid Wonders: Best Vanilla Ice Cream Recipe for KitchenAid Ice Cream Maker!

Make the most decadent homemade vanilla ice cream with your KitchenAid Ice Cream Maker – a truly mouthwatering experience awaits!

Published

on

By

kitchenaid vanilla ice cream

Create delicious homemade vanilla ice cream with your KitchenAid Ice Cream Maker! Chill ingredients, churn for 25-30 minutes, then savor the creamy goodness. Experiment with extracts and sugar levels for a unique twist. The KitchenAid attachment simplifies the process, ensuring a smooth texture. Try the no-egg recipe for a classic treat. And don't forget to check out the storage and freezing tips for best results. Enjoy the endless possibilities of homemade vanilla ice cream; mix in fruits, nuts, or chocolates for a delightful experience!

Key Takeaways

  • Chill ingredients for 2 hours for flavor development.
  • Experiment with extracts and sweetness levels for customization.
  • Freeze bowl for 15 hours before churning for optimal results.
  • Add a pinch of salt to enhance sweetness.
  • Use airtight containers to prevent ice crystals during storage.

Easy Homemade Vanilla Ice Cream Recipe

perfect summer treat option

Creating a luscious batch of homemade vanilla ice cream with your KitchenAid Ice Cream Maker is a breeze with this eggless recipe. All you need is heavy cream, whole milk, sugar, pure vanilla extract, and a pinch of salt. The simplicity of this recipe makes it a go-to dessert option for any occasion.

The combination of heavy cream and whole milk in this KitchenAid vanilla ice cream recipe guarantees a rich and creamy texture that's sure to please your taste buds. The pure vanilla extract adds a fragrant and flavorful touch to the ice cream, elevating its taste to a whole new level.

Once you have mixed all the ingredients together, let your KitchenAid Ice Cream Maker work its magic to churn the mixture into a velvety smooth treat.

Whether enjoyed on its own or paired with your favorite dessert, this homemade vanilla ice cream is certain to be a crowd-pleaser.

Tools and Ingredients Needed

tools for cooking pasta

To prepare the KitchenAid Ice Cream Maker recipe, gather essential tools such as the KitchenAid Mixer, Ice Cream Attachment, Mixing Bowl, and Wire Whisk, along with the necessary ingredients. Here's what you'll need:

  • Heavy Cream: Provides richness and creaminess to the ice cream.
  • Whole Milk: Adds a smooth texture to the ice cream base.
  • Sugar: Sweetens the mixture and helps with the ice cream's consistency.
  • Vanilla Extract: Infuses the ice cream with a classic vanilla flavor.

Ensure your KitchenAid freezer bowl has been frozen for at least 15 hours before starting.

The KitchenAid Mixer with the Ice Cream Attachment is specifically designed for this recipe, ensuring top-notch performance.

Advertisement

Tips for Perfect Vanilla Ice Cream

perfect vanilla ice cream

To achieve perfect vanilla ice cream, make sure that you churn the mixture for the recommended time to achieve the desired consistency.

Proper ingredient preparation, such as using high-quality vanilla extract and adjusting sweetness levels, will also contribute to the deliciousness of your homemade treat.

Pay attention to these tips to elevate your vanilla ice cream game.

Churning Time

Achieving the perfect texture for your homemade vanilla ice cream with the KitchenAid Ice Cream Maker involves churning for approximately 25-30 minutes to reach a soft-serve consistency.

After this churning time, follow these tips for the ideal vanilla ice cream:

  • For a firmer texture, transfer the soft-serve ice cream to a separate container and freeze for an additional 2-4 hours.
  • Make sure you use freezer-safe containers to store the churned ice cream properly.
  • The recipe yields a little over a quart of delicious homemade vanilla ice cream.

Following the churning time and freezing instructions secures the perfect consistency and texture of the vanilla ice cream.

Ingredient Preparation

For the ideal vanilla ice cream with the KitchenAid Ice Cream Maker, make sure all your ingredients are chilled before mixing. Start by using high-quality vanilla extract to achieve a rich and intense flavor in your homemade treat.

Advertisement

Chilling the mixture of heavy whipping cream and milk in the refrigerator for at least 2 hours is essential as it helps develop the flavors. Don't forget to add a pinch of salt to enhance the sweetness and overall taste of your vanilla ice cream.

Proper ingredient preparation is key to achieving the perfect texture and flavor. By ensuring that your heavy whipping cream and other ingredients are cold, you set yourself up for success.

The right proportions of heavy cream and milk will result in a creamy and smooth consistency that will impress your taste buds. So, take the time to chill, measure accurately, and enjoy the delicious outcome of your well-prepared vanilla ice cream.

Recipe Preparation and Variations

recipe customization and instructions

You're about to learn about the churning process details, ways to enhance flavors, and tips on storage and serving.

These points will help you master the art of making delicious homemade ice cream with your KitchenAid Ice Cream Maker.

Get ready to elevate your ice cream game with these essential insights!

Advertisement

Churning Process Details

To enhance the flavor and texture of your homemade vanilla ice cream, consider experimenting with different extracts or adjusting the sweetness level before churning.

When it comes to the churning process, here are some important details to keep in mind:

  • Chilling Mixture: Make sure to chill the ice cream base in the refrigerator for at least 2 hours before churning to achieve a smoother consistency.
  • Churning Process: Churn the mixture in your KitchenAid Ice Cream Maker for about 20-30 minutes until it reaches a creamy texture.
  • Homemade Ice Cream: Adjusting the sweetness level or trying out various extracts can help you create unique flavor variations for your homemade ice cream.
  • Freezing the Ice Cream: After churning, transfer the ice cream to a container and freeze it for a few hours until it firms up.

Flavor Enhancement Ideas

Enhancing your vanilla ice cream recipe can be achieved by incorporating homemade vanilla extract or exploring premium store-bought options for a richer flavor profile. To take your vanilla ice cream to the next level, consider experimenting with various flavor variations such as chocolate almond, fruit-infused, or unique extracts. Add a personal touch by incorporating toppings like hot fudge, nuts, or fruit compote to enhance both the taste and presentation of your ice cream. For a more intense vanilla flavor, try using vanilla bean paste instead of extract. You can also introduce mix-ins like cookie dough, brownie bites, or fresh fruit to add an exciting texture to your ice cream. Additionally, customize the sweetness level of your ice cream by adjusting the amount of sugar used in the recipe to match your preferences.

Flavor Enhancements Description
Vanilla extract Enhances the base vanilla flavor
Flavor variations Experiment with unique flavor combinations
Toppings Elevate taste and presentation with a variety of toppings

Storage and Serving

For best storage and serving of your homemade vanilla ice cream, make sure to transfer it to a freezer-safe container and cover it with plastic wrap to prevent ice crystals.

Here are some tips to enhance your ice cream experience:

  • Freezing Consistency: Allow the ice cream to freeze for at least 2-4 hours for a harder consistency before serving.
  • Serving Suggestions: Enjoy your vanilla ice cream in bowls or cones, topped with fresh fruit, chocolate sauce, or sprinkles for added flavor and texture.
  • Recipe Variations: Get creative by experimenting with mix-ins like chocolate chips, nuts, or fruit to personalize your ice cream flavors.
  • Leftover Maintenance: Store any leftover homemade ice cream in the freezer for up to 2-3 weeks, ensuring it's tightly sealed to maintain freshness and prevent freezer burn.

KitchenAid Ice Cream Maker Attachment

homemade ice cream delight

The KitchenAid Ice Cream Maker attachment offers a convenient way to create creamy homemade ice cream using your KitchenAid mixer. This attachment, designed to work with KitchenAid Stand Mixer Ice, includes a freeze bowl, special paddle, and drive assembly for making delicious ice cream at home.

To maintain optimal ice cream consistency, it's essential to freeze the bowl for at least 15 hours before using it. The KitchenAid Ice Cream Maker simplifies the churning process, eliminating the need for manual stirring and resulting in smooth and rich ice cream.

Advertisement

Directions for Churning Ice Cream

churning ice cream at home

Now it's time to churn your ice cream! Follow the guidelines for churning time to achieve that perfect soft-serve consistency.

After churning, consider freezing the ice cream for a firmer texture and remember to use freezer-safe containers for storage.

Churning Time Guidelines

Begin churning your ice cream in the KitchenAid Ice Cream Maker Attachment, aiming for a soft-serve consistency in about 25-30 minutes. During this process, the ice cream will transform into a creamy treat ready to enjoy.

Here are some guidelines to help you achieve the perfect texture:

  • Aim for a soft-serve consistency within the first 25-30 minutes of churning.
  • For a firmer texture, transfer the churned ice cream to a separate container and freeze it for 2-4 hours.
  • Remember to use freeze-safe containers when storing your freshly churned ice cream.

The churning process in the KitchenAid Ice Cream Maker Attachment guarantees a smooth and creamy consistency that will delight your taste buds.

Freezing Recommendations

Make sure the freeze bowl is thoroughly frozen for a minimum of 15 hours before beginning the churning process for your ice cream in the KitchenAid Ice Cream Maker Attachment. This step is essential for the proper freezing of the mixture during churning.

Once the freeze bowl is adequately frozen, assemble the attachment to your KitchenAid mixer and start churning according to the manufacturer's instructions. The churned ice cream will reach a soft-serve consistency in about 25 minutes.

Advertisement

If you prefer a firmer texture, transfer the churned ice cream into a freezer-safe container and freeze for an additional 2-4 hours. This extra freezing time helps achieve a scoopable consistency similar to store-bought ice cream.

Remember to always keep the freeze bowl in the freezer until needed so that it's ready whenever you feel like making a batch of delicious homemade ice cream.

Storage Tips

Once you have churned your ice cream to the desired consistency, it's important to transfer it to a freezer-safe container for best storage.

When storing your homemade ice cream, follow these essential tips:

  • Freeze the Churned Ice Cream: For a firmer texture, freeze the churned ice cream for an additional 2-4 hours before serving.
  • Use an Airtight Container: Ensure the container used for freezing the ice cream is hermetically sealed to prevent ice crystals from forming and maintain the freshness of your dessert.
  • Label the Container: Don't forget to label the container with the date and flavor of the ice cream. This will help you easily identify it in the freezer and avoid any mix-ups.
  • Store Properly: Homemade ice cream can typically be stored in the freezer for up to 2-3 months for maximum freshness and taste. Make sure to store it in the coldest part of your freezer for the best results.

Churning Time and Freezing Instructions

churning instructions and freezing

During the churning process in the KitchenAid Ice Cream Maker, allow the mixture to reach a soft-serve consistency which typically takes about 25-30 minutes.

Once the ice cream reaches this stage, transfer it to a freezer-safe container and freeze for an additional 2-4 hours for a firmer texture.

Advertisement

Freezing the ice cream post-churning is essential as it helps the dessert set and develop a scoopable texture, ensuring a delightful homemade vanilla ice cream experience.

Remember to use freezer-safe containers for best results to maintain the ice cream's quality.

No Egg Vanilla Ice Cream Recipe

delicious homemade ice cream

For a simple and egg-free treat using your KitchenAid Ice Cream Maker, gather heavy cream, whole milk, sugar, vanilla extract, and salt to create a delightful No Egg Vanilla Ice Cream Recipe. This quick and easy recipe yields a rich and creamy vanilla ice cream without the need for eggs.

Here's how to make it:

  • Combine Ingredients: Mix heavy cream, whole milk, sugar, vanilla extract, and a pinch of salt in a bowl until the sugar dissolves.
  • Chill the Mixture: Refrigerate the mixture for at least 2 hours to make sure it's properly chilled before churning.
  • Churn in the KitchenAid: Pour the chilled mixture into your KitchenAid Ice Cream Maker and churn following the manufacturer's instructions.
  • Freeze and Enjoy: Transfer the churned ice cream to a container, freeze for a few hours until firm, and then scoop out a delicious serving of homemade vanilla ice cream.

With this straightforward recipe, you can savor a luscious treat without the need for eggs, perfect for those seeking a trouble-free dessert option.

Versatility of Homemade Vanilla Ice Cream

delicious homemade vanilla treat

Discover the endless possibilities of incorporating delicious vanilla ice cream into a variety of desserts and flavor combinations. Making your own ice cream is the best way to unleash your creativity and indulge in unique flavor combinations.

Homemade vanilla ice cream allows you to experiment with different mix-ins, from fresh fruits and nuts to decadent chocolate chunks or swirls of caramel. With homemade vanilla ice cream, you have the freedom to tailor your dessert to suit your preferences perfectly.

Whether you prefer a classic scoop of vanilla alongside a warm slice of apple pie or an invigorating ice cream sandwich, the options are limitless. The versatility of homemade vanilla ice cream guarantees that you can enjoy it on its own as a delightful treat or elevate it by pairing it with various desserts.

Advertisement

Community Feedback and Reviews

community input on reviews

Check out what users are saying about the KitchenAid Ice Cream Maker recipe and their experiences with making and customizing different flavors. Community feedback on the homemade vanilla ice cream has been overwhelmingly positive, with many highlighting the simplicity and great taste of the recipe.

Users appreciate the versatility of the base recipe, sharing their experiences making a variety of flavors and pairing them with different desserts. Some community members have suggested sugar-free or alternative ingredient options to cater to dietary preferences.

Feedback also includes ideas for incorporating mix-ins like chocolate chips, nuts, or fruit to create unique flavor combinations. The customizable nature of the recipe has been a hit among users, with many expressing their joy in creating their own delicious homemade ice cream flavors.

Frequently Asked Questions

What Speed Should I Put My Kitchenaid Ice Cream On?

You should put your KitchenAid ice cream maker on Speed 1 for best results. Churning at a lower speed prevents excess air, creating a smoother texture. Following this suggestion guarantees your homemade vanilla ice cream turns out perfectly rich and creamy.

How Long Do You Churn Ice Cream in a Kitchenaid?

So, you wanna whip up some creamy goodness in your KitchenAid, huh? Well, typically, you churn ice cream for about 20-30 minutes. Adjust for desired texture. Longer churn = silkier ice cream. Enjoy your sweet treat!

Which Kitchenaid Attachment Is Best for Creaming?

For creaming, the best KitchenAid attachment is the paddle attachment. It's ideal for incorporating ingredients evenly and achieving a smooth, creamy texture. Swap in the paddle attachment for effortless creaming and enjoy delicious results.

Advertisement

How Long Do I Need to Freeze My Kitchenaid Ice Cream Maker?

To make creamy ice cream, freeze your KitchenAid Ice Cream Maker bowl for at least 15 hours. For the best results, chill it for 24 hours. Remember, a properly frozen bowl is the secret to perfect scoops!

Conclusion

So there you have it – the best vanilla ice cream recipe for your KitchenAid ice cream maker! Remember, the proof is in the pudding, or in this case, the ice cream.

So go ahead, whip up a batch of this creamy treat and taste the difference homemade makes.

Happy churning!

Advertisement

Continue Reading
Advertisement
Advertisement

Affiliate disclaimer

As an affiliate, we may earn a commission from qualifying purchases. We get commissions for purchases made through links on this website from Amazon and other third parties.

Vetted

affordable beverage fridges list affordable beverage fridges list
Vetted2 months ago

15 Best Beverage Fridges Under $300 to Keep Your Drinks Cool and Refreshing

Hunting for a budget-friendly beverage fridge under $300 to keep your drinks chilled and ready to enjoy?

chilled drinks at hand chilled drinks at hand
Vetted2 months ago

15 Best Beverage Fridges to Keep Your Drinks Chilled and Ready to Serve

Yearning for the perfect beverage fridge to keep your drinks chilled and ready to serve?

top camping fridge picks top camping fridge picks
Vetted2 months ago

15 Best Dometic Fridges for Camping Adventures – Keep Your Food Fresh Anywhere

Breeze through your camping trips with the top 15 Dometic fridges to keep your food fresh - adventure awaits!

top fridges for freshness top fridges for freshness
Vetted2 months ago

11 Best Denki Fridges to Keep Your Food Fresh and Your Kitchen Stylish

Kickstart your kitchen upgrade with the top Denki fridges for freshness and style, setting the stage for a perfect blend...

secure your beer storage secure your beer storage
Vetted2 months ago

15 Best Beer Fridges With Lock for Keeping Your Brews Safe and Cold

Get ready to safeguard your favorite brews with these 15 top-rated beer fridges featuring locks - the ultimate solution for...

top fridge freezer deals top fridge freezer deals
Vetted2 months ago

15 Best Deals on Fridge Freezers You Need to Check Out in 2024

Need a new fridge freezer? Discover top deals like the RCA Mini Refrigerator and Galanz Retro Fridge in this list...

affordable beer fridge options affordable beer fridge options
Vetted2 months ago

15 Best Beer Fridges Under $200 – Keep Your Brews Chilled Without Breaking the Bank

On the hunt for an affordable beer fridge?

fridge freezer deals galore fridge freezer deals galore
Vetted2 months ago

15 Best Deals for Fridge Freezers That Will Keep Your Food Fresh and Your Wallet Happy

Prepare for freshness and savings with these top 15 fridge freezers that will keep your food fresh and your wallet...

top beer fridge picks top beer fridge picks
Vetted2 months ago

15 Best Beer Fridges to Buy for Keeping Your Brews Chilled and Ready to Enjoy

Find the ultimate beer fridge with the top 15 picks, from Frigidaire's colorful options to Velieta's under-counter gem – your...

upgrade your kitchen now upgrade your kitchen now
Vetted2 months ago

15 Best Deals on Under Counter Fridges That Will Upgrade Your Kitchen

Looking to transform your kitchen? Discover the best deals on under-counter fridges that offer style, efficiency, and convenience.

top beer fridge models top beer fridge models
Vetted2 months ago

15 Best Beer Fridges for Your Ultimate Man Cave Experience

Find the perfect beer fridge for your man cave oasis with these top picks, setting the tone for ultimate relaxation...

save big on mini fridges save big on mini fridges
Vetted2 months ago

15 Best Deals on Mini Fridges With Freezer Compartments – Save Big on Cooling Solutions

Marvel at the savings on mini fridges with freezer compartments - discover top deals for efficient cooling solutions and space-saving...

Advertisement
Advertisement

Trending

Copyright © 2024 Dri Dri Gelato Affiliate disclaimer As an affiliate, we may earn a commission from qualifying purchases. We get commissions for purchases made through links on this website from Amazon and other third parties.