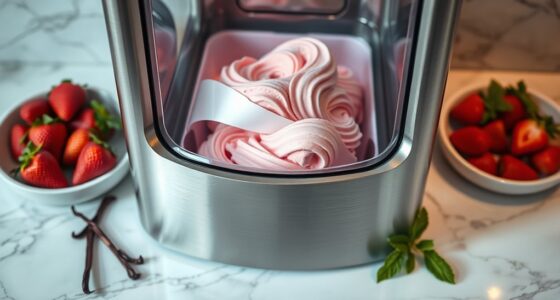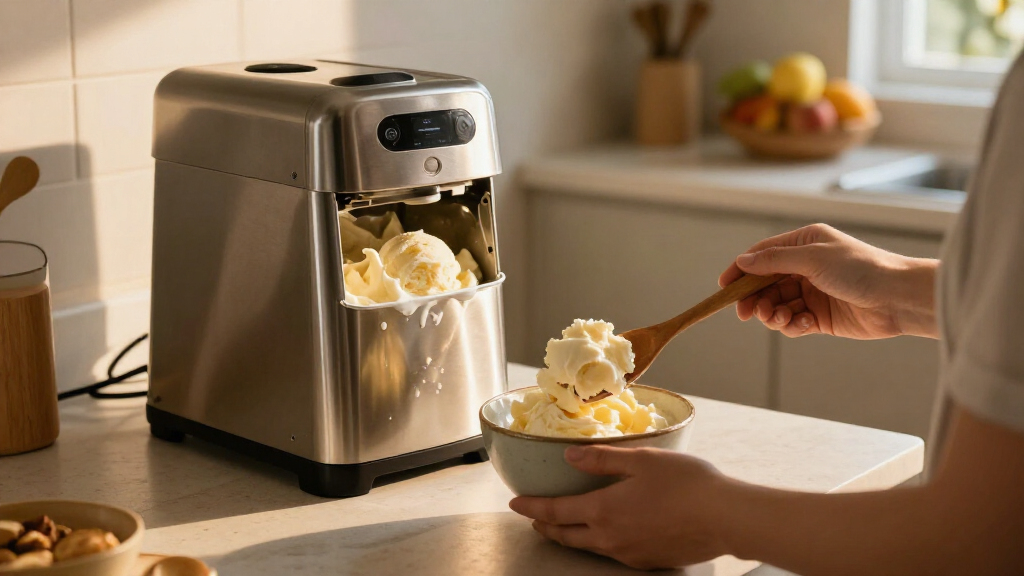

Use an automatic ice cream maker to turn a chilled ice cream base into a smooth frozen dessert. This guide is for beginners using a countertop machine with a removable freezer bowl or a built-in compressor. Allow 30–60 minutes for active work, plus several hours to chill the base and, for freezer-bowl models, freeze the bowl ahead of time.

Get baking supplies delivered free with Prime
- Fast, free delivery on millions of items
- Prime Video, Amazon Music and more included
- Member-only deals all year
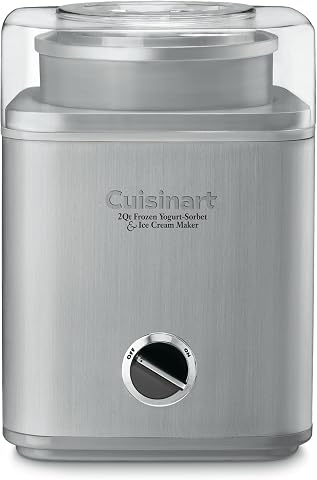
Cuisinart Ice Cream Maker Machine, 2 Qt., Model ICE-30BCP1
- ✔ Capacity: 2 quarts
- ✔ Freezing method: Double-insulated freezer bowl
- ✔ Freezer preparation: Pre-freeze for about 24 hours

Whynter Upright Automatic Ice Cream Maker, 2.1 Qt, ICM-201SB
- ✔ Capacity: 2.1 quarts
- ✔ Freezing method: Built-in compressor; no pre-freezing required
- ✔ Display: LCD timer

Whynter Automatic Ice Cream Maker, 2.1 Qt, ICM-200LS
- ✔ Capacity: 2.1 quarts
- ✔ Freezing method: Built-in CFC-free compressor
- ✔ Housing: Stainless steel
Difficulty: Beginner | Time: 30–60 minutes of active work, plus chilling and freezing time
What You’ll Need
Tools & Materials:
- Automatic ice cream maker with its manual
- Mixing bowl and whisk or spoon
- Measuring cups or a kitchen scale
- Flexible spatula
- Freezer-safe container with a lid
Knowledge:
- Basic measuring and mixing
- How to refrigerate and freeze food safely
Check the manual for your machine’s capacity, assembly, and operating instructions. Ingredients and bowl-freezing requirements vary by model. Use a tested ice cream recipe suited to your machine size; do not fill the bowl beyond its marked limit.
Cuisinart Ice Cream Maker Machine, 2 Qt., Model ICE-30BCP1
The Cuisinart is our most straightforward recommendation for households that can plan ahead. Its 2-quart capacity is close to the Whynter machines’ 2.1 quarts, so the stated batch sizes are broadly similar. The important difference is the freezer bowl: we need to freeze it for about 24 hours before churning. That asks for freezer space and advance notice, but lets us choose a machine without a built-in compressor.Once the bowl is ready, the heavy-duty motor handles automatic churning, and the large ingredient spout lets us add mix-ins near the end without stopping the machine. Compared with either Whynter, it is the less spontaneous choice; compared with a compressor model, it has a simpler freezer-bowl routine and is easier to consider when counter storage matters. It also calls for hand-washing the bowl, lid, and paddle. We should skip it if we often decide to make dessert at the last minute or cannot keep a bowl in the freezer.
Pros:
- Makes up to 2 quarts per batch for family servings.
- Automatic churning uses a heavy-duty motor.
- Large spout allows mix-ins during the final minutes.
- Bowl, lid, and paddle can be rinsed by hand; the base wipes clean.
Cons:
- Freezer bowl needs about 24 hours of advance freezing.
- Hand-washed components require more cleanup attention than a fully hands-off routine.
Best for: Families and hosts who want a generous batch and can keep the bowl frozen in advance.
Not ideal for: Buyers who want to make ice cream on impulse or have little freezer space for a dedicated bowl.
Bottom line: We recommend the Cuisinart when planned preparation and a family-sized batch matter more than compressor convenience.
“We recommend the Cuisinart when planned preparation and a family-sized batch matter more than compressor convenience.”
Whynter Upright Automatic Ice Cream Maker, 2.1 Qt, ICM-201SB
If making ice cream without advance freezer planning is our priority, the upright Whynter has a clear advantage over the Cuisinart. Its built-in compressor freezes as the machine churns, so we do not have to reserve freezer space for a bowl the day before. At 2.1 quarts, it has a little more stated capacity than the Cuisinart, though the difference is small enough that convenience is the more useful reason to choose it.The ICM-201SB stands apart from the other compressor model through its removable stainless-steel bowl, which can make it easier to serve from and clean. An LCD timer and audible alert help us monitor a batch, while the upright shape is intended to save counter space compared with horizontal machines. That tall profile can be awkward on a very narrow counter, and compressor operation may be noisier than a freezer-bowl machine. Compared with the ICM-200LS, this is the stronger fit when its bowl material and upright format suit our kitchen; it is not the one to choose if a simple, lightweight appliance is the priority.
Pros:
- Built-in compressor eliminates pre-freezing a bowl.
- 2.1-quart capacity is the largest stated in this lineup.
- Removable stainless-steel bowl supports serving and cleanup.
- LCD timer and audible alert make batch monitoring easier.
Cons:
- Tall profile may be less stable or convenient on very narrow countertops.
- Compressor operation can be noisier than the Cuisinart’s freezer-bowl design.
- More substantial than a simple freezer-bowl machine to store and move.
Best for: Home cooks who want compressor convenience, a removable stainless bowl, and an on-machine timer.
Not ideal for: People with narrow counters, noise-sensitive kitchens, or a preference for a lighter freezer-bowl machine.
Bottom line: We favor the ICM-201SB when we want spontaneous batches and value a removable stainless bowl enough to accommodate its upright compressor body.
“We favor the ICM-201SB when we want spontaneous batches and value a removable stainless bowl enough to accommodate its upright compressor body.”
Whynter Automatic Ice Cream Maker, 2.1 Qt, ICM-200LS
The ICM-200LS is another way to skip the overnight freezer-bowl routine. Like the upright ICM-201SB, it has a built-in compressor and a 2.1-quart capacity, so its main practical advantage over the Cuisinart is spontaneity rather than a dramatically larger batch. Its stainless-steel housing and LCD timer keep the setup focused on the basics: add the mixture, set the machine, and monitor the cycle.The key distinction from the ICM-201SB is the bowl: the ICM-200LS lists a BPA-free aluminum mixing bowl, while the ICM-201SB uses a removable stainless-steel bowl. Buyers who specifically prefer the ICM-201SB’s bowl material or its stated removable-bowl convenience have a reason to pay attention to that model instead. Both compressor machines take more storage space and weigh more than a basic freezer-bowl unit, according to the product details; we should account for that before choosing either. The ICM-200LS suits us when compressor convenience is the priority and its materials and footprint fit our kitchen, but the available details do not support a claim that it churns faster or produces better texture than its sibling.
Pros:
- Compressor freezes while churning, with no bowl pre-freezing.
- 2.1-quart capacity suits family-sized batches.
- Stainless-steel housing is described as easy to wipe clean.
- LCD display and audible timer aid monitoring.
Cons:
- Heavier and bulkier than a freezer-bowl machine.
- BPA-free aluminum bowl may not suit buyers who prefer the ICM-201SB’s stainless-steel bowl.
Best for: Buyers who want a 2.1-quart compressor machine with a stainless-steel exterior and timer.
Not ideal for: Shoppers who need a lightweight, compact-to-store machine or specifically want the ICM-201SB’s stainless-steel bowl.
Bottom line: We would choose the ICM-200LS for compressor convenience and its stainless-steel housing when the aluminum bowl is a comfortable fit.
“We would choose the ICM-200LS for compressor convenience and its stainless-steel housing when the aluminum bowl is a comfortable fit.”
As an Amazon Associate we earn from qualifying purchases.
Before You Start
For a freezer-bowl machine, place the bowl level in the freezer for the amount of time specified by the manufacturer, often 12–24 hours. Keep it upright and avoid shaking it. If the bowl contains liquid that sloshes when tilted, it may not be fully frozen. Compressor models do not need a pre-frozen bowl, but may need time to chill before churning.
Chill the prepared base thoroughly before churning. A warm base takes longer to freeze and can produce a soft or uneven result. Wash and dry the removable parts, and keep the machine on a stable, level surface with room for ventilation.
Step-by-Step Instructions
Step 1: Check the machine and recipe
Read the manual for the correct assembly, capacity, and cycle settings. Choose a recipe that fits the machine’s capacity and gather every ingredient before mixing. Confirm whether the recipe needs a cooked custard base or can be mixed cold.
Tip: Ice cream expands as it churns. Leave room in the bowl and follow the recipe’s fill guidance.
Check: You know the machine’s maximum capacity, the bowl preparation required, and the ingredients the recipe calls for.
Step 2: Prepare the ice cream base
Measure the ingredients accurately. If the recipe calls for cooking, heat and stir the mixture as directed, then cool it promptly. For a no-cook recipe, whisk the ingredients until evenly combined and the sugar has dissolved. Add flavorings and mix-ins at the point the recipe specifies.
Tip: Do not pour a hot mixture into the machine. Cool cooked bases before refrigerating them.
Check: The base is smooth and evenly mixed, with no undissolved sugar or hot spots.
Step 3: Chill the base
Cover the base and refrigerate it until it is thoroughly cold, usually at least 4 hours or overnight. If you need to cool a cooked base quickly, set the covered container in an ice bath and stir until cool, then refrigerate it. Keep it refrigerated until you are ready to churn.
Tip: A cold base churns more reliably. Follow the recipe if it gives a longer chilling time.
Check: The base feels cold throughout when you stir it; it is not merely cool on the surface.
Step 4: Assemble the machine
Set the machine on a stable surface. Place the frozen bowl into the base if your model uses one, then fit the dasher and lid as the manual shows. For compressor models, install the bowl and dasher as directed. Plug in the machine only when assembly is complete.
Tip: Keep a freezer bowl cold while assembling. Do not leave it on the counter while you prepare other items.
Check: The bowl and dasher sit securely, and the lid or motor unit locks into place without force.
Step 5: Start churning before adding the base
Turn on the machine using the setting specified in the manual. With the dasher moving, pour the chilled base through the opening in the lid. Starting the dasher first helps prevent the mixture from freezing in a solid patch against the bowl.
Tip: Do not pour past the fill line. Keep hands and utensils away from the moving dasher.
Check: The base moves around the bowl while the dasher turns, without spilling or jamming.
Step 6: Churn until the texture thickens
Let the machine churn for the time recommended by the recipe or manual. Watch for a thick, soft-serve consistency and listen for any change in the machine’s sound. If the dasher stops or the motor strains, switch the machine off and check the manual before continuing.
Tip: Churning time varies with the recipe, starting temperature, room temperature, and machine. Use texture as well as the timer to judge doneness.
Check: The mixture has thickened and holds soft peaks or a scoop-shaped trail, while remaining soft enough to transfer.
Step 7: Add mix-ins at the right time
If the recipe includes chocolate pieces, nuts, fruit, or other mix-ins, add them near the end of churning when the ice cream is already thick. Follow the recipe’s quantity guidance and let the machine mix just until they are distributed.
Tip: Large or hard pieces added too early can sink, clump, or interfere with the dasher.
Check: Mix-ins are spread through the ice cream without stopping the dasher or collecting in one place.
Step 8: Transfer and freeze the ice cream
Turn off and unplug the machine. Remove the dasher, then transfer the ice cream with a clean spatula into a freezer-safe container. Press a piece of parchment or food-safe wrap against the surface if available, seal the lid, and freeze until firm, typically 2–4 hours.
Tip: Do not scrape a freezer bowl with metal utensils. Transfer promptly so the ice cream does not melt in the bowl.
Check: The container is sealed, labeled if needed, and placed flat in the freezer.
Step 9: Clean the machine and serve
Unplug the machine and clean removable parts according to the manual. Do not immerse the motor or compressor housing. Let ice cream sit at room temperature for a few minutes before scooping if it has become very firm.
Tip: Check the manual before putting any part in a dishwasher; some bowls or components can be damaged by heat.
Check: Removable parts are clean and dry, the motor housing is wiped down, and the ice cream scoops without being melted.
Common Mistakes to Avoid
- Using a freezer bowl that is not fully frozen. — Freeze it for the time stated in the manual, keep it level, and check that its contents do not slosh when tilted.
- Churning a warm or only partly chilled base. — Refrigerate the covered base until cold throughout before starting the machine.
- Overfilling the bowl. — Follow the marked fill line or the recipe’s machine-specific yield guidance; the mixture expands as it churns.
- Adding mix-ins at the start. — Wait until the ice cream thickens, then add small, evenly sized pieces near the end of churning.
Troubleshooting
Problem: The ice cream stays thin after the usual churning time.
Solution: Stop and check that the base was fully chilled and that a freezer bowl was frozen solid. If both were prepared correctly, keep churning briefly while watching the texture. If it remains thin, transfer it to a covered container and freeze it until firm; check the machine and recipe guidance before the next batch.
Problem: The dasher or motor stops during churning.
Solution: Switch off and unplug the machine. Check the manual for reset instructions, then inspect for overfilling or large frozen pieces blocking the dasher. Remove an obstruction only when the machine is off, and do not force the dasher to turn.
Problem: Ice cream freezes unevenly or forms a hard layer on the bowl.
Solution: For a freezer-bowl model, confirm the bowl was fully frozen and chilled evenly. For either type, make sure the dasher is assembled correctly and the machine is level. Start the dasher before pouring in the base.
Problem: The finished ice cream is too hard to scoop.
Solution: Let the sealed container stand at room temperature for a few minutes, then try again. Store it toward the back of the freezer, where the temperature is steadier, and avoid repeatedly leaving it out to soften.
What Success Looks Like
The finished ice cream has a smooth, evenly churned texture and reaches a soft-serve thickness before transfer. After freezing in a sealed container, it is firm enough to scoop and has no large unmixed patches or visible spillover from an overfilled bowl. The machine is switched off, removable parts are clean, and the motor housing has not been immersed.
Next Steps
Label the container with the flavor and date, and keep it sealed in the freezer. For the next batch, note how long your machine took to reach soft-serve consistency and adjust only one factor at a time, such as base chilling time or mix-in size. Follow your recipe and local food-safety guidance for storage time, especially for bases containing eggs or dairy.
Frequently Asked Questions
How long should I freeze a removable bowl?
Follow the machine’s manual; many bowls need 12–24 hours. Freeze the bowl level and check for liquid movement inside before using it.
Can I churn a base that is not fully cold?
You can, but it may take longer and may not firm up properly. Chill the base thoroughly first for a more reliable texture.
Why is the ice cream soft when the machine finishes?
Most home machines produce soft-serve ice cream. Transfer it to a covered container and freeze it for a few hours to make it firm enough to scoop.
When should I add chocolate chips or fruit?
Add small mix-ins near the end, once the base has thickened. This helps distribute them without weighing them to the bottom or disrupting the churn.
Can I wash the bowl in the dishwasher?
Check the manual first. Some removable parts are dishwasher-safe, while freezer bowls and electronic components may require hand cleaning.