Connect with us

Ice Cream Recipes

Churned Perfection: Best Vanilla Ice Cream Recipe With Ice Cream Maker!

Get ready to indulge in the creamiest vanilla ice cream recipe using an ice cream maker, and discover the secrets to churning perfection!

Published

on

perfect vanilla ice cream

Create the perfect vanilla ice cream with your ice cream maker by whisking egg yolks and sugar for a rich base. Combine half & half and essential heavy cream for that luxurious texture. Don't forget vanilla extract and vanilla bean for robust flavor. Chill the custard before churning to get that silky smoothness you crave. The churning process is key for creaminess, aerating for a light texture and flavor enhancement. Want to elevate your homemade ice cream game? Continue discovering mix-ins, toppings, serving ideas, storage tips, and more for the ultimate treat experience.

Key Takeaways

  • Rich custard base with egg yolks for velvety texture.
  • Optimal fat content in dairy products for creaminess.
  • Proper churning time for a well-balanced taste.
  • Experiment with mix-ins for enhanced flavor profiles.
  • Serve with creative toppings for a delightful twist.

Ingredients & Substitutions

recipe customization and alternatives

For a successful vanilla ice cream batch, make sure you have the necessary ingredients and understand potential substitutions.

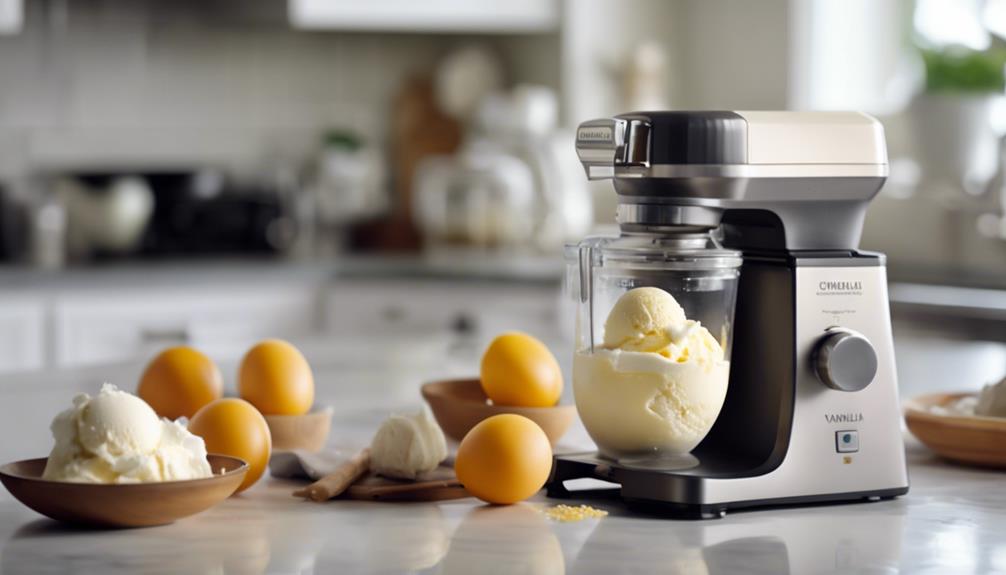
When preparing your ingredients, be sure to include egg yolks for richness and a smooth texture. Opt for half & half with 11%-18% milk fat to achieve a balanced creaminess in your ice cream. Heavy cream, with at least 36% milk fat, is essential for a luxurious and creamy consistency in your dessert. Enhance the vanilla flavor by using granulated cane sugar for its pure sweetness.

To create a robust taste profile, consider incorporating both vanilla extract and vanilla bean into the recipe. These ingredients, when combined in the Cuisinart Ice Cream maker, will result in a delectable vanilla ice cream.

If you prefer a lower fat option, adjust the ratios accordingly while maintaining the essence of the vanilla flavor.

Recipe Preparation Steps

how to make quiche

Begin by whisking together the egg yolks and sugar until smooth to create a rich custard base for your vanilla ice cream.

Follow these steps to achieve the perfect homemade vanilla ice cream:

Advertisement
  1. Combine Ingredients: Heat the egg yolk and sugar mixture with half and half in a saucepan. Add the scraped vanilla bean to infuse the custard with a deep, aromatic flavor.
  2. Thicken the Custard: Cook the mixture over low heat, stirring constantly until slightly thickened. This step ensures a velvety and luxurious texture in your ice cream.
  3. Incorporate Cream and Flavorings: Remove the custard from heat and stir in the heavy cream, a pinch of salt, and vanilla extract. This combination adds richness and depth to your vanilla ice cream.
  4. Chill and Churn: Chill the custard thoroughly in the refrigerator before transferring it to the ice cream maker for churning. The churning process incorporates air into the mixture, creating a silky and creamy consistency for your delightful vanilla ice cream.

Homemade Ice Cream Process

making ice cream at home

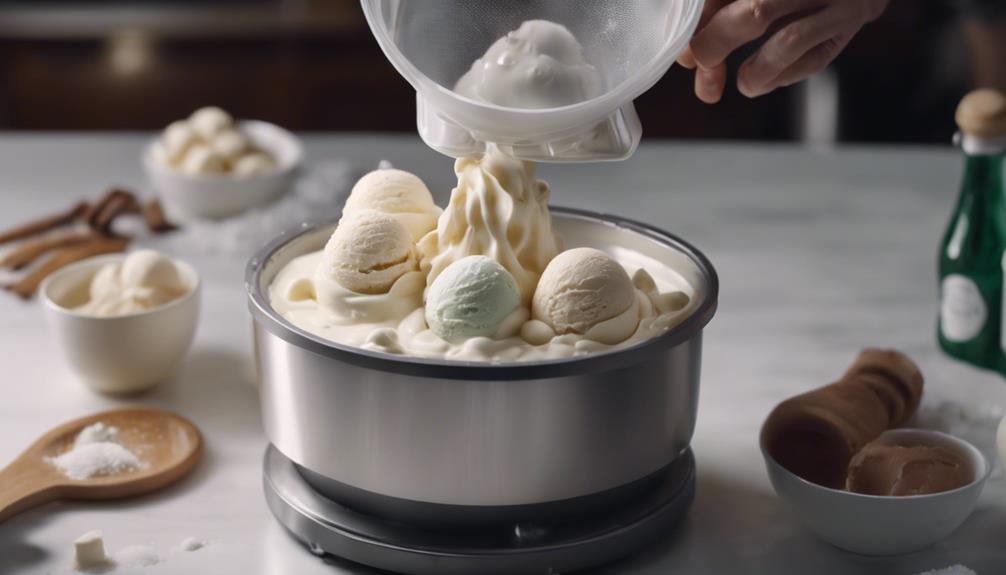
You'll love how churning the ice cream mixture in the maker incorporates air, resulting in a creamy texture.

Adding mix-ins like chocolate chips or fruit enhances the flavor profile, making each scoop a delightful experience.

These simple steps are key to creating a homemade treat that will impress your friends and family.

Churning for Creaminess

To achieve a creamy texture in your homemade ice cream, churn the mixture until it reaches a smooth consistency. Churning plays an important role in creating that perfect scoop of ice cream. Here's why it matters:

  1. Aeration: Churning ice cream incorporates air into the mixture, giving it a light and airy texture.
  2. Fat Distribution: The churning process evenly distributes fats throughout the ice cream base, resulting in a rich and creamy mouthfeel.
  3. Ice Crystal Prevention: Churning helps break down ice crystals, preventing them from growing too large and ensuring a velvety smoothness.
  4. Flavor Development: Proper churning time allows the ingredients to blend well, enhancing flavor development and creating a well-balanced taste profile.

Mix-Ins for Flavor

Enhance the flavor and texture of your homemade vanilla ice cream by incorporating mix-ins like chocolate chips, caramel swirls, fruit chunks, or nuts during the churning process. Adding these mix-ins during the last 10-15 minutes of churning ensures they're evenly distributed, providing bursts of flavor in every bite.

Experimenting with different mix-ins allows for endless customization, creating unique combinations that cater to your preferences. Mix-ins like chocolate chips can add a delightful crunch, caramel swirls introduce a rich sweetness, while fruit chunks bring an invigorating burst of flavor.

It's crucial to balance the sweetness and texture of the ice cream by selecting mix-ins that complement the creamy vanilla base. By carefully choosing and combining mix-ins, you can create a harmonious blend that elevates the taste and visual appeal of your vanilla ice cream, making it a truly decadent treat.

Advertisement

Toppings & Variations

tasty topping variations included

Consider adding fruity compotes or fresh fruit to your vanilla ice cream for a burst of flavor. To elevate your vanilla ice cream experience, here are some delightful toppings and variations you can try:

  1. Fruity Toppings: Enhance your vanilla ice cream with a variety of compotes or fresh fruit such as strawberries, raspberries, or mango for a invigorating and tangy twist.
  2. Nutty Toppings: Add a crunchy texture and rich flavor by sprinkling some chopped almonds, pecans, or a drizzle of peanut butter over your vanilla ice cream.
  3. Chocolate Toppings: Indulge your sweet tooth by topping your vanilla ice cream with chocolate chips, chocolate shavings, or crumbled cookies for a decadent treat.
  4. Classic Toppings: Elevate your dessert with classic toppings like drizzles of caramel sauce, a dollop of whipped cream, or a sprinkle of rainbow sprinkles for a fun and traditional touch.

Experiment with these customizable mix-ins to create your own personalized vanilla ice cream masterpiece.

Serving Suggestions

unique ideas for plating

Enhance your vanilla ice cream experience with flavorful pairings and creative topping ideas.

Seasonal fruits, classic desserts, and unique toppings can take your dessert to the next level.

Experiment with different combinations to find your perfect sweet treat.

Flavorful Ice Cream Pairings

Looking to elevate your vanilla ice cream experience? Here are some flavorful ice cream pairings that will take your dessert to the next level:

  1. Warm Desserts: Pair your vanilla ice cream with warm desserts like apple pie or brownies for a comforting and indulgent treat.
  2. Sweet Sauces: Enhance the flavor of vanilla ice cream by drizzling it with caramel sauce or hot fudge for a rich and indulgent touch.
  3. Fresh Fruits: Add an invigorating twist to your vanilla ice cream by topping it with fresh fruits like strawberries or peaches, balancing out the creamy sweetness.
  4. Decadent Sundaes: Create a lavish sundae with nuts, whipped cream, and a cherry on top of your vanilla ice cream for a delightful and satisfying dessert experience.

Creative Topping Ideas

For a delightful twist on your vanilla ice cream, explore creative topping ideas that will elevate your dessert experience. Add a burst of freshness with fruity toppings like strawberry compote or fresh blueberries. The sweet and tangy flavors will complement the creamy vanilla base perfectly.

If you're a fan of nutty flavors, consider adding some crunch with crushed almonds or a luscious swirl of peanut butter. These nutty toppings won't only add texture but also a rich and indulgent taste to your vanilla ice cream.

For those with a sweet tooth, indulge in decadent chocolate toppings such as chocolate chips or crumbled cookies. The combination of chocolate and vanilla is a classic favorite that never disappoints.

Advertisement

For a touch of elegance, opt for classic toppings like caramel sauce or a dollop of whipped cream. These toppings will add a luxurious finish to your vanilla ice cream creation.

To customize your dessert even further, mix in chunks of fresh strawberries or more chocolate chips. These mix-ins will add a personalized touch and create a delicious surprise in every bite.

Experiment with different topping combinations to find your perfect match and enjoy a truly decadent treat.

Storage Tips & Tricks

organizing your living space

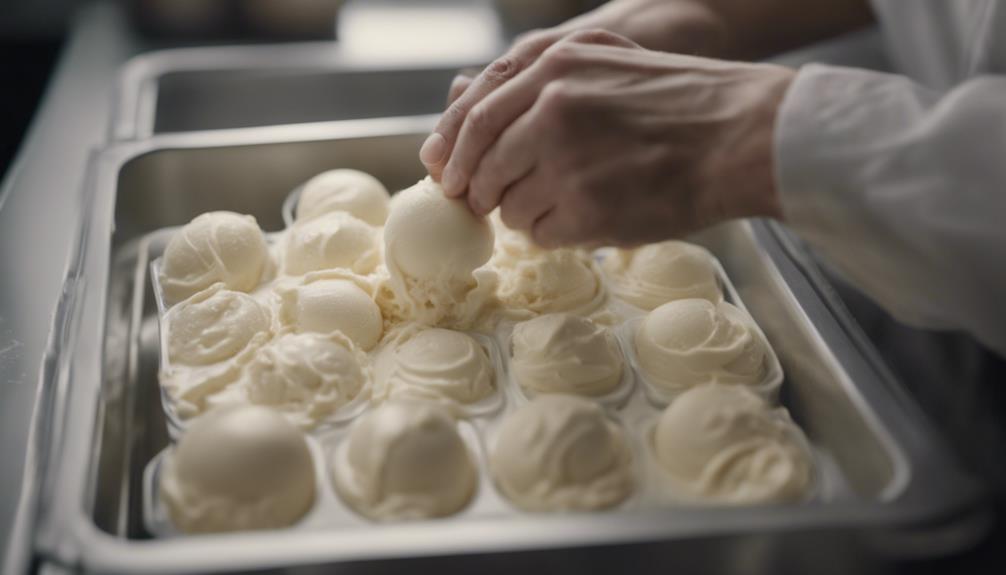
To maintain the freshness of your homemade vanilla ice cream, store it in a freezer-safe container and press plastic wrap directly onto the surface before sealing to prevent freezer burn.

Here are some essential storage tips & tricks:

  1. Use an airtight container: Opt for an airtight container to prevent ice crystals from forming on your delicious ice cream.
  2. Press plastic wrap: Make sure to press plastic wrap directly onto the ice cream's surface before sealing the container to avoid freezer burn.
  3. Keep away from strong-smelling foods: Store your ice cream away from strong-smelling foods in the freezer to preserve its original flavor.
  4. Soften before serving: Allow the ice cream to soften slightly at room temperature before scooping for easier serving and a creamier texture.

Ice Cream Maker Features

ice cream machine functions

You can enhance your homemade ice cream experience with the versatile features provided by ice cream makers like the Cuisinart 2-quart model.

The Cuisinart ice cream maker offers three settings for making ice cream, sorbet, or gelato, catering to various preferences. Its compact design allows for easy storage in the freezer, making it convenient for immediate use in dessert preparation.

Advertisement

The inner bowl of the ice cream maker must be frozen for at least 12 hours before churning to guarantee proper freezing and consistency in your vanilla ice cream recipe. Additionally, the Cuisinart machine is dishwasher safe, offering hassle-free cleaning post-use.

With the ability to churn out delicious ice cream in just around 30 minutes, this ice cream maker simplifies the dessert-making process and allows you to enjoy freshly made treats whenever the craving strikes.

Frequently Asked Questions

How to Make Ice Cream Using an Ice Cream Machine?

To make ice cream with an ice cream machine, freeze the bowl, mix ingredients, churn as directed, add mix-ins, and freeze for firmness. Enjoy your homemade treat in no time with these simple steps.

How Long Should You Churn Ice Cream in an Ice Cream Maker?

When churning ice cream in an ice cream maker, you should aim for approximately 25-30 minutes to get that creamy texture. Keep an eye on it to prevent graininess or a soft serve consistency. Adjust as needed for perfection.

How Do You Prevent Ice Crystals in No Churn Ice Cream?

To prevent ice crystals in no churn ice cream, use high-fat ingredients like heavy cream and sweetened condensed milk. Limit air incorporation during mixing, store in airtight containers with plastic wrap on the surface, or add a splash of alcohol.

Advertisement

What Are the Ratios for Homemade Ice Cream?

You'll mix 2 parts heavy cream with 1 part whole milk, adding sugar for sweetness. A common ratio: 2 cups cream, 1½ cups milk, ¾ cup sugar. Adjusting these ratios lets you craft a rich, creamy ice cream tailored to your taste.

Conclusion

To sum up, churned perfection awaits with this best vanilla ice cream recipe. From the creamy texture to the rich flavor, this homemade treat is sure to satisfy any sweet tooth.

So grab your ice cream maker, gather your ingredients, and get ready to indulge in a scoop of pure delight. With just a few simple steps, you'll be on your way to enjoying a delicious dessert that will have everyone coming back for more.

Mario's creativity shines through his ability to describe the sensory experience of enjoying ice cream. Whether he's discussing the velvety texture, the explosion of flavors, or the delightful combinations of toppings and sauces, his words transport readers to a world of mouthwatering sensations. His descriptive language allows readers to imagine and savor the flavors even before taking the first bite.

Continue Reading
Advertisement

Ice Cream Recipes

Sugar-Free Treat: Best Vanilla Ice Cream Recipe Without Sugar!

Whip up a guilt-free scoop of creamy sweetness with our top-rated sugar-free vanilla ice cream recipe that will satisfy your sweet tooth without the sugar!

Published

on

By

sugar free vanilla ice cream

You can enjoy a guilt-free scoop of creamy sweetness with our top-rated sugar-free vanilla ice cream recipe. Crafted with allulose to prevent crystallization and erythritol for a silkier texture, this dessert is a deliciously satisfying treat without the added sugar. Whip up a batch using dairy cream, almond milk, egg yolks, sweetener, and vanilla for a delightful twist on a classic favorite. Discover the perfect combination of flavors and textures that will have you coming back for more. Get ready to savor every bite of this delectable treat without any sugar worries!

Key Takeaways

  • Utilize erythritol for a silky texture in sugar-free vanilla ice cream.
  • Incorporate allulose to prevent crystallization and enhance sweetness.
  • Avoid Splenda, opt for natural sweeteners like monk fruit and stevia.
  • Properly prepare by boiling cream, almond milk, and vanilla for richness.
  • Use an ice cream maker for optimal texture; avoid no-churn for best results.

Ingredients and Sweeteners

ingredients and sweeteners in food

When making sugar-free vanilla ice cream, choosing the right sweeteners is crucial for achieving a delightful and smooth texture. Allulose stands out as the top choice due to its ability to prevent crystallization, resulting in a tender texture that mimics traditional ice cream.

Erythritol can also be used, especially when powdered, with Bocha Sweet being recommended for producing silkier results. It's important to steer clear of sweeteners like Splenda, which contains Sucralose and may not be suitable for everyone. For a natural sugar-free option, sweeteners containing monk fruit extract or stevia are excellent alternatives.

This sugar-free ice cream recipe prides itself on simplicity, using only 5 ingredients: dairy cream, almond milk, egg yolks, sweetener, and vanilla. By selecting the right sweeteners, you can ensure your sugar-free vanilla ice cream isn't only healthier but also irresistibly delightful.

Equipment and Preparation

prepping for outdoor adventure

To guarantee the smoothest and creamiest texture for your sugar-free vanilla ice cream, having the right equipment and following proper preparation steps is essential. For this recipe, you will need an ice cream maker to achieve the best results. While a no-churn option is possible, it may result in a less smooth and creamy texture. Here's a breakdown of the equipment and preparation steps:

Equipment Preparation Tips
Ice Cream Maker Split and scrape vanilla pods Use heavy cream for richness
Heavy Cream Boil cream, almond milk, and vanilla on low heat Chill mixture before churning
Vanilla Pods Thicken mixture on low heat Proper preparation is vital for ideal ice cream texture

Using an ice cream maker ensures a better texture, but if opting for the no-churn recipe, be prepared for a slightly different outcome. Following the detailed steps, such as properly chilling the mixture, will notably impact the final result.

Serving Suggestions

creative ways to serve

Enhance your sugar-free vanilla ice cream experience by exploring a variety of delectable serving suggestions. To elevate your dessert, consider pairing your creamy vanilla ice cream with various cakes for a classic dessert combo.

For added flavor and texture, top your sugar-free vanilla ice cream with melted chocolate, nuts, cookie dough, peanut butter, or fresh berries. Get creative and experiment with different flavors like peppermint, chocolate, or butter pecan to customize your vanilla ice cream to your liking.

Advertisement

For a softer texture, store your sugar-free vanilla ice cream in a shallow container, opt for a sugar substitute like Allulose sweetener, and add a splash of vodka. Before serving, make sure your ice cream has the perfect consistency by thawing it either on the counter or by giving it a quick zap in the microwave.

These serving suggestions will take your sugar-free vanilla ice cream to the next level, providing a delightful and guilt-free treat for any occasion.

Storage and Thawing Techniques

effective storage and thawing

When storing your sugar-free ice cream, remember to keep it in an airtight container in the freezer for up to 6 months.

Soften the ice cream before serving by letting it sit out for a few minutes or microwaving it for a quick thaw.

Proper thawing techniques are essential to preserve the ice cream's consistency and texture.

Storage Guidelines

For best results, store your sugar-free ice cream in an airtight container in the freezer for up to 6 months.

Advertisement

To maintain the best consistency and texture of your ice cream, follow these storage guidelines:

  • Softening Ice Cream: Before serving, allow the ice cream to soften by leaving it on the counter or microwaving it for a few seconds.
  • Proper Thawing Techniques: When ready to enjoy, use proper thawing techniques to preserve the texture of the ice cream.
  • Avoid Re-freezing Ice Cream: To prevent ice crystal formation and texture changes, avoid re-freezing ice cream multiple times.
  • Shallow Containers: Opt for shallow containers when storing ice cream for easier thawing and serving.

Thawing Tips

To maintain the best texture and flavor of your sugar-free ice cream, thaw it in the refrigerator for a few hours before serving. Proper thawing techniques are essential to guarantee a smooth texture and creamy consistency.

Store your sugar-free ice cream in the freezer in an airtight container for up to 6 months. When it's time to enjoy your treat, soften the ice cream by leaving it on the counter or giving it a quick zap in the microwave, but be careful not to melt it completely.

Thawing the ice cream in the refrigerator allows it to gradually reach the ideal serving temperature, resulting in a perfectly creamy dessert. Remember, avoid refreezing the ice cream multiple times as this can affect its texture and flavor.

Recipe FAQs and Additional Recipes

cooking information and selection

Let's address common ingredient questions and shine a light on exciting recipe variations.

Get ready to elevate your sugar-free vanilla ice cream game with these helpful insights and delicious alternatives.

Discover new ways to customize your frozen treats and make your dessert experience even more enjoyable.

Advertisement

Ingredient Inquiries Addressed

Exploring common questions about ingredients in this sugar-free vanilla ice cream recipe can enhance your understanding of substitutions and flavor adjustments. Here are some essential ingredient inquiries addressed:

  • Can I use a different sweetener in place of the one listed?
  • What can I substitute for heavy cream to make the recipe lower in calories?
  • Are raw eggs safe to consume in this homemade ice cream?
  • Can I use a blender instead of a hand mixer for this recipe?
  • Is unsweetened almond milk a suitable alternative to regular milk for a low-carb version?

Understanding these ingredient nuances can help you tailor the recipe to your preferences while maintaining the delicious vanilla flavor. By addressing these inquiries, you can confidently adapt the sugar-free ice cream to suit various dietary needs and taste preferences.

Recipe Variations Highlighted

Consider incorporating fruit or sugar-free flavorings to add an invigorating twist to this sugar-free vanilla ice cream recipe.

You can experiment with low carb sweeteners like monk fruit or stevia to enhance the sweetness without adding sugar.

For a keto-friendly option, try making homemade keto ice cream by using unsweetened almond milk as a base.

If you're looking for a no-churn vanilla ice cream variation, simply adjust the recipe by using a Soft Keto Ice method to achieve a creamy texture without an ice cream maker.

Advertisement

Additionally, for a decadent touch, consider mixing in sugar-free chocolate chunks or a sugar-free chocolate sauce swirl to elevate the flavor profile.

These recipe variations offer flexibility to cater to different dietary needs while still enjoying a delicious and guilt-free treat.

Don't forget to refer to user reviews and experiences for insights on taste and texture adjustments when trying out these different options.

Reviews and Tweaks

reviews and improvements made

Read through the reviews and tweaks shared by users to gain insights into their experiences with the sugar-free vanilla ice cream recipe. Users were pleased with the taste and simplicity of creating this keto-friendly treat.

They successfully substituted ingredients such as almond milk and Swerve sweetener, enhancing the flavor and texture. Some reviewers experimented with incorporating keto-friendly additions like fat bomb dough, adding depth to the recipe.

Concerns were raised regarding the creaminess of the ice cream post-freezing, prompting discussions on potential adjustments to maintain a creamy consistency. Additionally, users engaged in carb calculations to tailor the recipe to their dietary preferences, showcasing the recipe's adaptability.

Advertisement
  • Positive feedback on taste and ease of making the recipe
  • Successful use of almond milk and Swerve sweetener as substitutes
  • Experimentation with keto-friendly additions like fat bomb dough
  • Questions raised about maintaining creaminess after freezing
  • Discussions on carb calculations for recipe adjustments

Recipe Submitted By

recipe for delicious cookies

The sugar-free vanilla ice cream recipe was submitted by dr_kaley, a profile known for converting recipes to healthier versions. Dr_kaley's focus on organic and scratch cooking shines through in this homemade low-carb treat. Their expertise in creating diabetic-friendly recipes guarantees a creamy and delicious vanilla ice cream that's guilt-free and suitable for those with dietary restrictions.

Through ongoing studies in herbal medicine, dr_kaley brings a unique perspective to crafting wholesome recipes that cater to a variety of cooking techniques. Their commitment to providing diabetic-friendly options extends to this sugar-free vanilla ice cream, making it a perfect choice for individuals looking for a healthier dessert alternative.

You'll Also Love

discovering new favorite items

Exploring a diverse array of additional recipes and food-related content opens up a world of culinary possibilities. When you're enjoying your sugar-free ice cream, you might also love to try out these tempting options to complement your low carb diet:

  • Homemade Ice Cream: Experiment with different flavors and ingredients to create your own sugar-free ice cream recipes at home.
  • Low Churn Vanilla Ice Cream: Whip up a batch of smooth and creamy vanilla ice cream without the need for fancy equipment.
  • Make Sugar-Free Treats: Plunge into the world of sugar-free desserts and treats that are both delicious and guilt-free.
  • Cream in the Freezer: Learn the art of storing and preserving homemade ice cream to maintain its perfect texture.
  • Tempted to Eat: Explore ways to resist temptation and stay on track with your low carb lifestyle while indulging in delectable treats.

These options will enhance your culinary skills and provide a delightful variety of treats to enjoy alongside your sugar-free ice cream.

Frequently Asked Questions

What Is the Best Sweetener for Sugar-Free Ice Cream?

For your sugar-free ice cream, the best sweetener is allulose. It prevents crystallization and gives a soft texture. Erythritol works if powdered, but Bocha Sweet yields creamier results. Monk fruit extract or stevia are excellent alternatives. Avoid Splenda for better taste and texture.

What Makes No Sugar Ice Cream Sweet?

When crafting your own no sugar ice cream, sweetness is born from the dance of sugar substitutes like Allulose, erythritol, or stevia. The right blend creates a symphony of flavor without the sugar crash.

Does Sugar-Free Ice Cream Still Have Sugar in It?

Sugar-free ice cream does not contain traditional sugar. It is sweetened with alternative sweeteners that don't affect blood sugar levels. Always check labels to confirm no hidden sugars. Enjoy a sweet and creamy treat guilt-free!

Can I Substitute Stevia for Sugar in Ice Cream?

You can substitute stevia for sugar in ice cream. Follow the recommended conversion ratio on the stevia packaging. Remember that stevia is sweeter than sugar, so adjust the amount cautiously. Experiment with various brands to find your preferred sweetness level.

Advertisement

Conclusion

Indulge in this luscious, creamy, and guilt-free vanilla ice cream, bursting with flavor and sweetness without the sugar.

With simple ingredients and easy preparation, this treat is sure to satisfy your cravings without the added guilt.

So go ahead, scoop up a serving of this scrumptious sugar-free delight and savor every spoonful of this delectable dessert.

Continue Reading

Ice Cream Recipes

Egg-Enhanced Vanilla: Best Vanilla Ice Cream Recipe With Eggs!

Savor the ultimate indulgence in vanilla ice cream with eggs for a creamy, luxurious treat that elevates your dessert game.

Published

on

By

egg enhanced vanilla ice cream

For the creamiest and most decadent vanilla ice cream, incorporating eggs is key. The custard base with eggs gives a rich texture and luxurious taste. Don't miss out on the velvety outcome eggs bring. Customize with mix-ins and flavor variations to make it your own. Experiment with different flavors beyond vanilla for unique frozen treats. Properly storing the custard base enhances the shelf life. Share and adapt the recipe for a community-driven experience. Embrace the richness and flavor profile egg-enhanced vanilla offers for a truly indulgent treat.

Key Takeaways

  • Incorporating egg yolks creates a rich custard base for ultimate creaminess.
  • The ideal egg-to-milk ratio enhances flavor depth and luxurious texture.
  • Tempering eggs prevents curdling and ensures a velvety smoothness.
  • Experiment with different numbers of yolks for varying levels of richness.
  • Egg-enhanced vanilla ice cream surpasses store-bought options in flavor and creaminess.

Vanilla Ice Cream Recipe Details

perfecting homemade vanilla ice cream

Creating a rich and creamy vanilla ice cream involves mastering the classic custard base with eggs. This homemade recipe is all about achieving that decadent and luscious texture that makes your taste buds sing with delight.

By incorporating eggs into the custard base, you're adding a luxurious richness that sets this vanilla ice cream apart from the rest. The heavy cream plays a pivotal role in ensuring that your ice cream turns out creamy and velvety, making each bite a delightful experience.

When making your own vanilla ice cream, don't shy away from using eggs in the custard base. While eggless versions exist, they may not provide the same creamy texture and depth of flavor that a custard-based recipe offers.

To truly elevate your homemade vanilla ice cream to a decadent treat, embrace the classic method of creating a custard base with eggs for a dessert that's sure to impress.

Recipe Yield and Variations

recipe customization and quantity

To adjust the yield of the vanilla ice cream recipe or explore various flavor variations, consider the recipe's adaptability and the potential for customizing your frozen dessert experience.

The vanilla custard-based recipe makes 1 quart of delicious ice cream, perfect for a quart ice cream maker. If you have a larger 2-quart machine, simply double the ingredients for a bigger batch. This egg custard base guarantees a creamy texture and richness that sets well when frozen.

Advertisement

Experiment with different mix-ins like Oreos or try a Porto substitution for added flavor complexity. The recipe allows for easy customization, so feel free to multiply the ingredients for larger gatherings or to suit your preferences.

Whether you prefer a classic vanilla base or want to explore different flavors, this versatile recipe provides a solid foundation for creating your own personalized ice cream variations.

Additional Ice Cream Recipes

ice cream flavors galore

Now, let's discuss creating some invigorating ice cream flavors to expand your dessert repertoire.

From decadent chocolate to rejuvenating mint chocolate chip, the possibilities are endless for your culinary experiments.

Get ready to share and swap recipes with fellow ice cream enthusiasts for a fun and flavorful experience in the kitchen.

Flavorful Ice Cream Variations

Explore a delightful array of ice cream flavors beyond vanilla, including chocolate, mint chocolate chip, butter pecan, and blueberry cheesecake. When it comes to homemade ice cream, the possibilities are endless for creating unique and delicious frozen treats. Experimenting with different ice cream flavors allows you to cater to various preferences and cravings. Whether you prefer the classic taste of old-fashioned vanilla ice cream or the richness of custard ice cream made with egg yolks, there is a flavor for everyone to enjoy.

Advertisement

To showcase the diversity of ice cream flavors, here is a table highlighting some popular options:

Flavor Description Key Ingredients
Chocolate Rich and indulgent cocoa flavor Cocoa powder, cream
Mint Chocolate Chip Invigorating mint with chocolate chips Mint extract, chocolate
Butter Pecan Buttery and nutty goodness Pecans, butter, cream
Blueberry Cheesecake Creamy cheesecake with blueberry swirls Blueberries, cream cheese

Get creative with your ice cream making and have fun exploring these flavorful variations!

Community Ice Cream Creations

Engage with fellow ice cream enthusiasts to explore a variety of additional homemade ice cream recipes, including Cookies N Cream, Chocolate, and custom flavors. In the vibrant ice cream community, you can find inspiration for creating gluten-free frozen treats and experimenting with innovative flavors. Share your own unique recipes and variations with like-minded individuals using #yesalyonascooking on Instagram and Pinterest to showcase your delicious creations.

Homemade ice cream opens up a world of possibilities beyond traditional vanilla. Explore the endless creativity within the community, where individuals are constantly pushing the boundaries of flavor and texture. Whether you prefer classic recipes like Cookies N Cream or want to dive into rich Chocolate creations, there's something for everyone in this diverse and welcoming space.

Custard Base Storage and Freezer Shelf Life

custard storage guidelines review

You should take note of the recommended storage durations and methods for custard bases when preparing homemade ice cream.

It's pivotal to keep your ice cream in an airtight container to preserve its flavor and texture.

Advertisement

Storage Recommendations

For best results, the custard base for vanilla ice cream should be refrigerated for 3-4 days before churning. Once you have churned your homemade vanilla ice cream, proper storage is key to maintaining its delicious texture. It is recommended to store the finished ice cream in an airtight container to prevent ice crystals from forming. Placing a layer of plastic wrap directly on the surface of the ice cream before sealing the container can further help in preventing freezer burn.

To emphasize the importance of proper storage methods, here is a helpful table outlining some key storage recommendations for your vanilla ice cream:

Storage Method Recommendation
Refrigeration 3-4 days before churning
Freezer Up to 2 months in an airtight container
Homemade Ice Cream Texture Maintain by using plastic wrap directly on the surface

Freezing Guidelines

After refrigerating the custard base for 3-4 days before churning, the next step is to follow appropriate freezing guidelines for storing your homemade vanilla ice cream.

Once the mixture is churned into a creamy ice cream, transfer it into an airtight container. Make sure the ice cream is stored in the coldest part of the freezer to maintain its texture and flavor. Before sealing the container, cover the surface of the ice cream with plastic wrap to prevent the formation of ice crystals.

Whether you have made your ice cream from scratch or bought it from the store, storing it correctly is essential. Homemade ice cream can last up to 2 months in the freezer without compromising its quality if stored properly.

Advertisement

Community Interactions and Recipe Adaptations

community collaboration and cooking adaptations

In community discussions surrounding this vanilla ice cream recipe, various experiences with ice cream making methods and flavor adaptations are shared among enthusiasts. Users engage in conversations about perfecting vanilla ice cream, experimenting with flavors, and creating unique flavor combinations. They exchange tips on making ice cream without a churn and storing the custard base for best results.

Readers often request ingredient amounts and variations to tailor the recipe to their preferences, showcasing a shared passion for homemade ice cream within the community. Feedback highlights successful attempts at adapting the vanilla ice cream recipe, such as incorporating Oreos or experimenting with strawberry ice cream variations.

The interactions demonstrate a collaborative effort to enhance the recipe and explore new ways to enjoy delicious frozen treats. Participants in these discussions inspire one another to push the boundaries of traditional vanilla ice cream by embracing creativity and innovation in their culinary endeavors.

Recipe Benefits and Reviews

culinary evaluation and feedback

Enhance your ice cream experience with the rich and creamy texture of homemade vanilla ice cream made with eggs. The addition of egg yolks in the churning method results in a light and fluffy consistency, elevating the dessert to a decadent level. The use of egg yolks not only enhances the creamy texture but also brings out a rich flavor that surpasses store-bought options. The versatile nature of this vanilla ice cream recipe allows for a more pronounced vanilla taste, making it a go-to choice for dessert lovers.

Readers have raved about the egg-enhanced vanilla ice cream recipe, praising its superior taste and luxurious mouthfeel. The combination of egg yolks with the churning process creates a velvety smoothness that sets this homemade vanilla ice cream apart. The recipe's ability to deliver a creamy and rich flavor profile has made it a favorite for those seeking a truly indulgent treat.

Ingredients and Cooking Process

cooking instructions and ingredients

Let's now move on to exploring the ingredients and cooking process for preparing this delectable vanilla ice cream recipe with eggs.

Egg yolks play a vital role in creating a rich and creamy custard base for the ice cream. The ideal ratio of egg yolks to dairy is typically four yolks to three cups of milk and cream, resulting in a decadent texture. More yolks contribute to a richer and creamier ice cream, while fewer yolks lead to a lighter consistency.

The egg yolks not only thicken the base but also enhance its taste and texture, providing a smooth finish. To make sure the eggs blend smoothly without curdling, it's necessary to temper them. This process involves slowly mixing hot milk into the egg-sugar mixture to raise the temperature gradually.

Advertisement

Frequently Asked Questions

What Does Adding Eggs to Ice Cream Do?

Adding eggs to ice cream creates a rich and creamy custard base. Egg yolks thicken the mixture, contributing to a smoother texture. The fats in yolks enhance mouthfeel and richness, while also helping emulsify ingredients for a smooth consistency.

What Is the Role of Eggs in Quality Vanilla Ice Cream?

Eggs elevate vanilla ice cream, delivering a creamy texture and rich flavor. With emulsifying properties, yolks bind ingredients for a silky consistency. More yolks mean denser, custard-like ice cream. Their fat content creates a luxurious mouthfeel, thickening the base for a velvety finish.

Does Vanilla Ice Cream Have Eggs in It?

Vanilla ice cream often contains eggs for a rich, creamy texture. The yolks create a custard base that thickens the mixture, leading to a velvety consistency. Eggs contribute to a smoother mouthfeel and luxurious taste.

How to Make the Creamiest Ice Cream?

To make the creamiest ice cream, whisk egg yolks into the base for a velvety texture. Tempering eggs properly avoids curdling, giving you a smooth custard. Add richness and depth, creating a luxurious mouthfeel. Try it for the ultimate treat!

Conclusion

Indulge in the creamy goodness of homemade egg-enhanced vanilla ice cream, perfect for satisfying your sweet tooth cravings.

Advertisement

This recipe is like a scoop of sunshine on a hot summer day, bringing a burst of flavor and nostalgia with every bite.

So grab a spoon, dig in, and treat yourself to a taste of pure ice cream bliss!

Continue Reading

Ice Cream Recipes

KitchenAid Wonders: Best Vanilla Ice Cream Recipe for KitchenAid Ice Cream Maker!

Make the most decadent homemade vanilla ice cream with your KitchenAid Ice Cream Maker – a truly mouthwatering experience awaits!

Published

on

By

kitchenaid vanilla ice cream

Create delicious homemade vanilla ice cream with your KitchenAid Ice Cream Maker! Chill ingredients, churn for 25-30 minutes, then savor the creamy goodness. Experiment with extracts and sugar levels for a unique twist. The KitchenAid attachment simplifies the process, ensuring a smooth texture. Try the no-egg recipe for a classic treat. And don't forget to check out the storage and freezing tips for best results. Enjoy the endless possibilities of homemade vanilla ice cream; mix in fruits, nuts, or chocolates for a delightful experience!

Key Takeaways

  • Chill ingredients for 2 hours for flavor development.
  • Experiment with extracts and sweetness levels for customization.
  • Freeze bowl for 15 hours before churning for optimal results.
  • Add a pinch of salt to enhance sweetness.
  • Use airtight containers to prevent ice crystals during storage.

Easy Homemade Vanilla Ice Cream Recipe

perfect summer treat option

Creating a luscious batch of homemade vanilla ice cream with your KitchenAid Ice Cream Maker is a breeze with this eggless recipe. All you need is heavy cream, whole milk, sugar, pure vanilla extract, and a pinch of salt. The simplicity of this recipe makes it a go-to dessert option for any occasion.

The combination of heavy cream and whole milk in this KitchenAid vanilla ice cream recipe guarantees a rich and creamy texture that's sure to please your taste buds. The pure vanilla extract adds a fragrant and flavorful touch to the ice cream, elevating its taste to a whole new level.

Once you have mixed all the ingredients together, let your KitchenAid Ice Cream Maker work its magic to churn the mixture into a velvety smooth treat.

Whether enjoyed on its own or paired with your favorite dessert, this homemade vanilla ice cream is certain to be a crowd-pleaser.

Tools and Ingredients Needed

tools for cooking pasta

To prepare the KitchenAid Ice Cream Maker recipe, gather essential tools such as the KitchenAid Mixer, Ice Cream Attachment, Mixing Bowl, and Wire Whisk, along with the necessary ingredients. Here's what you'll need:

  • Heavy Cream: Provides richness and creaminess to the ice cream.
  • Whole Milk: Adds a smooth texture to the ice cream base.
  • Sugar: Sweetens the mixture and helps with the ice cream's consistency.
  • Vanilla Extract: Infuses the ice cream with a classic vanilla flavor.

Ensure your KitchenAid freezer bowl has been frozen for at least 15 hours before starting.

The KitchenAid Mixer with the Ice Cream Attachment is specifically designed for this recipe, ensuring top-notch performance.

Advertisement

Tips for Perfect Vanilla Ice Cream

perfect vanilla ice cream

To achieve perfect vanilla ice cream, make sure that you churn the mixture for the recommended time to achieve the desired consistency.

Proper ingredient preparation, such as using high-quality vanilla extract and adjusting sweetness levels, will also contribute to the deliciousness of your homemade treat.

Pay attention to these tips to elevate your vanilla ice cream game.

Churning Time

Achieving the perfect texture for your homemade vanilla ice cream with the KitchenAid Ice Cream Maker involves churning for approximately 25-30 minutes to reach a soft-serve consistency.

After this churning time, follow these tips for the ideal vanilla ice cream:

  • For a firmer texture, transfer the soft-serve ice cream to a separate container and freeze for an additional 2-4 hours.
  • Make sure you use freezer-safe containers to store the churned ice cream properly.
  • The recipe yields a little over a quart of delicious homemade vanilla ice cream.

Following the churning time and freezing instructions secures the perfect consistency and texture of the vanilla ice cream.

Ingredient Preparation

For the ideal vanilla ice cream with the KitchenAid Ice Cream Maker, make sure all your ingredients are chilled before mixing. Start by using high-quality vanilla extract to achieve a rich and intense flavor in your homemade treat.

Advertisement

Chilling the mixture of heavy whipping cream and milk in the refrigerator for at least 2 hours is essential as it helps develop the flavors. Don't forget to add a pinch of salt to enhance the sweetness and overall taste of your vanilla ice cream.

Proper ingredient preparation is key to achieving the perfect texture and flavor. By ensuring that your heavy whipping cream and other ingredients are cold, you set yourself up for success.

The right proportions of heavy cream and milk will result in a creamy and smooth consistency that will impress your taste buds. So, take the time to chill, measure accurately, and enjoy the delicious outcome of your well-prepared vanilla ice cream.

Recipe Preparation and Variations

recipe customization and instructions

You're about to learn about the churning process details, ways to enhance flavors, and tips on storage and serving.

These points will help you master the art of making delicious homemade ice cream with your KitchenAid Ice Cream Maker.

Get ready to elevate your ice cream game with these essential insights!

Advertisement

Churning Process Details

To enhance the flavor and texture of your homemade vanilla ice cream, consider experimenting with different extracts or adjusting the sweetness level before churning.

When it comes to the churning process, here are some important details to keep in mind:

  • Chilling Mixture: Make sure to chill the ice cream base in the refrigerator for at least 2 hours before churning to achieve a smoother consistency.
  • Churning Process: Churn the mixture in your KitchenAid Ice Cream Maker for about 20-30 minutes until it reaches a creamy texture.
  • Homemade Ice Cream: Adjusting the sweetness level or trying out various extracts can help you create unique flavor variations for your homemade ice cream.
  • Freezing the Ice Cream: After churning, transfer the ice cream to a container and freeze it for a few hours until it firms up.

Flavor Enhancement Ideas

Enhancing your vanilla ice cream recipe can be achieved by incorporating homemade vanilla extract or exploring premium store-bought options for a richer flavor profile. To take your vanilla ice cream to the next level, consider experimenting with various flavor variations such as chocolate almond, fruit-infused, or unique extracts. Add a personal touch by incorporating toppings like hot fudge, nuts, or fruit compote to enhance both the taste and presentation of your ice cream. For a more intense vanilla flavor, try using vanilla bean paste instead of extract. You can also introduce mix-ins like cookie dough, brownie bites, or fresh fruit to add an exciting texture to your ice cream. Additionally, customize the sweetness level of your ice cream by adjusting the amount of sugar used in the recipe to match your preferences.

Flavor Enhancements Description
Vanilla extract Enhances the base vanilla flavor
Flavor variations Experiment with unique flavor combinations
Toppings Elevate taste and presentation with a variety of toppings

Storage and Serving

For best storage and serving of your homemade vanilla ice cream, make sure to transfer it to a freezer-safe container and cover it with plastic wrap to prevent ice crystals.

Here are some tips to enhance your ice cream experience:

  • Freezing Consistency: Allow the ice cream to freeze for at least 2-4 hours for a harder consistency before serving.
  • Serving Suggestions: Enjoy your vanilla ice cream in bowls or cones, topped with fresh fruit, chocolate sauce, or sprinkles for added flavor and texture.
  • Recipe Variations: Get creative by experimenting with mix-ins like chocolate chips, nuts, or fruit to personalize your ice cream flavors.
  • Leftover Maintenance: Store any leftover homemade ice cream in the freezer for up to 2-3 weeks, ensuring it's tightly sealed to maintain freshness and prevent freezer burn.

KitchenAid Ice Cream Maker Attachment

homemade ice cream delight

The KitchenAid Ice Cream Maker attachment offers a convenient way to create creamy homemade ice cream using your KitchenAid mixer. This attachment, designed to work with KitchenAid Stand Mixer Ice, includes a freeze bowl, special paddle, and drive assembly for making delicious ice cream at home.

To maintain optimal ice cream consistency, it's essential to freeze the bowl for at least 15 hours before using it. The KitchenAid Ice Cream Maker simplifies the churning process, eliminating the need for manual stirring and resulting in smooth and rich ice cream.

Advertisement

Directions for Churning Ice Cream

churning ice cream at home

Now it's time to churn your ice cream! Follow the guidelines for churning time to achieve that perfect soft-serve consistency.

After churning, consider freezing the ice cream for a firmer texture and remember to use freezer-safe containers for storage.

Churning Time Guidelines

Begin churning your ice cream in the KitchenAid Ice Cream Maker Attachment, aiming for a soft-serve consistency in about 25-30 minutes. During this process, the ice cream will transform into a creamy treat ready to enjoy.

Here are some guidelines to help you achieve the perfect texture:

  • Aim for a soft-serve consistency within the first 25-30 minutes of churning.
  • For a firmer texture, transfer the churned ice cream to a separate container and freeze it for 2-4 hours.
  • Remember to use freeze-safe containers when storing your freshly churned ice cream.

The churning process in the KitchenAid Ice Cream Maker Attachment guarantees a smooth and creamy consistency that will delight your taste buds.

Freezing Recommendations

Make sure the freeze bowl is thoroughly frozen for a minimum of 15 hours before beginning the churning process for your ice cream in the KitchenAid Ice Cream Maker Attachment. This step is essential for the proper freezing of the mixture during churning.

Once the freeze bowl is adequately frozen, assemble the attachment to your KitchenAid mixer and start churning according to the manufacturer's instructions. The churned ice cream will reach a soft-serve consistency in about 25 minutes.

Advertisement

If you prefer a firmer texture, transfer the churned ice cream into a freezer-safe container and freeze for an additional 2-4 hours. This extra freezing time helps achieve a scoopable consistency similar to store-bought ice cream.

Remember to always keep the freeze bowl in the freezer until needed so that it's ready whenever you feel like making a batch of delicious homemade ice cream.

Storage Tips

Once you have churned your ice cream to the desired consistency, it's important to transfer it to a freezer-safe container for best storage.

When storing your homemade ice cream, follow these essential tips:

  • Freeze the Churned Ice Cream: For a firmer texture, freeze the churned ice cream for an additional 2-4 hours before serving.
  • Use an Airtight Container: Ensure the container used for freezing the ice cream is hermetically sealed to prevent ice crystals from forming and maintain the freshness of your dessert.
  • Label the Container: Don't forget to label the container with the date and flavor of the ice cream. This will help you easily identify it in the freezer and avoid any mix-ups.
  • Store Properly: Homemade ice cream can typically be stored in the freezer for up to 2-3 months for maximum freshness and taste. Make sure to store it in the coldest part of your freezer for the best results.

Churning Time and Freezing Instructions

churning instructions and freezing

During the churning process in the KitchenAid Ice Cream Maker, allow the mixture to reach a soft-serve consistency which typically takes about 25-30 minutes.

Once the ice cream reaches this stage, transfer it to a freezer-safe container and freeze for an additional 2-4 hours for a firmer texture.

Advertisement

Freezing the ice cream post-churning is essential as it helps the dessert set and develop a scoopable texture, ensuring a delightful homemade vanilla ice cream experience.

Remember to use freezer-safe containers for best results to maintain the ice cream's quality.

No Egg Vanilla Ice Cream Recipe

delicious homemade ice cream

For a simple and egg-free treat using your KitchenAid Ice Cream Maker, gather heavy cream, whole milk, sugar, vanilla extract, and salt to create a delightful No Egg Vanilla Ice Cream Recipe. This quick and easy recipe yields a rich and creamy vanilla ice cream without the need for eggs.

Here's how to make it:

  • Combine Ingredients: Mix heavy cream, whole milk, sugar, vanilla extract, and a pinch of salt in a bowl until the sugar dissolves.
  • Chill the Mixture: Refrigerate the mixture for at least 2 hours to make sure it's properly chilled before churning.
  • Churn in the KitchenAid: Pour the chilled mixture into your KitchenAid Ice Cream Maker and churn following the manufacturer's instructions.
  • Freeze and Enjoy: Transfer the churned ice cream to a container, freeze for a few hours until firm, and then scoop out a delicious serving of homemade vanilla ice cream.

With this straightforward recipe, you can savor a luscious treat without the need for eggs, perfect for those seeking a trouble-free dessert option.

Versatility of Homemade Vanilla Ice Cream

delicious homemade vanilla treat

Discover the endless possibilities of incorporating delicious vanilla ice cream into a variety of desserts and flavor combinations. Making your own ice cream is the best way to unleash your creativity and indulge in unique flavor combinations.

Homemade vanilla ice cream allows you to experiment with different mix-ins, from fresh fruits and nuts to decadent chocolate chunks or swirls of caramel. With homemade vanilla ice cream, you have the freedom to tailor your dessert to suit your preferences perfectly.

Whether you prefer a classic scoop of vanilla alongside a warm slice of apple pie or an invigorating ice cream sandwich, the options are limitless. The versatility of homemade vanilla ice cream guarantees that you can enjoy it on its own as a delightful treat or elevate it by pairing it with various desserts.

Advertisement

Community Feedback and Reviews

community input on reviews

Check out what users are saying about the KitchenAid Ice Cream Maker recipe and their experiences with making and customizing different flavors. Community feedback on the homemade vanilla ice cream has been overwhelmingly positive, with many highlighting the simplicity and great taste of the recipe.

Users appreciate the versatility of the base recipe, sharing their experiences making a variety of flavors and pairing them with different desserts. Some community members have suggested sugar-free or alternative ingredient options to cater to dietary preferences.

Feedback also includes ideas for incorporating mix-ins like chocolate chips, nuts, or fruit to create unique flavor combinations. The customizable nature of the recipe has been a hit among users, with many expressing their joy in creating their own delicious homemade ice cream flavors.

Frequently Asked Questions

What Speed Should I Put My Kitchenaid Ice Cream On?

You should put your KitchenAid ice cream maker on Speed 1 for best results. Churning at a lower speed prevents excess air, creating a smoother texture. Following this suggestion guarantees your homemade vanilla ice cream turns out perfectly rich and creamy.

How Long Do You Churn Ice Cream in a Kitchenaid?

So, you wanna whip up some creamy goodness in your KitchenAid, huh? Well, typically, you churn ice cream for about 20-30 minutes. Adjust for desired texture. Longer churn = silkier ice cream. Enjoy your sweet treat!

Which Kitchenaid Attachment Is Best for Creaming?

For creaming, the best KitchenAid attachment is the paddle attachment. It's ideal for incorporating ingredients evenly and achieving a smooth, creamy texture. Swap in the paddle attachment for effortless creaming and enjoy delicious results.

Advertisement

How Long Do I Need to Freeze My Kitchenaid Ice Cream Maker?

To make creamy ice cream, freeze your KitchenAid Ice Cream Maker bowl for at least 15 hours. For the best results, chill it for 24 hours. Remember, a properly frozen bowl is the secret to perfect scoops!

Conclusion

So there you have it – the best vanilla ice cream recipe for your KitchenAid ice cream maker! Remember, the proof is in the pudding, or in this case, the ice cream.

So go ahead, whip up a batch of this creamy treat and taste the difference homemade makes.

Happy churning!

Advertisement
Continue Reading
Advertisement
Advertisement

Affiliate disclaimer

As an affiliate, we may earn a commission from qualifying purchases. We get commissions for purchases made through links on this website from Amazon and other third parties.

Vetted

affordable beverage fridges list affordable beverage fridges list
Vetted2 months ago

15 Best Beverage Fridges Under $300 to Keep Your Drinks Cool and Refreshing

Hunting for a budget-friendly beverage fridge under $300 to keep your drinks chilled and ready to enjoy?

chilled drinks at hand chilled drinks at hand
Vetted2 months ago

15 Best Beverage Fridges to Keep Your Drinks Chilled and Ready to Serve

Yearning for the perfect beverage fridge to keep your drinks chilled and ready to serve?

top camping fridge picks top camping fridge picks
Vetted2 months ago

15 Best Dometic Fridges for Camping Adventures – Keep Your Food Fresh Anywhere

Breeze through your camping trips with the top 15 Dometic fridges to keep your food fresh - adventure awaits!

top fridges for freshness top fridges for freshness
Vetted2 months ago

11 Best Denki Fridges to Keep Your Food Fresh and Your Kitchen Stylish

Kickstart your kitchen upgrade with the top Denki fridges for freshness and style, setting the stage for a perfect blend...

secure your beer storage secure your beer storage
Vetted2 months ago

15 Best Beer Fridges With Lock for Keeping Your Brews Safe and Cold

Get ready to safeguard your favorite brews with these 15 top-rated beer fridges featuring locks - the ultimate solution for...

top fridge freezer deals top fridge freezer deals
Vetted2 months ago

15 Best Deals on Fridge Freezers You Need to Check Out in 2024

Need a new fridge freezer? Discover top deals like the RCA Mini Refrigerator and Galanz Retro Fridge in this list...

affordable beer fridge options affordable beer fridge options
Vetted2 months ago

15 Best Beer Fridges Under $200 – Keep Your Brews Chilled Without Breaking the Bank

On the hunt for an affordable beer fridge?

fridge freezer deals galore fridge freezer deals galore
Vetted2 months ago

15 Best Deals for Fridge Freezers That Will Keep Your Food Fresh and Your Wallet Happy

Prepare for freshness and savings with these top 15 fridge freezers that will keep your food fresh and your wallet...

top beer fridge picks top beer fridge picks
Vetted2 months ago

15 Best Beer Fridges to Buy for Keeping Your Brews Chilled and Ready to Enjoy

Find the ultimate beer fridge with the top 15 picks, from Frigidaire's colorful options to Velieta's under-counter gem – your...

upgrade your kitchen now upgrade your kitchen now
Vetted2 months ago

15 Best Deals on Under Counter Fridges That Will Upgrade Your Kitchen

Looking to transform your kitchen? Discover the best deals on under-counter fridges that offer style, efficiency, and convenience.

top beer fridge models top beer fridge models
Vetted2 months ago

15 Best Beer Fridges for Your Ultimate Man Cave Experience

Find the perfect beer fridge for your man cave oasis with these top picks, setting the tone for ultimate relaxation...

save big on mini fridges save big on mini fridges
Vetted2 months ago

15 Best Deals on Mini Fridges With Freezer Compartments – Save Big on Cooling Solutions

Marvel at the savings on mini fridges with freezer compartments - discover top deals for efficient cooling solutions and space-saving...

Advertisement
Advertisement

Trending

Copyright © 2024 Dri Dri Gelato Affiliate disclaimer As an affiliate, we may earn a commission from qualifying purchases. We get commissions for purchases made through links on this website from Amazon and other third parties.