Ice Cream Recipes
Churn Mastery: Best Ice Cream Recipes With Ice Cream Maker!
Nurturing the perfect scoop is within reach with these expert-approved ice cream recipes and techniques that will transform your dessert game.
You're about to discover the secret to crafting exceptional ice cream at home, with rich, creamy bases and limitless flavor combinations that will impress even the most discerning palates. To get started, you'll need to master the ice cream base by tempering egg yolks with warm cream and cooking to nappe consistency. Then, explore flavorful variations by adding unique ingredients and mix-ins. With the right tools and techniques, you'll be churning out perfect ice cream in no time. From there, the possibilities are endless – and you're just a few steps away from discovering your new favorite flavor.
Key Takeaways
- Master a luxurious ice cream base with egg yolks, heavy cream, whole milk, and sugar for a smooth texture.
- Temper egg yolks with warm cream to prevent curdling and cook to nappe consistency for a thickened custard.
- Experiment with unique flavor combinations and ingredients, such as peanut butter or herb sugars, to create one-of-a-kind flavors.
- Chill the custard mixture for 8-24 hours before churning to meld flavors and textures, and freeze for at least two hours to set.
- Follow the manufacturer's instructions for churning and freezing techniques to achieve the perfect texture and consistency.
Mastering the Ice Cream Base
What's the secret to a rich, creamy ice cream base that will elevate your homemade recipes to the next level? It starts with egg yolks, which provide a luxurious foundation for your ice cream.
You'll also need heavy cream, whole milk, and sugar to achieve a smooth texture. To prevent curdling, temper the egg yolks with a warm cream mixture, then cook it to a nappe consistency to create a thickened custard. This step is vital, as it guarantees a flavorful and creamy base.
Once you've cooked the mixture, it's vital to chill it properly before churning. This allows the flavors and textures to meld together, resulting in a superior homemade ice cream recipe.
When you take the time to master the ice cream base, you'll be rewarded with a creamy, smooth texture that's unparalleled. By following these steps, you'll be well on your way to creating exceptional ice cream that will impress anyone.
Exploring Flavorful Variations
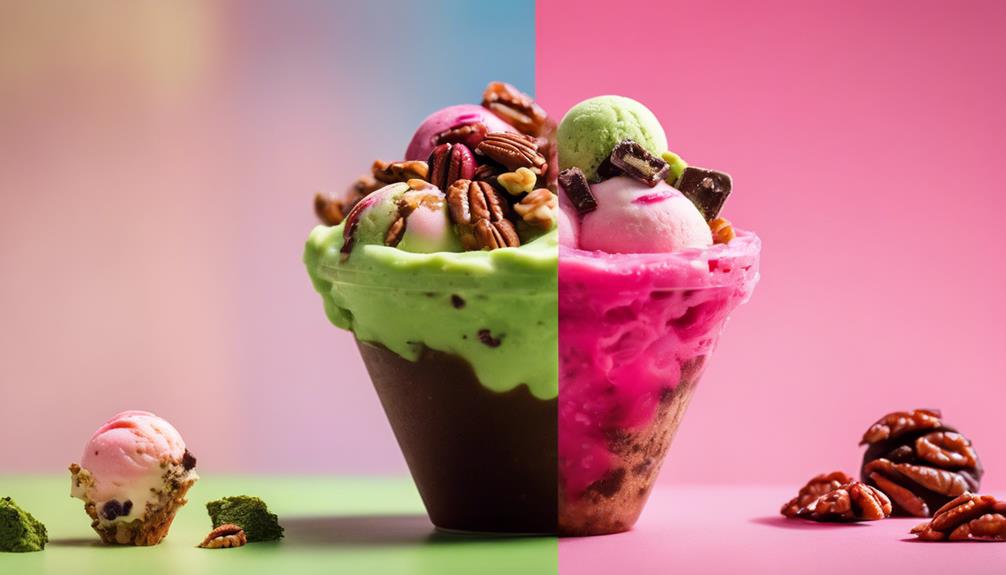
As you venture into the world of flavorful variations, you'll discover that the possibilities are endless, and the secret to accessing them lies in your willingness to experiment with unique ingredients and combinations.
Take your strawberry ice cream recipe to the next level by adding a drizzle of peanut butter or infusing it with herb sugars for added complexity. When making ice cream, don't be afraid to think outside the box and try new flavor combinations.
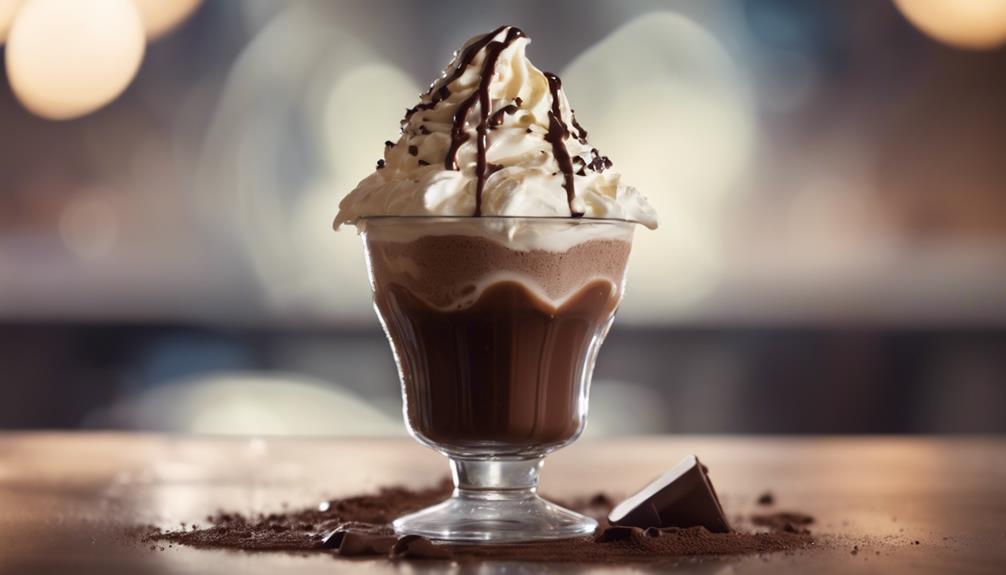
Want a rich and decadent treat? Try adding cocoa powder to your cream mixture for a Chocolate Ice Cream that's sure to please. To prevent ice crystals from forming, make sure to heat your mixture in a medium saucepan and then chill it before churning in your KitchenAid Ice Cream maker.
Once you've churned your desired flavor, be sure to freeze the ice cream for at least two hours to set. And why not get creative with mix-ins like Oreo cookies or nuts to take your flavors to new heights?
The world of ice cream is yours to explore, so get churning and see what delicious creations you can come up with!
Essential Ingredients and Tools
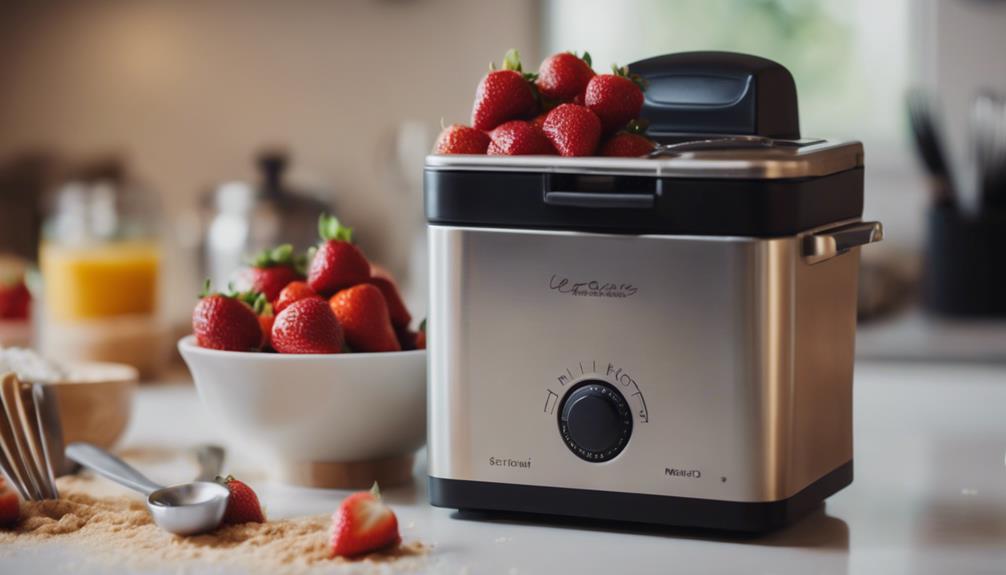
Now that you've explored the world of tasty variations, it's time to focus on the building blocks of your creations: the ingredients and tools that will bring your ice cream to life.
When it comes to necessary ingredients, you'll need heavy cream, whole milk, sugar, and egg yolks. The egg yolks provide richness and a creamy base for the mixture, while the proper ratios of cream, milk, and sugar are essential for achieving a smooth and creamy texture.
In addition to these ingredients, you'll need the right tools to churn your mixture into creamy perfection. An ice cream maker is a must-have, and you'll also need rock salt and ice to help the machine do its job. Before churning, make sure to chill your custard mixture to meld the flavors and ensure the best texture.
Churning and Freezing Techniques
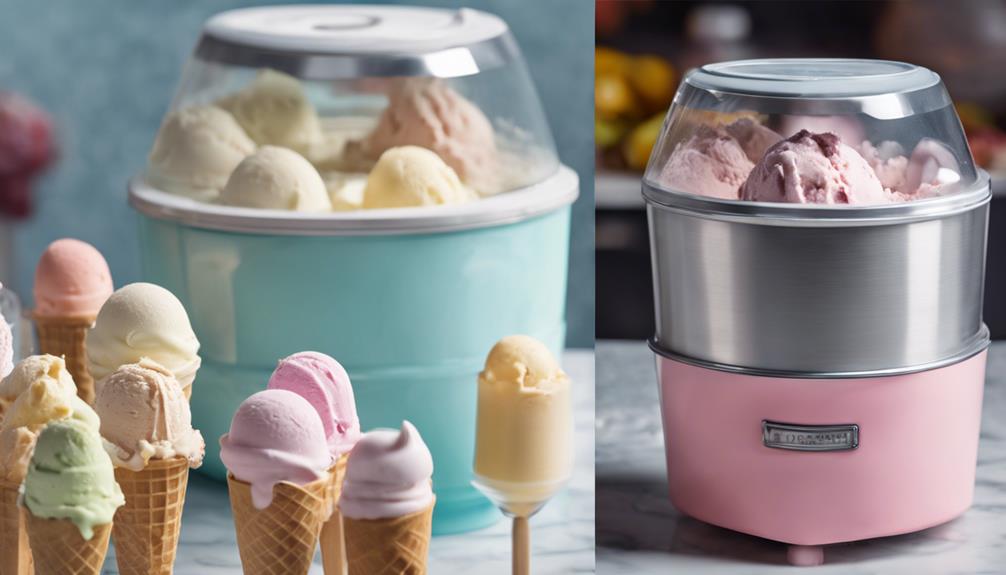
With your ingredients and tools ready, you're set to churn your ice cream base into a creamy, dreamy delight using your trusty ice cream maker. Now it's time to master the churning and freezing techniques that'll take your ice cream recipes to the next level.
Churning is all about mixing and freezing the base to incorporate air and prevent ice crystals from forming. Be sure to follow the manufacturer's instructions for churning time and speed to achieve that perfect, creamy consistency.
Once you've finished churning, transfer the mixture to a freezer-safe container and freeze it for 3-4 hours or overnight to further solidify. To prevent ice crystals from forming on top, cover the surface with parchment paper before sealing the container.
Achieving the Perfect Texture
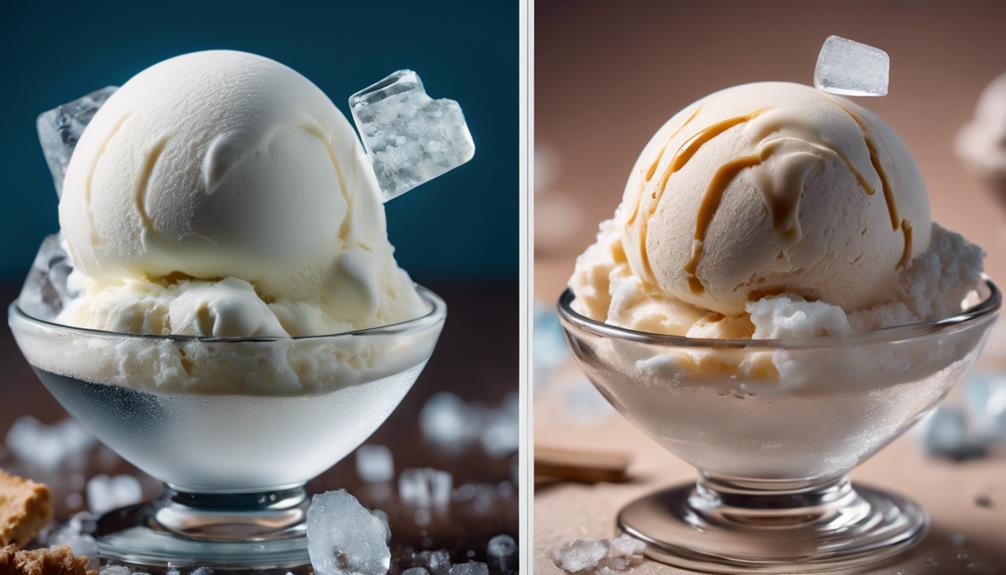
You've mastered the churning and freezing techniques, and now it's time to focus on the nuances of achieving the perfect texture in your homemade ice cream. Tempering egg yolks with warm cream mixture is essential to prevent curdling and secure a smooth, creamy texture.
Next, cook the custard mixture to a nappe consistency, where it coats the back of a spoon, resulting in a rich and velvety ice cream base. Straining the custard before chilling helps remove any bits of scrambled eggs, leading to a silky texture in the final product.
Properly chilling the custard for 8-24 hours before churning allows flavors to meld and ensures best texture and creaminess. When it's time to churn, follow the manufacturer's churning instructions for your ice cream machine.
Frequently Asked Questions
What Is the Secret to Making Ice Cream Very Creamy?
When making ice cream, you'll get the creamiest results by using a higher ratio of heavy cream to milk and incorporating egg yolks into the base – it's the secret to a rich, velvety texture!
How Long Should You Churn Ice Cream in an Ice Cream Maker?
You've got 30 minutes to 1 hour to churn that ice cream to perfection – not a minute more, not a minute less! Over-churn and it's icy, under-churn and it's soupy, so follow the maker's instructions to get it just right!
Why Put Eggs in Homemade Ice Cream?
You add eggs to homemade ice cream because they provide a rich, creamy base, contributing to a smooth texture and flavor. Whisked with sugar, they create a luscious base, and tempering them prevents curdling for a cohesive custard.
How Do You Make Homemade Ice Cream Creamy and Not Icy?
As you set out on the creamy quest, remember that a rich tapestry of flavors begins with a solid foundation – use high-fat cream, egg yolks, and stabilizers to weave a smooth, velvety texture that will leave your taste buds singing.
What Makes Homemade Ice Cream Recipes with an Ice Cream Maker the Best for Churning?
When it comes to churning out the best homemade ice cream recipe, using an ice cream maker is essential. The controlled churning process helps create a smooth and creamy texture while incorporating air to make the ice cream light and fluffy. It also allows for the addition of mix-ins for a customized treat.
Conclusion
You've now got the scoop on churning out incredible ice cream at home! With these expert tips and recipes, you're ready to join the ranks of ice cream masters.
Did you know that the average American consumes around 23 pounds of ice cream per year? That's a lot of creamy goodness! With your newfound skills, you'll be whipping up batches that'll make those numbers skyrocket.
Happy churning!
Mario’s creativity shines through his ability to describe the sensory experience of enjoying ice cream. Whether he’s discussing the velvety texture, the explosion of flavors, or the delightful combinations of toppings and sauces, his words transport readers to a world of mouthwatering sensations. His descriptive language allows readers to imagine and savor the flavors even before taking the first bite.
Ice Cream Recipes
No Ice Cream? No Problem! Best Banana Milkshake Recipe Without Ice Cream!
You're just one blend away from a creamy, indulgent milkshake that will make you forget all about ice cream.
You are just one ripe banana away from making the creamiest, most indulgent milkshake of your dreams, without using ice cream! Simply blend your overripe banana with your preferred milk, and you will have a naturally sweet and creamy base. Try experimenting with different types of milk, such as whole, soy, or nut-based, to change the texture and flavor. You can also add frozen fruits, avocado, or Greek yogurt for extra creaminess. With a powerful blender, you will achieve a rich and velvety texture. Now, let your creativity run wild and enhance your banana milkshake to a whole new level – a world of flavors and textures is waiting for you to discover.
Key Takeaways
- Overripe bananas provide a naturally sweet and creamy base, eliminating the need for ice cream in a banana milkshake recipe.
- Experiment with different milk options, such as whole, soy, or nut-based milk, to achieve varied textures and flavors.
- Freeze ripe bananas before blending to create a creamier texture and intensify the banana flavor.
- Use a powerful blender to break down the bananas and milk, resulting in a rich and velvety texture.
- Customize the milkshake to your taste by adding ingredients like peanut butter, cocoa powder, or cinnamon to create unique flavor combinations.
Ingredient Essentials
Choose overripe bananas, preferably frozen, as the foundation of your banana milkshake, as they provide a naturally sweet and creamy base without the need for ice cream. You'll be surprised at how well they blend into a smooth and delicious treat.
When it comes to milk, you have the freedom to choose any type that suits your taste preferences, including non-dairy options. This means you can opt for almond milk, soy milk, or even coconut milk to add a unique twist to your banana milkshake.
Remember, the key is to blend the bananas with milk to create a creamy and flavorful drink. You're not limited to traditional dairy milk, so feel free to experiment with different options.
Without ice cream, your banana milkshake relies on the natural sweetness of the bananas and the creaminess of the milk. By combining these two essential ingredients, you'll be well on your way to creating a delicious banana milkshake that's perfect for hot summer days.
No-Ice Cream Mastery
Now that you've got your ingredients ready, it's time to master the techniques that'll take your banana milkshake to the next level.
You'll need to brush up on your blender skills, learn some expert tips for achieving the perfect consistency, and discover clever hacks for replicating the creaminess of ice cream.
Blender Essentials
You'll need a powerful mixer that can handle tough ingredients like frozen bananas to create a creamy and smooth banana milkshake without ice cream. This essential tool helps combine all the ingredients effectively, guaranteeing a thick and frosty consistency. The mixer's power plays an essential role in breaking down the frozen bananas, allowing you to achieve a milkshake-like texture. With the right mixer, you can easily master the art of making delicious milkshakes without the need for ice cream.
When choosing a mixer, look for one that can handle frozen ingredients with ease. A high-powered motor will ensure that your frozen bananas are blended to a creamy perfection, giving your milkshake a smooth and velvety texture. The result is a rich and indulgent treat that's surprisingly free of ice cream.
Milkshake Mastery Tips
With your powerful mixer at the ready, it's time to master the art of creating a banana milkshake without ice cream by fine-tuning your technique with a few expert tips.
To take your milkshake game to the next level, remember these essential tips:
- Ripe bananas are key: Use ripe bananas for natural sweetness and creaminess in your milkshake.
- Experiment with milk options: Try different milk options like full-fat cow's milk or soy milk for varying textures and flavors.
- Boost banana flavor: Add dried bananas or banana powder for enhanced taste and texture in your milkshake.
No-Ice Cream Hacks
To master the art of creating a banana milkshake without ice cream, harness the power of overripe frozen bananas, which magically transform into a creamy texture when blended with your preferred milk and sweetener. You'll be amazed at how these frozen bananas mimic the consistency of traditional ice cream.
To take your no-ice cream milkshake to the next level, experiment with different milks and sweeteners to find your perfect combination. Want a classic Vanilla Milkshake? Try pairing frozen bananas with almond milk and a drizzle of honey.
But don't stop there! You can also add other frozen fruits or even avocado to give your milkshake a unique twist and extra creaminess. If you're looking for a tangy kick, incorporate some Greek yogurt into your blend.
The possibilities are endless, and the best part is that you're in control. With these no-ice cream hacks, you can create a customized milkshake that's tailored to your taste buds.
Milkshake Magic Variations
Now that you've mastered the no-ice cream banana milkshake, it's time to get creative and make it your own!
You can transform your milkshake with a few simple tweaks, like adding peanut butter for a nutty flavor or cocoa powder for a chocolatey twist.
With these mix-and-match ideas, you'll be able to craft unique flavor combinations that will take your milkshake game to the next level.
Milkshake Makeovers
Take your banana milkshake to the next level by experimenting with creative twists and flavor combinations that will make your taste buds dance.
You can transform your basic milkshake into a decadent treat by adding peanut butter for a creamy banana smoothie or cocoa powder for a rich chocolate milkshake.
Here are some milkshake makeover ideas to get you started:
- Peanut Butter Banana Delight: Add a spoonful of peanut butter for a creamy and nutty twist.
- Plant-Based Chocolate Indulgence: Mix in some cocoa powder and a splash of plant-based milk for a guilt-free treat.
- Banana Oat Heaven: Blend in some rolled oats and a pinch of cinnamon for a nutritious and filling banana smoothie.
Flavorful Fusion Ideas
You can conjure up magical flavor combinations by fusing bananas with an array of ingredients to create unique milkshake variations. Try adding a spoonful of peanut butter to your banana milkshake for a creamy and nutty twist. The richness of peanut butter pairs perfectly with the sweetness of bananas, creating a match made in heaven.
If you're a chocolate lover, incorporate cocoa powder or fudge sauce into your milkshake for a rich, decadent flavor. You can also experiment with different nut butters or spreads to enhance the taste and texture of your milkshake. For instance, almond butter adds a subtle nutty flavor, while cashew butter provides a creamy richness.
Don't be afraid to get creative and customize your milkshake with additional mix-ins such as vanilla extract or cinnamon for added depth of flavor. With these flavorful fusion ideas, the possibilities are endless, and you'll never get bored with the same old banana milkshake again!
Creative Twist Options
Mix and match different ingredients to conjure up unique milkshake magic variations that will tantalize your taste buds. You're not limited to a classic banana milkshake – get creative and experiment with various twists to elevate your drink.
Here are some ideas to get you started:
- Peanut Butter Banana: Blend in a spoonful of creamy peanut butter for a rich and nutty flavor.
- Chocolate Banana: Add 2-3 tablespoons of cocoa powder to give your milkshake a decadent chocolatey twist. You can also drizzle with fudge sauce for an extra treat.
- Tropical Banana: Swap out the frozen banana for frozen pineapple or mango to create an invigorating summer treat.
More Banana Delights
Beyond the creamy goodness of banana milkshakes, bananas can be used to whip up a multitude of sweet treats and snacks. You can explore a variety of banana-based recipes like small-batch banana muffins and vegan banana oatmeal cookies.
Experiment with different ways to use bananas in dishes, such as in mini banana pancakes or easy air-fried banana recipes. You'll enjoy the simplicity and versatility of bananas in cooking and baking, from favorite banana bread recipes to banana pancakes.
When you're craving something cold and creamy, you can always fall back on your trusty banana milkshake recipe without ice cream. Blend frozen fruit with almond milk and a ripe banana for a quick and invigorating treat. But don't stop there! Bananas can be used in countless ways to create delicious and nutritious dishes.
Discover diverse recipes incorporating bananas, such as vegan banana oatmeal cookies and small-batch chocolate banana muffins. With a little creativity, you'll be whipping up banana delights in no time!
Benefits of Banana Goodness
As you explore the world of banana delights, it's worth highlighting the impressive benefits that come with indulging in banana goodness. You'll be thrilled to know that ripe bananas are packed with nutrients like potassium, magnesium, and calcium, which promote heart and bone health.
When you use frozen bananas in your banana milkshake recipe, you'll not only preserve their creamy texture but also reap the benefits of their nutritional goodness.
Here are just a few benefits you can expect from incorporating banana goodness into your diet:
- Heart and bone health: Ripe bananas are rich in potassium, magnesium, and calcium, making them an excellent choice for supporting heart and bone health.
- Natural sweetness: Bananas are naturally sweet, making them a great alternative to added sugars in your banana milkshake recipe.
- Versatility: Bananas can be used in a variety of dishes, from smoothies to baked goods, providing essential nutrients for overall well-being.
Banana Facts Uncovered
You're about to uncover some fascinating banana facts that'll take your milkshake game to the next level!
When it comes to making a delicious banana milkshake, ripe bananas are the way to go. They contain more sugar, making them perfect for a sweeter and creamier treat. And, if you're not ready to use them right away, freezing ripe bananas preserves them for later use in your milkshakes. Just be sure to avoid using salted dried bananas, as they can negatively impact the flavor.
But, did you know that bananas are also a good source of essential nutrients like potassium and magnesium? This makes your banana milkshake not only tasty but also nutritious! Additionally, dried banana powder can even enhance the flavor and texture of your milkshake.
Milk Choices Explained
When crafting the perfect banana milkshake, selecting the right milk is just as crucial as choosing ripe bananas. You want a milk that complements the natural sweetness of the bananas and adds a creamy texture to your shake.
Here are three essential milk choices to contemplate:
- Whole milk: Rich in calcium, potassium, and magnesium, whole milk is an excellent choice for a banana milkshake. It provides a creamy texture and a subtle sweetness that enhances the flavor of the bananas.
- Soy milk: If you or your child is lactose intolerant, soy milk is a great alternative. It's a suitable substitute that still packs a nutritional punch.
- Nut-based milk: If you're looking for a lower-calorie option, contemplate a nut-based milk with added Vitamin D. This choice is perfect for adults who want a lighter banana milkshake.
Thickshake of Epic Glory
How do you create a thickshake that's truly epic in flavor and texture? By combining the perfect blend of ingredients, of course!
For a banana milkshake that's out of this world, you'll need frozen bananas, dehydrated bananas, cinnamon, vanilla extract, and gluten-free oats. The addition of gluten-free oats adds a hearty texture and nutritional benefits to the thickshake, making it a guilt-free indulgence.
Freezing fresh bananas and dehydrating bananas intensifies their flavors and enhances the creaminess of the thickshake. When you blend these ingredients together, you'll get a smooth and satisfying thickshake with a hint of cinnamon and vanilla.
For an even creamier consistency, blend the ingredients longer and use plenty of ice to mimic the texture of traditional ice cream-based milkshakes. The result is a thickshake that's truly epic in flavor and texture, with a velvety smooth consistency that'll leave you wanting more.
Chef's Expert Tips
To take your banana milkshake to the next level, incorporate these expert tips into your blending process. You'll be amazed at how these simple tweaks can elevate the flavor and texture of your milkshake without ice cream.
Here are three essential tips to get you started:
- Use plenty of ice: This will help compensate for the creamy texture usually provided by ice cream, making your milkshake thick and invigorating.
- Freeze your bananas: Freezing fresh bananas prior to blending will result in a creamier milkshake consistency. It's a game-changer!
- Blend for longer: Blend your ingredients for a longer duration to achieve a smooth and well-mixed banana milkshake without ice cream. This will guarantee that all the flavors come together beautifully.
Banana Milkshake Variations
You can transform your banana milkshake into a unique treat by experimenting with various flavors and toppings. Try adding peanut butter for a creamy and nutty twist, or blend in some cocoa powder for a chocolatey spin. If you're feeling adventurous, mix in some other fruits like berries or mango to create a fruity fusion. You can also experiment with different nut butters, spreads, or mix-ins like vanilla extract or cinnamon to enhance your milkshake.
Take your banana milkshake to the next level by adding some exciting toppings. Whip up some whipped cream and top it with a sprinkle of cinnamon or a pinch of sea salt. Alternatively, sprinkle some dried banana powder on top for an extra layer of flavor. If you're feeling fancy, decorate your glass with melted chocolate, berries, or a rim of chocolate sprinkles.
Frequently Asked Questions
What Can You Use Instead of Ice Cream in a Milkshake?
You can substitute ice cream with frozen bananas for a creamy texture, or try Greek yogurt, avocado, or frozen fruit like berries to add thickness and flavor to your milkshake.
How Do You Thicken Milk for a Milkshake Without Ice Cream?
You cleverly craft a creamy concoction by curbing the liquid content, then cleverly combine thickening agents like frozen bananas, Greek yogurt, or oats to achieve a rich, velvety milkshake without ice cream.
Is Ice Cream Necessary for Milkshakes?
You're wondering if ice cream is necessary for milkshakes, and the answer is no, it's not! You can achieve a creamy texture with frozen bananas, and they add natural sweetness too.
Is Banana Milkshake Healthy?
You're wondering if banana milkshakes are healthy, and the answer is yes! Rich in potassium, fiber, and vitamins, bananas provide natural sugars for energy, making them a nutritious and satisfying treat when blended with milk.
Can I Make a Banana Milkshake Without Ice Cream Using the Banana Ice Cream Recipe?
Yes, you can make a delicious banana milkshake without ice cream using the best banana ice cream recipe. Simply blend ripe bananas with milk and a touch of vanilla extract for a creamy and refreshing treat. Enjoy the natural sweetness of the bananas in this healthier alternative to traditional milkshakes.
Conclusion
You've made it to the end, congratulations! You're now a certified banana milkshake master, no ice cream required!
Go forth and shake (not stir) your way to a world where bananas are the ultimate heroes. Don't @ us when your friends beg for your recipe. You're welcome.
Now, go bananas (literally) and experiment with those variations. And remember, in a world without ice cream, there's still banana milkshake hope.
Mario’s creativity shines through his ability to describe the sensory experience of enjoying ice cream. Whether he’s discussing the velvety texture, the explosion of flavors, or the delightful combinations of toppings and sauces, his words transport readers to a world of mouthwatering sensations. His descriptive language allows readers to imagine and savor the flavors even before taking the first bite.
Ice Cream Recipes
Banana Heaven: Best Banana Ice Cream Recipe You'll Love!
Transform your frozen bananas into a creamy, dreamy, and indulgent treat that will change the way you think about ice cream forever!
You are on the verge of unlocking the secret to the richest, most indulgent banana ice cream you will ever taste! Ripened bananas are the secret ingredient, providing a burst of flavor and natural sweetness. By freezing and blending them with vanilla extract, coconut milk, and a hint of honey, you can enjoy a guilt-free, dairy-free treat. For a smooth texture, be sure to chill the mixture before churning, and feel free to add in mix-ins like chocolate chips or nuts to elevate the experience. Get ready to indulge in your own banana paradise – there is so much more to discover in this recipe!
Key Takeaways
- Use ripe bananas as the base flavor and freeze them before blending for a rich banana flavor and creamy texture.
- Add a dairy-free milk option like coconut milk or almond milk to enhance the flavor and texture.
- Intensify the flavor with vanilla extract and add honey for sweetness, if desired.
- Churn the mixture to incorporate air and prevent ice crystal formation, then freeze to set the texture.
- Customize with add-ins like chocolate chips, nuts, or caramel swirls, and top with whipped cream, sprinkles, or fresh fruit for a unique treat.
Rich Banana Flavor Explained
When you use ripe bananas as the primary ingredient, you reveal a rich and intense banana flavor that's unparalleled in traditional ice cream recipes. The natural sweetness of the bananas eliminates the need for added sugars, making this ice cream a healthier alternative.
As you blend the bananas until smooth, you'll notice the creamy texture that's surprisingly similar to traditional dairy-based ice cream.
To take your banana ice cream to the next level, consider freezing it on a sheet with parchment paper before scooping. This will help the ice cream hold its shape and prevent it from becoming too soft.
With a rich banana flavor as your base, the possibilities for customization are endless. You can add in chocolate chips, nuts, or swirls of caramel to create a unique flavor profile that's all your own.
Whatever you choose, you can't go wrong with the simplicity and indulgence of banana ice cream. So go ahead, get creative, and enjoy every bite of your delicious banana ice cream!
Essential Ingredients for Success
To ensure your banana ice cream turns out creamy and delicious, you'll need a few essential ingredients that will enhance the natural sweetness of your ripe bananas.
First and foremost, you'll need those ripe bananas themselves, which provide the base flavor and sweetness for your ice cream. Freezing them before blending is pivotal, as it helps create a smooth, creamy texture similar to traditional ice cream.
Next, add a splash of vanilla extract to intensify the banana flavor and add a hint of sweetness. This will elevate your banana ice cream to the next level!
If you're looking for a dairy-free option, consider using coconut milk or almond milk instead of traditional dairy products. These alternatives will still provide a rich, creamy texture without the dairy.
Preparing the Banana Base
Frozen banana chunks are the foundation of your creamy banana ice cream, and it's pivotal to prepare them correctly to achieve the perfect base. You'll be thrilled with the result if you follow these simple steps.
Here's how to prepare the banana base:
- Peel and chunk: Peel ripe bananas and cut them into small pieces.
- Freeze: Place the banana chunks in a single layer on a baking sheet lined with parchment paper and freeze until solid, usually for about 2-3 hours.
- Blend: Once the banana pieces are frozen, transfer them to a food processor or blender and blend until smooth and creamy, resembling a soft-serve ice cream consistency.
Now that you've got your banana base ready, you can enhance the flavor by adding vanilla extract or honey to taste. If you prefer a firmer texture, simply transfer the blended mixture to a container and freeze for an additional 1-2 hours before serving.
You're one step closer to enjoying your delicious banana ice cream!
Churning the Ice Cream Mix
Now that you've prepared the banana base, it's time to churn the ice cream mix.
As you churn, you'll notice the mix thickening and transforming into a creamy, smooth texture.
You'll want to pay close attention to the churning time, as it can make all the difference in achieving the perfect scoop.
Mix Thickening Process
Frequently, you'll find that mixing the ice cream blend is an important step in creating a smooth and creamy banana ice cream. This process involves freezing the blend while stirring to incorporate air and prevent large ice crystals from forming. By doing so, you'll achieve a smooth and creamy texture in your ice cream.
Here are three key benefits of mixing your ice cream blend:
- Even distribution of mix-ins: Mixing ensures that any added mix-ins, like chunks of banana or nuts, are evenly distributed throughout the ice cream.
- Prevents ice crystal formation: Mixing prevents large ice crystals from forming, which would otherwise give your ice cream a grainy texture.
- Creates a smooth texture: Mixing incorporates air into the blend, resulting in a smooth and creamy banana ice cream that's perfect for hot summer days.
Ice Cream Texture
As you stir the ice cream mix, you'll be integrating air into the mixture, creating a smooth and creamy texture that's free from ice crystals. This process helps prevent ice crystals from forming, resulting in a velvety consistency that's a hallmark of perfect banana ice cream.
By continuously moving the mixture during churning, you guarantee even freezing and distribution of flavors, which means every bite will be a delight.
Chilling the ice cream base before churning also plays an essential role in achieving the perfect texture. It helps the mixture freeze faster and reduces the formation of large ice crystals, making your banana ice cream even smoother.
The longer you churn the ice cream, the smoother and creamier the final texture will be. So, be patient and take your time – it's worth the wait!
With these tips, you'll be on your way to creating banana ice cream that's so divine, you'll want to scream with joy.
Churning Time Matters
You'll find that churning time is a critical component of achieving the perfect banana ice cream, as it directly impacts the final texture and consistency of your frozen treat. If you churn for too short a time, your ice cream will be soft and creamy, but if you overdo it, you'll end up with a grainy or icy texture. So, how do you get it just right?
Here are some key things to keep in mind when churning your banana ice cream:
- Start checking early: Begin checking the ice cream for doneness around the 15-minute mark to avoid over-churning.
- Aim for the sweet spot: The ideal churning time for banana ice cream is typically around 20-30 minutes, but this can vary depending on your machine and recipe.
- Monitor the texture: Stop churning when your ice cream is smooth, creamy, and free from large ice crystals.
Freeze and Blend to Perfection
You're now just a few steps away from enjoying your banana ice cream!
First, you'll need to freeze your bananas to perfection – the riper, the better.
Then, it's time to blend them to smoothness, creating a creamy consistency that's hard to resist.
Freeze to Perfection
Peel and slice ripe bananas, then lay them flat on a baking sheet lined with parchment paper and freeze for at least 2 hours to transform them into a perfect base for your dairy-free ice cream. This step is essential in intensifying the bananas' natural sweetness and creating a creamy texture when blended.
As you wait for the bananas to freeze, you can start thinking about the mix-ins you'll add to customize your banana ice cream flavor. Here are a few ideas to get you started:
- Chocolate chips: Add a handful of dark or milk chocolate chips for a classic ice cream flavor.
- Nuts: Chopped walnuts or pecans add a nice crunch and flavor contrast to your banana ice cream.
- Caramel sauce: Drizzle in some store-bought or homemade caramel sauce for a sweet and salty flavor combination.
Blend to Smoothness
Now that your bananas are frozen to perfection, how do you transform them into a creamy, dreamy ice cream? It's time to blend them into a smooth and velvety consistency. Grab your food processor or blender and add the frozen bananas. Blend them until they reach a soft-serve ice cream consistency. You'll be amazed at how easily they break down into a creamy treat.
As you blend, you can add other ingredients to enhance the flavor of your banana ice cream. A pinch of vanilla extract or a sprinkle of cocoa powder can give it a unique twist. If you're feeling extra adventurous, throw in some chopped nuts for added crunch. Blend until everything is fully incorporated and you're left with a delicious, creamy banana ice cream.
If you prefer a firmer texture, transfer the blended mixture into a container and freeze it for a few hours before serving. Either way, you'll be indulging in a guilt-free, dairy-free ice cream that's perfect for hot summer days or any time you need a sweet treat.
Customizing Your Banana Heaven
With your banana ice cream base ready, it's time to spark your creativity and transform it into a personalized treat that suits your taste buds. You're just a few mix-ins away from creating a unique flavor profile that's all yours.
Here are some ideas to get you started:
- Add-ins: Introduce new textures and flavors to your banana ice cream by mixing in chocolate chips, nuts, or caramel swirls.
- Toppings: Take your banana ice cream to the next level with whipped cream, sprinkles, or fresh fruit toppings that add a pop of color and flavor.
- Flavor Variations: Experiment with different flavor combinations by incorporating peanut butter, cocoa powder, or cinnamon into your banana ice cream base.
Feel free to adjust the sweetness of your banana ice cream by using ripe or overripe bananas, or adding a touch of honey or maple syrup.
If you're catering to dairy-free diets, substitute regular milk with almond milk, coconut milk, or any other non-dairy milk alternative.
The possibilities are endless, so go ahead and get creative with your banana ice cream!
Tips for Achieving Smooth Texture
To make sure your banana ice cream has a silky smooth texture, you'll want to pay attention to a few key factors during the preparation process.
First, use ripe bananas that are soft and sweet, as they'll blend more easily and give your ice cream a creamy consistency. Freezing the bananas before blending them can also help achieve a smooth texture. Additionally, adding a splash of milk or cream while blending can help break down any remaining chunks and create a velvety texture.
If you want an even richer and creamier texture, consider adding ingredients like Greek yogurt or coconut milk to the banana mixture. These won't only add flavor but also help to create a luxurious, smooth consistency.
Enjoy Your Banana Ice Cream
You're finally ready to indulge in your freshly made banana ice cream, and the best part is that you can customize it to your heart's content! This guilt-free treat is all yours, and you can enjoy it any time of the year. Since banana ice cream is dairy-free and naturally sweetened by the bananas, you don't have to worry about the calories.
Now, it's time to get creative with your toppings! Here are some ideas to get you started:
- Nutty Delight: Sprinkle some chopped nuts like walnuts or almonds on top of your banana ice cream for a crunchy texture and nutty flavor.
- Chocolatey Heaven: Add some chocolate chips or shavings to give your banana ice cream a rich and decadent twist.
- Sweet and Simple: Drizzle some honey on top of your banana ice cream for a touch of sweetness and a hint of floral flavor.
Frequently Asked Questions
Why Is My Banana Ice Cream Bitter?
You're wondering why your banana ice cream tastes bitter? It's likely because you used overripe or brown-spotted bananas or froze them for too long, but don't worry, adding a sweetener or flavorings can help balance out the flavor!
Is Ice Cream Made From Bananas Healthy?
You think banana ice cream is a guilty pleasure, but ironically, it's a nutritious treat! Made from frozen bananas, it's dairy-free, naturally sweetened, and packed with potassium, fiber, and vitamins – so go ahead, indulge in this healthy delight!
What Is Banana Ice Cream Made Of?
You're wondering what banana ice cream is made of? Fundamentally, it's frozen bananas blended until creamy, with optional add-ins like vanilla, nut butter, or coconut milk for extra flavor and texture.
Is Homemade Ice Cream Healthier?
You wonder if homemade ice cream is really healthier… The truth is, yes, it can be! By controlling the ingredients, you can reduce sugar, use natural sweeteners, and customize to suit your dietary needs, making it a guilt-free indulgence.
Can I Make Banana Ice Cream Keto-Friendly?
Yes, you can make banana ice cream keto-friendly by using low-carb sweeteners and full-fat dairy or coconut milk. The best keto ice cream recipe often involves swapping out traditional ingredients for more low-carb alternatives, allowing you to indulge in a delicious frozen treat while staying in ketosis.
Conclusion
As you take your first bite, the creamy texture melts in your mouth, releasing a symphony of ripe banana flavors that transport you to a tropical paradise.
Your taste buds do the happy dance, singing praises to the sweet and velvety smoothness that's now your new obsession.
You've discovered the secret to banana heaven, and there's no turning back – every spoonful is a sinful delight that'll leave you craving more, more, MORE!
Mario’s creativity shines through his ability to describe the sensory experience of enjoying ice cream. Whether he’s discussing the velvety texture, the explosion of flavors, or the delightful combinations of toppings and sauces, his words transport readers to a world of mouthwatering sensations. His descriptive language allows readers to imagine and savor the flavors even before taking the first bite.
Ice Cream Recipes
Churn Up a Storm: Best Ice Cream Recipes for Your Ice Cream Maker!
Satisfy your sweet tooth with unique and delicious flavors, from Summer Peach to Mint to Be Chip, using your electric ice cream maker!
Get ready to whip up a storm with your ice cream maker! First, ensure you have the necessary equipment, such as an electric ice cream maker and rock salt, to ensure a smooth and creamy texture. Set up your outdoor stirring station with a stable surface, power source, and organized ingredients. Then, mix your chilled ingredients and stir according to the machine’s instructions. With a two-quart ice cream maker, you can experiment with unique flavors like Summer Peach Ice Cream, Mint to Be Chip, and more. Now, let your creativity flow and uncover the secrets to crafting the perfect scoop!
Key Takeaways
- Invest in an Electric Ice Cream Maker and essential tools like rock salt and ice for a smooth ice cream making experience.
- Set up a churning station with a frozen canister, organized ingredients, and a power source for efficient churning.
- Combine chilled ingredients in the canister and churn following the machine's instructions for a creamy texture and consistent flavor.
- Experiment with unique flavor creations like Summer Peach Ice Cream, Mint to Be Chip, and Triple Chocolate Chip using a two-quart ice cream maker.
- Follow precise recipe measurements and add mix-ins like chocolate chips or nuts for extra flavor and texture in your homemade ice cream.
Ice Cream LOVE Story
Growing up, you were surrounded by the sweet, creamy essence of ice cream, a family tradition that was lovingly passed down from both parents. Special occasions were made even sweeter with the use of an old-fashioned churner to create homemade ice cream recipes, adding a nostalgic touch to family gatherings. The churning sound and anticipation of that first creamy bite are memories you'll always treasure.
As you grew older, the family upgraded to a 4-Quart Electric Ice Cream Maker, making it easier to create a variety of delicious flavors. This new addition didn't replace the old-fashioned charm, but rather complemented it. You can still experiment with new recipes while holding onto the traditional methods that brought so much joy.
Now, you can share this love for ice cream with your own family and friends. With recipes that cater to different ice cream maker sizes, you can pass down this beloved tradition to the next generation. Whether you're a fan of classic flavors or innovative twists, your electric ice cream maker is ready to churn out memories that'll last a lifetime.
Essential Items for Success
To ensure a successful ice cream making experience, you'll need to gather a few key items, including an Electric Ice Cream Maker, rock salt, and ice (or snow) for the freezing process. These must-haves will help you churn out delicious ice cream recipes with ease.
The Electric Ice Cream Maker is the star of the show, doing the hard work of mixing and freezing your ingredients to the perfect consistency. Rock salt is essential for creating the right temperature environment, allowing your mixture to freeze smoothly and evenly. And, of course, you'll need plenty of ice (or snow) on hand to keep things cool.
With these key elements in place, you'll be free to focus on the enjoyable part – experimenting with different ingredients and flavors to create unique ice cream recipes that showcase your creativity. By having the right tools and ingredients, you'll be well on your way to churning out scoop after scoop of creamy, dreamy goodness.
Two-Quart Ice Cream Recipes
With your two-quart ice cream maker ready to go, you can immerse yourself in a world of flavors, from classic Vanilla Bean and Butter Pecan to unique twists like Peppermint Stick and Pumpkin. Whether you're in the mood for something fruity or chocolatey, there's a recipe out there for you.
Here are some ideas to get you started:
- Summer Peach Ice Cream: Combine sliced peaches with a hint of cinnamon and a touch of cream for a sweet and invigorating treat.
- Mint to Be Chip: Cut fresh mint leaves and mix them with chocolate chips for a cool and creamy dessert.
- Butter Pecan Delight: Add a crunch to your ice cream with chopped pecans and a drizzle of caramel sauce.
- Triple Chocolate Chip: Indulge in a rich and decadent treat with three types of chocolate chips – dark, milk, and white.
With these recipes and your two-quart ice cream maker, the possibilities are endless. So go ahead, churn up a storm, and enjoy the fruits of your labor!
Churning Station Setup Guide
Now that you're ready to start churning, it's crucial to set up your churning station correctly.
You'll need to prepare your ice cream maker's canister by freezing it beforehand, and then set up an outdoor churning area with the necessary requirements.
Freezing the Canister
You'll want to get a head start on the ice cream-making process by freezing the canister for at least 24 hours before churning, an important step in setting up your churning station. This will guarantee that your electric ice cream maker has a cold canister to work with, which is vital for making delicious homemade ice cream.
Here are some key reasons why freezing the canister is significant:
- Even freezing: A frozen canister helps freeze the ice cream mixture evenly, resulting in a smooth and creamy texture.
- Cold temperature: Placing the frozen canister into the ice cream maker helps maintain a cold temperature for churning the ingredients effectively.
- Ideal churning environment: Creating an ideal churning environment with the frozen canister is important for successfully making delicious homemade ice cream.
- Proper churning: A frozen canister allows the ice cream maker to churn the mixture properly, guaranteeing that your homemade ice cream turns out light, fluffy, and full of flavor.
Outdoor Churning Essentials
Set up your outdoor churning station by designating a stable surface for your ice cream maker, making sure a nearby power source, and organizing ingredients and utensils within easy reach. This will help prevent messes inside the house and provide better ventilation for a more enjoyable experience.
Here's a checklist to get you started:
Category | Item | Tips |
---|---|---|
Surface | Table or counter | Choose a stable and level surface |
Power | Extension cord | Ensure a nearby power source |
Ingredients | Mix-ins and flavorings | Keep them organized and within reach |
Utensils | Spatula and spoon | Have them ready for scraping and serving |
Miscellaneous | Trash can and paper towels | Prepare for any messes or spills |
Mixing and Churning Process
Now that you've set up your churning station, it's time to focus on the mixing and churning process.
You'll want to make certain you're blending your ingredients properly and have the right essentials at your churning station to guarantee a smooth process.
Next, you'll need to freeze the mix and let the churning magic begin!
Ice Cream Blending Tips
Mix your ice cream ingredients thoroughly before pouring them into the canister to ensure a smooth and creamy texture. This guarantees that all the flavors and ingredients are well combined, resulting in a delicious and consistent taste throughout your ice cream.
When churning your mixture, make sure to follow the manufacturer's instructions and guidelines to achieve the perfect consistency.
Here are some additional tips to keep in mind:
- Churn properly: Churning the mixture properly in the ice cream maker helps integrate air and prevent ice crystals from forming, resulting in a creamy texture.
- Don't overfill: Avoid filling the canister excessively to allow room for expansion as the mixture churns and freezes.
- Check consistency: Regularly check the texture of the ice cream during churning to achieve the desired thickness and creaminess.
- Be patient: The churning process typically takes 30 minutes to one hour, depending on the recipe and ice cream maker model, so be patient and let the machine do its job.
Churning Station Essentials
To ensure a smooth and successful ice cream making process, you'll need to gather the right equipment and prepare a suitable space for churning, which we'll explore in more detail below.
Your churning station essentials should include an Electric Ice Cream Maker, rock salt, and ice or snow for the freezing process. It's recommended to set up your churning station outdoors to guarantee proper ventilation and space for the ice cream maker.
Once you've got your equipment in place, it's time to start the mixing and churning process. Begin by freezing the ice cream canister, then mix your ingredients – whether you're making a classic strawberry ice cream recipe or something more unique.
Pour the mixture into the canister and churn for approximately 30 minutes to one hour. The combination of ice and rock salt in the ice cream maker creates the best environment for freezing and churning the ingredients effectively.
Remember to maintain a consistent churning speed throughout the process to achieve the desired creamy texture in your homemade ice cream.
Freezing the Mix
With your churning station set up and equipment ready, you're about to begin on the most exciting part of the ice cream making process: freezing the mix. This is where the magic happens, and your ingredients transform into a creamy, dreamy treat.
To freeze the ice cream, you'll be using your electric ice cream maker. Churning the ice cream in this machine helps incorporate air and prevents ice crystals from forming, resulting in a smooth, even texture.
Here's what you can expect during the churning process:
- Combine your chilled ingredients in the canister and churn following the machine's instructions.
- The churning time will vary from 30 minutes to one hour, depending on the recipe and machine size.
- As the mixture churns, it will gradually freeze and thicken into a creamy texture.
- Proper churning guarantees a smooth consistency and even distribution of flavors in your homemade ice cream.
Remember to stay patient and let the machine do its job. Before you know it, you'll be scooping out a delicious batch of freshly churned ice cream!
Four-Quart Ice Cream Creations
You'll love whipping up a batch of four-quart ice cream recipes, perfect for satisfying the sweet tooth of a crowd or stocking your freezer with a favorite flavor.
These recipes cater to larger gatherings or big families, offering a rich and creamy texture that's hard to resist. Popular choices include Peanut Butter Ice Cream and Very Berry Strawberry Ice Cream, but you can also experiment with classic flavors like vanilla ice cream or decadent Chocolate Ice Cream.
When it comes to cream ingredients, you can't go wrong with high-quality cream, sugar, and a pinch of salt. The result is a smooth and indulgent treat that's sure to please.
If you're feeling adventurous, try mixing in nuts, candy pieces, or fruit to create unique flavor combinations. With four-quart recipes, the possibilities are endless, and you can indulge in a big batch of your favorite flavor.
Tips for Perfect Homemade Ice Cream
One vital step in achieving perfect homemade ice cream is preparing your equipment beforehand, as freezing the ice cream canister before churning helps maintain the ideal temperature for the ice cream mixture. This guarantees that your ice cream maker can work its magic efficiently.
To take your homemade ice cream to the next level, follow these additional tips:
- Set up a churning station outdoors to secure proper ventilation and space for your ice cream maker.
- Follow recipe measurements precisely, as this is essential for achieving the desired consistency and flavor.
- Store freshly churned ice cream in a freezer-safe container to prevent it from melting and maintain its texture.
- Experiment with different mix-ins like chocolate chips or nuts to add extra flavor and texture to your homemade ice cream.
Frequently Asked Questions
How Long to Churn Ice Cream in an Ice Cream Maker?
When making ice cream, you'll typically need to churn it for 20-30 minutes to get that perfect creamy consistency. However, you should check the manufacturer's instructions and monitor the mixture to avoid over- or under-churning!
Is It Better to Churn Ice Cream Fast or Slow?
You're wondering if you should churn ice cream fast or slow – it depends on the texture you're after! Fast churning yields smaller crystals and a smooth texture, while slow churning incorporates more air for a lighter, fluffier treat.
How to Make the Best Quality Ice Cream?
To make the best quality ice cream, you're using high-quality ingredients, right? Fresh dairy, eggs, and real vanilla are a must for amazing flavor and texture.
How to Make Ice Cream Using an Ice Cream Machine?
You'll start by preparing your ingredients and freezing the canister, then mix and pour them in, churning for 30 minutes to an hour, and finally, transfer the creamy treat to a container and freeze to enjoy!
What are the best ice cream recipes for a homemade ice cream maker?
Looking for the best ice cream recipes with maker? Try classic flavors like vanilla or chocolate, or get creative with unique options like salted caramel or mint chocolate chip. Whichever recipe you choose, using a homemade ice cream maker will ensure a delicious and creamy treat for any occasion.
Conclusion
You've churned up a storm, and now your freezer is stocked with creamy, dreamy ice cream!
You've mastered the art of ice cream making, and your taste buds are doing the happy dance.
Just like a conductor leading an orchestra, you've harmoniously blended flavors and textures to create sweet symphonies.
Your ice cream maker has been your trusty sidekick, helping you create unforgettable treats.
Keep on churning, and remember, the possibilities are endless!
Mario’s creativity shines through his ability to describe the sensory experience of enjoying ice cream. Whether he’s discussing the velvety texture, the explosion of flavors, or the delightful combinations of toppings and sauces, his words transport readers to a world of mouthwatering sensations. His descriptive language allows readers to imagine and savor the flavors even before taking the first bite.
-
Frozen Delights13 hours ago
Beginner’s Guide to Ice Cream Making: Tips and Tricks on Page 9!
-
Frozen Delights13 hours ago
Anderson's Ice Cream: The Sweet Secret to Unforgettable Flavors!
-
Frozen Delights1 hour ago
The Difference Between Ice Cream and Popsicles: Explained!
-
Ice Cream Recipes12 hours ago
Creamy Perfection: Best Homemade Vanilla Ice Cream Recipes for Ice Cream Makers!
-
Frozen Delights3 months ago
Best Gelato in Philly – Philadelphia's Finest
-
Frozen Delights3 months ago
Best Gelato in Firenze – Florence's Sweet Spots
-
Frozen Delights13 hours ago
Sonic the Hedgehog Ice Cream: A Nostalgic Treat for Fans!
-
Frozen Delights12 hours ago
Sundae Ice Cream: Perfect Recipes for Every Occasion!