Ice Cream Recipes
How to Make Waffle Cones at Home
Bake delicious homemade waffle cones with just a few ingredients, but discover the secret techniques that will elevate your treats to the next level!
You can easily make waffle cones at home with simple ingredients. Start by beating 2 egg whites with ½ cup sugar and 1 teaspoon vanilla until frothy. Gradually mix in ⅓ cup all-purpose flour, a pinch of salt, and 2 tablespoons melted butter. Let the batter rest for about 10 minutes. Preheat your waffle cone maker and brush it with oil. Pour in 2 tablespoons of batter and cook for about 1 minute and 30 seconds. Roll the warm cone around a mold to shape it, and cool it seam side down. There's plenty more to explore as you create these treats!
Key Takeaways
- Beat together egg whites, granulated sugar, and vanilla extract, then mix in flour, salt, and melted butter to create the batter.
- Preheat waffle cone maker, brush with oil, and use about 2 tablespoons of batter per cone.
- Cook the batter for 1 minute and 30 seconds until golden brown, then roll the warm waffle around a cone mold.
- Allow shaped cones to cool seam side down for 2-3 minutes to maintain their structure and crispness.
- Store cones in an airtight container at room temperature for up to four days, or freeze for longer storage.
Ingredients for Waffle Cones
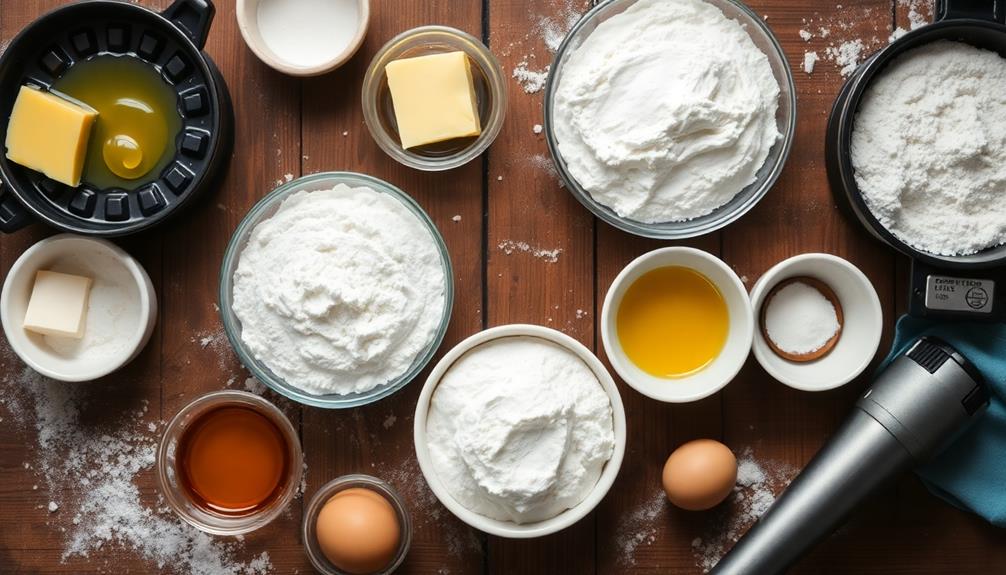
When making waffle cones, you'll want to gather a few essential ingredients to guarantee they turn out perfectly. The base of your homemade waffle cone batter includes egg whites, granulated sugar, vanilla extract, all-purpose flour, melted unsalted butter, and a pinch of salt.
These ingredients work together to create that delightful texture and flavor you expect from a great waffle cone.
To add a special twist, consider mixing in chocolate chips. They not only boost the flavor but also help seal the cone against melting ice cream, ensuring your treat holds up longer.
Remember, the quality of your ingredients directly impacts the final result—so opt for fresh, high-quality components whenever possible.
You can also experiment with various extracts or flavorings to create unique waffle cones that reflect your taste preferences or dietary needs. This flexibility allows you to customize your cones, making them even more enjoyable.
Typically, this recipe yields about eight homemade waffle cones, giving you plenty to serve alongside your favorite ice cream flavors.
Making the Batter
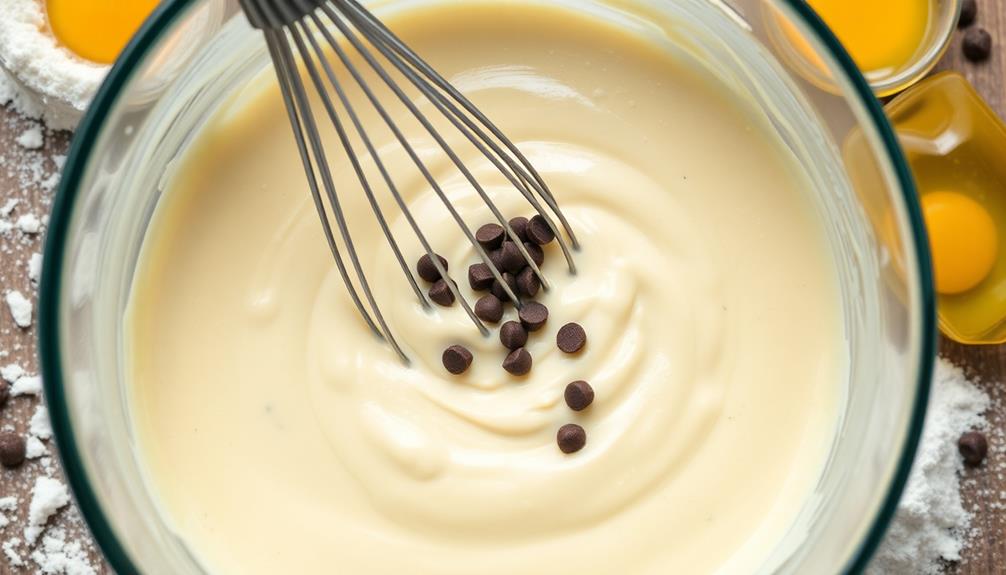
To create a smooth and delicious waffle cone batter, start by beating together 2 egg whites, 1/2 cup granulated sugar, and 1 teaspoon vanilla extract in a medium bowl until the mixture is well combined and slightly frothy. This will form the base of your batter. Gradually add in 1/3 cup all-purpose flour, mixing continuously until the batter is smooth and uniform.
Next, incorporate a pinch of salt and 2 tablespoons of melted unsalted butter into the batter. This step is essential, as the butter adds richness and helps with the texture of your cones. Make sure all ingredients are thoroughly combined for the best results.
Once your batter is ready, allow it to rest for about 10 minutes. This resting period is important because it improves the texture and consistency, making it easier to achieve perfect cone formation when you cook your batter.
If you want to get creative, consider mixing in optional ingredients like chocolate chips or ground cinnamon for an extra flavor boost. Now you're set to move on to the next step in making your waffle cones!
Cooking the Waffle Cones
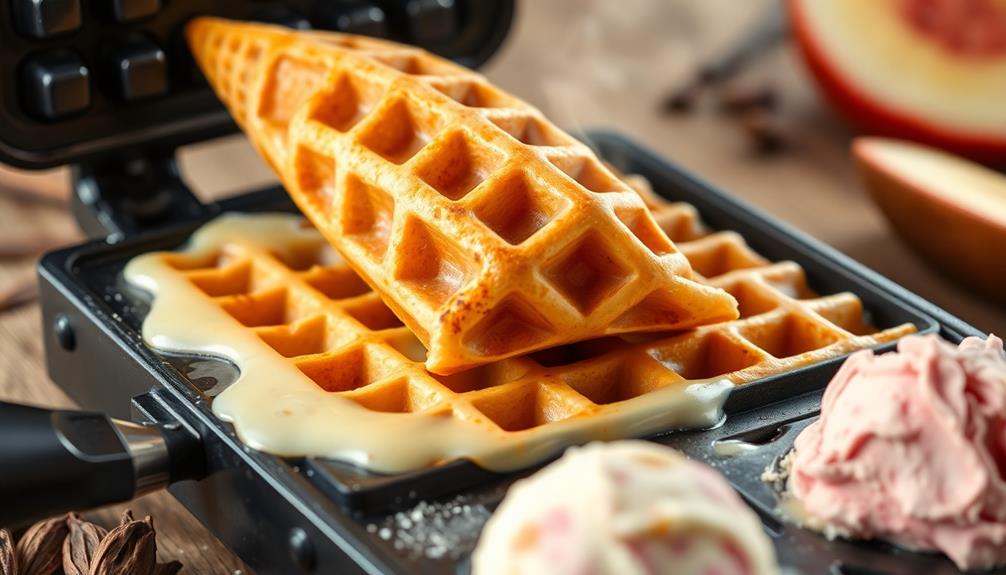
To cook your waffle cones perfectly, you'll need to master timing and temperature control.
Start by preheating your waffle cone maker and applying a bit of oil to prevent sticking.
Once you pour in the batter, shaping the cone quickly is key to achieving that ideal crispiness.
Essential Cooking Techniques
Preheating your waffle cone maker is essential for achieving that perfect crispy texture. Start by setting your maker to #4 and let it heat for 5 minutes. Once it's ready, brush both sides with vegetable oil to prevent sticking. For your homemade waffle cone recipe, use about 2 tablespoons of batter, placing it onto the center of the waffle maker.
Here's a quick overview of the essential cooking techniques:
Step | Action | Duration |
---|---|---|
Preheat the maker | Set to #4 | 5 minutes |
Add batter | Pour 2 tablespoons | – |
Cooking time | Cook until golden brown | 1 minute 30 seconds |
As soon as the waffle cone turns golden brown, remove it and immediately roll it around a cone mold while it's still warm. This shapes the cone and seals the bottom to prevent leaks. Let the cone cool completely, seam side down, for a few minutes. This technique will guarantee you get that perfect crisp texture for your delicious waffle cones!
Timing and Temperature Control
Getting the timing and temperature just right is vital for making perfect waffle cones. Start by preheating your waffle cone maker for about 5 minutes on setting #4. This guarantees an even cooking temperature before you add the batter.
Use approximately 2 to 3 tablespoons of batter per cone, placing it in the center of the machine for ideal spreading and thickness.
Now, it's time to cook the waffle. Aim for a cooking time of about 1 minute and 30 seconds to 2 minutes. Keep an eye on the color; you want a beautiful golden brown hue to indicate that the cone is fully cooked without burning.
Adjust the cooking times based on your specific waffle cone maker, as different models may have slight variations in heat and timing for perfect results.
Once cooked, allow the waffle to cool seam side down for about 2-3 minutes. This step is vital for maintaining its structural integrity, making sure your cones don't collapse before you fill them.
With careful timing and temperature control, you'll create delightful waffle cones every time!
Shaping and Cooling Methods
Once you've cooked the waffle, it's essential to shape it quickly while it's still warm, as this prevents brittleness. Remove the waffle from the maker after about 1 minute and 30 seconds, then immediately roll it around a cone mold. Pinch the tip tightly to seal it, guaranteeing that ice cream won't leak out later.
Hold the formed cone in place for 2-3 minutes to allow it to cool and retain its shape effectively. This step is significant for maintaining the structure of your waffle cones.
Once cooled, place the cones seam side down on a cooling rack. This position helps preserve their crispness and prevents any unwanted bending.
Be cautious not to stack the cones while they cool, as they can become misshapen or soggy if they come into contact with one another.
Proper shaping and cooling are key to creating perfect waffle cones that are both sturdy and delicious. With these methods, you'll guarantee that each cone is ready to hold your favorite ice cream without any fuss. Enjoy your homemade waffle cones!
Shaping the Cones
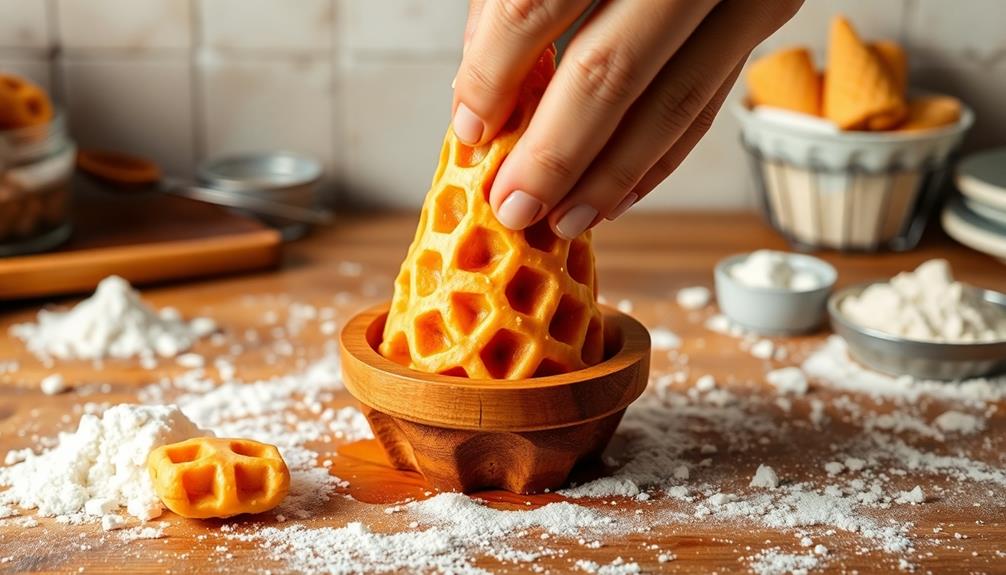
To shape your waffle cones, roll the warm waffle around a cone mold immediately after cooking. This step is vital for achieving the desired shape and stability. Confirm the seam is on the inside to maintain a secure seal, which prevents any leakage of ice cream later.
As you roll, pinch the tip of the cone to create a pointed shape that holds the filling well. After shaping, allow the cone to cool for 2-3 minutes while still on the mold. This cooling period helps the cone maintain its structure and crispness.
It's important to handle the hot waffle safely, so use a kitchen towel or gloves to minimize the risk of burns during this process. For added stability, verify the cone is tightly rolled and evenly shaped.
A well-shaped cone can support the weight of ice cream without collapsing, providing a delightful experience as you enjoy your homemade treat. By following these steps carefully, you'll create beautifully shaped waffle cones that are ready to be filled with your favorite flavors!
Storage Tips
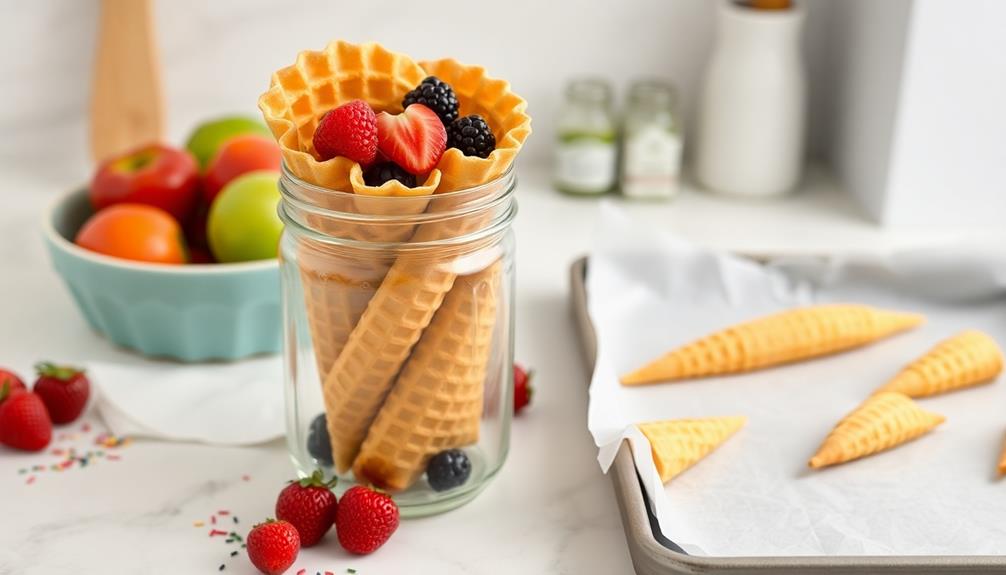
To keep your homemade waffle cones fresh and crispy, store them in an airtight container at room temperature for up to four days.
Avoid warm or humid places to prevent sogginess.
If you need to stack them, use parchment paper between layers to protect against crushing.
Optimal Storage Conditions
Keeping your homemade waffle cones fresh is all about proper storage. To maintain their crisp texture and prevent moisture absorption, store your cones in an airtight container at room temperature.
Avoid stacking the cones directly on top of each other; instead, place parchment paper between layers to prevent breakage and maintain their shape.
It's essential to keep the cones away from warm environments and humidity, as these conditions can lead to sogginess and reduce their shelf life. If you've properly cooled your cones, they can last up to a week when stored correctly.
However, for the best taste and crunchiness, you should consume them within a few days.
If you need to store them for a longer duration, consider freezing the cones. Wrap them tightly in plastic wrap or aluminum foil and place them in a freezer-safe bag.
When frozen properly, they can remain fresh for up to 2-3 months. Remember, ideal storage conditions are key to enjoying your homemade waffle cones at their best!
Preventing Softness Techniques
Proper storage is just the beginning when it comes to keeping your waffle cones crispy. To truly prevent softness, you need to follow some essential storage techniques.
Start by placing your homemade waffle cones in an airtight container at room temperature. This helps prevent moisture, which can lead to sogginess.
Here are some tips to maintain the crispness and texture of your cones:
- Avoid stacking: Don't stack cones directly on top of each other. Use parchment paper between layers to keep them from sticking together.
- Keep away from heat and humidity: Store your cones in a cool, dry place, away from heat sources and humidity that can quickly ruin their crunch.
- Re-crisp if necessary: If you notice any signs of softness, re-crisp your cones in a preheated oven at around 200°F for a few minutes before serving.
Ice Cream Pairings
When it comes to enjoying homemade waffle cones, selecting the right ice cream can elevate your treat to new heights. Best Ever Chocolate Ice Cream pairs beautifully with waffle cones, enhancing their crispy texture and rich flavor.
If you're after a revitalizing contrast, try Blueberry Ice Cream; its fruity burst complements the sweetness of the cone perfectly. It's important to remember that moderation is key when indulging in ice cream, as excessive consumption can lead to health issues like weight gain or diabetes, especially with high-sugar options like ice cream and health considerations.
For a summer twist, Peach Ice Cream adds a light and delightful flavor that harmonizes with the waffle cone's crispiness. Meanwhile, Strawberry Ice Cream enhances the cone's sweetness, creating a visually appealing and delicious combination.
You'll find that these flavors not only taste great but also make your ice cream cones look stunning.
Don't forget about classic Vanilla Bean Ice Cream, either! This timeless option allows the flavors of both the ice cream and the waffle cone to shine, making it a favorite for many.
Experiment with these pairings to discover your ultimate ice cream cone combination. With the right ice cream, your homemade waffle cones can transform into an irresistible treat that's perfect for any occasion!
Variations and Creative Ideas
Release your creativity in the kitchen by exploring exciting variations of waffle cones! Making waffle cones at home opens up a world of delicious possibilities.
For a rich chocolate twist, simply substitute some all-purpose flour with dark cocoa powder to create a delicious chocolate waffle cone. You can also enhance the flavor by adding ground cinnamon to the batter, giving it a warm, aromatic touch that pairs beautifully with any ice cream.
If you're looking for smaller portions, try making mini waffle cones using about three tablespoons of batter. They're perfect for kids or as a fun treat.
Here are some unique ideas to elevate your waffle cone experience:
- Dip the edges of your cones in melted chocolate for added flavor and a decorative touch.
- Roll your cones with filling ideas like Nutella and banana for a unique dessert experience.
- Use your cones as a base for waffle bowls topped with assorted toppings.
These variations not only make your waffle cones special but also inspire creativity with every scoop! Enjoy experimenting with these ideas for a delightful treat.
Frequently Asked Questions
How Do They Make Waffle Cones?
To make waffle cones, you mix egg whites, sugar, and flour, then cook the batter in a specialized maker. Once golden brown, you roll it into shape, allowing it to cool for structure.
What Can You Use if You Don't Have a Waffle Cone Maker?
If you don't have a waffle cone maker, don't sweat it! A stovetop waffle iron, non-stick skillet, or even a muffin tin can help you whip up some delightful cones or bowls for your treats.
How Do You Roll Homemade Waffle Cones?
To roll homemade waffle cones, carefully remove the warm waffle, then wrap it around a cone mold. Pinch the tip securely and let it cool in that shape to maintain its structure. Enjoy your creation!
Why Are My Homemade Waffle Cones Soggy?
Your homemade waffle cones might be soggy due to undercooking, high humidity, improper storage, or a too-wet batter. Guarantee you cook them until golden, store them properly, and maintain a balanced batter consistency.
Conclusion
Now that you know how to make delicious waffle cones at home, it's time to enjoy your sweet creations! Remember, "the proof of the pudding is in the eating." So, fill those cones with your favorite ice cream and savor every bite. Whether you keep it classic or get creative with flavors, you'll impress your friends and family. Happy cone-making, and don't forget to share your tasty treats! Enjoy every crunchy, creamy moment!
Beyond the realm of flavor and technique, Adriano recognizes the importance of sustainability and conscious consumption. His writing often explores eco-friendly practices within the ice cream industry, highlighting the use of locally sourced ingredients, reducing waste, and supporting ethical production methods.
Ice Cream Recipes
No Ice Cream, No Problem: Best Strawberry Milkshake Recipe Without Ice Cream!
Kick your milkshake game up a notch with this no-ice-cream strawberry shake recipe that's sure to surprise and delight!
You don’t need ice cream to make a delicious strawberry milkshake! Combine frozen strawberries, milk, sweetener, and optional ingredients like ripe banana or Greek yogurt for a smooth blend. If you want to add a twist, try using frozen bananas for a creamy texture. Enhance the flavor with Nutella or peanut butter, or use avocado for a thicker consistency. Finish it off with homemade whipped cream or a dollop of yogurt. If you’re looking for more ideas to take your milkshake to the next level, try the full recipe for a delightful surprise!
Key Takeaways
- Use frozen bananas or Greek yogurt for creaminess.
- Incorporate sweeteners like honey or maple syrup.
- Blend with frozen strawberries, milk, and vanilla essence.
- Experiment with avocado for a rich consistency.
- Explore Nutella or peanut butter for added flavor.
Ingredients
For the best strawberry milkshake without ice cream, gather frozen strawberries, heavy cream, whole milk, vanilla essence, salt, and sweetener.
This creamy and indulgent milkshake alternative offers a silky-smooth texture without the need for ice cream. Enhance the flavor by adding strawberry preserves or sauce, or get creative with sweeteners like honey or maple syrup. Experiment with different variations to find your perfect balance of sweetness.
Using frozen strawberries ensures a thick and frosty consistency without diluting the flavor. Combine them with heavy cream and whole milk for richness, while vanilla essence adds depth and a pinch of salt enhances the sweetness.
This recipe allows you to enjoy a delicious strawberry milkshake without the guilt of using ice cream. It's a revitalizing and satisfying treat that you can customize to your liking.
Instructions
To make this delicious strawberry milkshake without ice cream, start by blending frozen strawberries with milk, sugar, and vanilla extract for a creamy texture. You can also enhance the creaminess by adding a ripe banana or Greek yogurt to the mix. For a touch of sweetness, consider incorporating maple syrup as a sweetener. Here's a simple table to guide you through the process:
Step | Instructions |
---|---|
1 | Combine frozen strawberries, milk of your choice, sugar, and vanilla extract in a blender. |
2 | Add a ripe banana or Greek yogurt for extra creaminess. |
3 | Drizzle in some maple syrup for sweetness. |
4 | Blend until smooth and creamy. |
5 | Pour into a glass, garnish as desired, and enjoy your homemade strawberry milkshake! |
Variations
Consider experimenting with different ingredients to create unique flavors in your non-ice cream strawberry milkshake recipes. Substitute ice cream with frozen bananas for a creamy texture or add a dollop of Nutella or peanut butter for a flavorful twist.
Frozen fruits like strawberries or blueberries can provide an invigorating burst of taste in your milkshake without ice cream. For a rich and velvety consistency, try incorporating avocado into your blend. Greek yogurt is another excellent option, offering a tangy and thick substitute for traditional ice cream that results in a satisfying treat with less sweetness.
These variations allow you to customize your strawberry milkshake to suit your preferences, whether you prefer a nutty undertone, a fruity essence, or a creamy finish. Get creative with your ingredients to craft a delicious and unique non-ice cream strawberry milkshake that will surely delight your taste buds.
Serving and Garnishes
Enhance the visual appeal of your milkshake by exploring creative garnishing ideas such as colorful sprinkles or fresh mint leaves.
Elevate the indulgence by topping your milkshake with homemade or canned whipped cream for a delightful treat.
Create a marbled effect by swirling strawberry puree through the milkshake before serving.
Garnishing Ideas for Milkshake
For a classic touch, top your milkshake with a dollop of whipped cream.
To add a visually appealing marbled effect, swirl in some strawberry puree.
Get creative with your garnishing by adding fun toppings like colorful sprinkles or vibrant mint leaves.
Enhance the strawberry flavor by spooning strawberry syrup into the glass before pouring in the milkshake.
For an elegant presentation, consider using a fresh strawberry as a garnish on the rim of the glass.
These garnishing ideas not only elevate the taste but also make your strawberry milkshake visually enticing.
Experiment with different combinations to find the perfect garnish that suits your taste preferences and adds a delightful touch to your milkshake.
Whether you prefer a simple whipped cream topping or a more elaborate garnish, the options are endless to make your milkshake a treat for both the taste buds and the eyes.
Serving Suggestions for Milkshake
Top your strawberry milkshake with a dollop of whipped cream for a classic touch, or swirl in strawberry puree to create a marbled effect that enhances both flavor and visual appeal.
For an extra flair, consider garnishing with sprinkles, mint leaves, or even a drizzle of chocolate syrup. If you have any leftover strawberry puree, store it for later use in other recipes or future milkshakes to elevate their taste.
When serving your milkshake, remember to add toppings just before serving to maintain their freshness and texture. This attention to detail will secure a delightful experience for your guests at small parties or celebrations.
Whether you choose a plain milkshake for a healthier option or opt for the indulgence of whipped cream, these serving suggestions will enhance the visual appeal and overall enjoyment of your strawberry milkshake.
Storage
To keep your leftover strawberry milkshake without ice cream crisp, store it in a sealed glass jar or airtight container in the fridge. By placing it in a sealed glass jar or airtight container, you can maintain its taste and quality for up to 2 days.
Remember to refrain from adding any toppings or garnishes until right before serving to guarantee the milkshake stays crisp. This method is perfect for small gatherings or as a delightful treat for yourself.
If you're looking to add a special touch, explore different recipes for various occasions or flavor variations to keep things interesting. Keeping your milkshake chilled in the fridge in a sealed container not only helps preserve its flavor but also makes it convenient to enjoy whenever you crave a invigorating sip.
Recipe
Blend together frozen strawberries, milk, sweetener, and vanilla extract to create a creamy strawberry milkshake without ice cream. Customize the sweetness and thickness by adjusting the sweetener and milk quantities. Enhance the flavor with ingredients like freeze-dried strawberry powder or powdered milk for a richer texture. Experiment with variations such as almond or coconut milk for a vegan option, or Greek yogurt for added tanginess.
Ingredients | Amount |
---|---|
Frozen Strawberries | 1 cup |
Milk | 1 cup |
Sweetener | To taste |
Vanilla Extract | 1 teaspoon |
Recommended Products
For achieving best results in your strawberry milkshake recipe without ice cream, consider incorporating essential kitchen tools and quality ingredients. To ensure a smooth and creamy texture, using a high-quality blender like the Vitamix Blender is vital. The powerful motor and sharp blades of the Vitamix Blender will help you achieve the perfect consistency for your milkshake.
Enhance the flavor of your strawberry milkshake without ice cream by adding organic strawberry spread or strawberry syrup. These ingredients will provide a more intense strawberry taste, making your milkshake truly delicious.
Experiment with different sweeteners and flavors to customize your milkshake according to your preferences and dietary needs. Whether you prefer a sweeter taste or want to add a unique flavor twist, the recommended products can assist you in achieving the perfect balance in your milkshake.
Enjoy a convenient and satisfying treat with a strawberry milkshake without ice cream, made using the recommended products for a delightful experience.
Post Navigation
Wondering how to navigate through the rest of this article efficiently? Below is a handy post navigation section to help you find the information you need to whip up a delightful strawberry milkshake without ice cream.
Ingredients | Instructions |
---|---|
Frozen Strawberries | Blend until smooth |
Milk | Add gradually |
Sweetener | Adjust to taste |
Now that you have an overview of the essential ingredients and basic steps required to make a scrumptious strawberry milkshake without ice cream, feel free to explore the article for more detailed instructions. Don't forget to explore alternative sweeteners like honey or maple syrup for a healthier twist, and if you're feeling adventurous, experiment by incorporating Greek yogurt for a tangy kick. Whether you're craving a creamy treat or looking for a guilt-free indulgence, this recipe has got you covered. Happy blending!
Frequently Asked Questions
What Can You Use Instead of Ice Cream in a Milkshake?
You can substitute frozen bananas, Greek yogurt, or avocado for ice cream in a milkshake. Use milk, sweeteners, and frozen fruit to create a creamy drink. Experiment with different flavors like chocolate or Nutella for a tasty twist.
How to Make a Strawberry Milkshake Without Vanilla Ice Cream?
To make a strawberry milkshake without vanilla ice cream, blend frozen strawberries, milk, sweetener, and vanilla extract. Consider using frozen bananas or yogurt for creaminess. Add honey, maple syrup, or stevia for sweetness. Experiment with flavors like salt or strawberry syrup.
How Do You Thicken Milk for a Milkshake Without Ice Cream?
To thicken milk for a milkshake without ice cream, blend in frozen bananas or mixed berries. Add avocado for creaminess, Greek yogurt for tang, and adjust milk/sweetener amounts for consistency. Experiment with fruits like strawberries for flavor.
Do You Need Ice Cream for a Milkshake?
You don't need ice cream for a milkshake; it's like driving without a map, exciting and full of possibilities. Try frozen bananas, Greek yogurt, or avocado to create a creamy and delicious strawberry milkshake without the cream.
Can I Use Ube Ice Cream in Place of Regular Ice Cream for the Strawberry Milkshake Recipe?
Yes, you can use the best ube ice cream recipe in place of regular ice cream for the strawberry milkshake recipe. It will add a unique twist to the traditional milkshake with its sweet, nutty flavor and vibrant purple color. Try it for a delightful and unexpected treat.
Conclusion
Now that you've got the perfect recipe for a delicious strawberry milkshake without ice cream, you can enjoy a creamy and invigorating treat anytime!
Don't cry over spilled milk, just whip up this easy and tasty shake to satisfy your sweet tooth.
With just a few simple ingredients and a blender, you'll be sipping on a homemade delight in no time.
Cheers to milkshake magic!
Mario’s creativity shines through his ability to describe the sensory experience of enjoying ice cream. Whether he’s discussing the velvety texture, the explosion of flavors, or the delightful combinations of toppings and sauces, his words transport readers to a world of mouthwatering sensations. His descriptive language allows readers to imagine and savor the flavors even before taking the first bite.
Ice Cream Recipes
Berry Goodness: Best Strawberry Milkshake Recipe With Ice Cream!
Join us on a journey of sweet indulgence with the ultimate strawberry milkshake recipe that will leave you craving every sip.
Indulge in the ultimate strawberry milkshake! Combine creamy vanilla ice cream with delicious real strawberries for a decadent treat that excites your taste buds. Experience the ideal balance of sweetness and creaminess in each sip. Add whipped cream on top for an extra touch of luxury. Explore the delightful flavors that a basic shake can provide – ideal for a refreshing treat on a warm day. Embrace the goodness of fresh strawberries and creamy ice cream mixed together to make a gratifying beverage that will make you want more.
Key Takeaways
- Use ripe strawberries and strawberry ice cream for a luscious shake
- Achieve ideal ratio with 3 scoops of ice cream to 1/2-3/4 cup of milk
- Enhance flavor with vanilla and adjust sweetness with sugar or more strawberries
- Blend ingredients until smooth for a creamy, satisfying milkshake
- Customize with cream cheese, fudge sauce, bananas, or mix-ins for unique variations
Fresh Strawberry Milkshake Recipe
For a delightful variation on a classic treat, try making a cool strawberry milkshake using vanilla ice cream and real strawberries. The combination of creamy vanilla ice cream and juicy strawberries creates a luscious and flavorful shake that's sure to satisfy your sweet cravings.
With the ideal milkshake ratio of 3 scoops of vanilla ice cream to 1/2-3/4 cup of milk, you can achieve the perfect consistency for a rich and indulgent milkshake experience.
Using vanilla ice cream and strawberries in your milkshake enhances the real fruit taste, resulting in a deliciously invigorating beverage.
If you're feeling adventurous, you can also substitute the vanilla ice cream with strawberry ice cream to intensify the berry flavor.
However, the classic pairing of vanilla ice cream and real strawberries guarantees a well-rounded and satisfying milkshake that will leave you wanting more.
Strawberry Milkshake Preparation Steps
To start preparing your delightful strawberry milkshake, gather all the necessary ingredients and equipment on your kitchen counter. You'll need ripe strawberries, strawberry ice cream, milk, and a teaspoon of vanilla.
Begin by washing and hulling the strawberries, then chop them into small pieces. Afterward, scoop three generous portions of strawberry ice cream into a blender. Include the chopped strawberries, a teaspoon of vanilla, and half to three-fourths cup of milk into the blender.
Blend the mixture until smooth and creamy, ensuring there are no large strawberry chunks remaining. Taste the milkshake and adjust the sweetness by adding more strawberries or a hint of sugar if desired.
Once you achieve your preferred flavor, pour the strawberry milkshake into a tall glass. Finish it off with a dollop of whipped cream and a ripe strawberry for garnish.
Enjoy your invigorating and fruity strawberry milkshake!
Choosing the Right Strawberries
When selecting strawberries for your strawberry milkshake, prioritize ripe, sweet, and fragrant berries to guarantee the best flavor in your invigorating drink. Whether you choose fresh or frozen strawberries, make sure they meet these criteria for a delicious milkshake experience. Fresh strawberries are ideal for their natural sweetness and aroma, while frozen strawberries can provide convenience and a thicker shake consistency, though they may require longer blending. Remember to hull the strawberries by removing the green leafy tops before use. Slicing the strawberries before blending can help achieve a smoother texture in your milkshake. For those concerned about pesticides and chemicals, opting for organic strawberries is a great way to reduce exposure. By selecting the right strawberries, you set the foundation for a perfect strawberry milkshake that will delight your taste buds.
Fresh Strawberries | Frozen Strawberries |
---|---|
Ripe, sweet, fragrant | Convenient, thicker shake |
Natural sweetness, aroma | Requires longer blending time |
Hull before using | Hull before using |
Slice for smoother consistency | Slice for smoother consistency |
Consider organic for fewer chemicals | Consider organic for fewer chemicals |
Variations of Strawberry Milkshakes
Experiment with various strawberry combinations to craft unique and flavorful twists on your classic strawberry milkshake.
For a homemade strawberry milkshake with a tangy kick, consider blending in cream cheese to create a decadent strawberry cheesecake variation.
To indulge in a chocolate-covered delight, mix in fudge sauce to enjoy a rich and creamy chocolate-covered strawberry milkshake.
For a tropical twist, add a ripe banana to your strawberry milkshake for a revitalizing strawberry banana fusion.
Additionally, use the strawberry milkshake as a versatile base to experiment with different mix-ins like nuts or chocolate chips, adding texture and depth to your drink.
These variations offer a creative way to elevate the traditional strawberry milkshake, providing a range of flavors to suit every palate. Let your imagination run wild and customize your strawberry milkshake to create a delicious and unique treat every time.
Nutritional Information and Tips
Explore the nutritional breakdown of a strawberry milkshake to make informed choices about your indulgence.
A typical serving made with a cup of whole milk contains 7.6g of saturated fat, representing 11.6% of the recommended daily intake.
The carbohydrate content in a strawberry milkshake amounts to 4.5g, contributing to 22.5% of the total daily value.
Despite being a sweet treat, it also offers 31.7g of fiber, providing 10.6% of the daily recommended intake.
With 1.7g of sugars, this delightful milkshake contributes 6.9% to your daily sugar intake, making it a reasonable dessert option.
Additionally, the 12.0g of protein in a strawberry milkshake adds a nutritious element to this indulgent drink.
For added flavor, consider incorporating a dash of vanilla extract to enhance the overall taste without significantly impacting the nutritional profile.
Enjoy your strawberry milkshake knowing its nutritional value and savor it as a delightful treat that can fit into a balanced diet.
Frequently Asked Questions
What Is the Secret of a Good Milkshake?
The secret of a good milkshake is the classic ratio of 3 scoops of ice cream to 1/2-3/4 cup of milk. Enhance fruit flavors with fresh strawberries and vanilla ice cream. Experiment with different combos for unique flavors.
How to Do Strawberry Milkshake Trick?
When making a strawberry milkshake, you'll want to start by freezing those berries for a burst of flavor. Blend them with milk and ice cream, add a dash of malted milk powder for depth, then savor every sip!
How Does Dairy Queen Make Their Strawberry Milkshakes?
To make their strawberry milkshakes, Dairy Queen blends soft-serve vanilla ice cream with strawberry topping. The topping is a sweet, fruity syrup. The shake is then topped with whipped cream, creating a creamy and indulgent treat.
What's the Difference Between a Strawberry Smoothie and a Strawberry Milkshake?
A strawberry smoothie is a healthier blend of fruit, yogurt, and liquid, while a strawberry milkshake is a richer dessert made with ice cream, milk, and strawberries. Smoothies are thinner; milkshakes are thick and creamy. Choose based on your preference for light or decadent beverages.
Can I Make a Delicious Milkshake Without Using Ice Cream?
Yes, you can make a tasty milkshake without using ice cream. Simply blend together frozen bananas, milk, and a splash of vanilla extract for the best milkshake recipe without ice cream. You can also add in some peanut butter or cocoa powder for extra flavor. Enjoy your dairy-free treat!
Conclusion
So why wait any longer? Treat yourself to the creamy, sweet goodness of a homemade strawberry milkshake today.
With just a few simple ingredients and a blender, you can create a delicious and invigorating treat that everyone will love.
So go ahead and indulge in this classic dessert – you deserve it!
Mario’s creativity shines through his ability to describe the sensory experience of enjoying ice cream. Whether he’s discussing the velvety texture, the explosion of flavors, or the delightful combinations of toppings and sauces, his words transport readers to a world of mouthwatering sensations. His descriptive language allows readers to imagine and savor the flavors even before taking the first bite.
Ice Cream Recipes
Egg-Free Strawberry Delight: Best Strawberry Ice Cream Recipe Without Eggs!
Boost your dessert game with a luscious egg-free strawberry ice cream recipe that's bursting with flavor and perfect for allergy-friendly indulgence!
Make a delicious eggless strawberry ice cream using fresh strawberries, milk, and cream to achieve a creamy consistency. This treat is ideal for those with allergies or anyone looking for a sweet dessert without eggs. Savor a silky, fruity taste without sacrificing flavor.
Key Takeaways
- Creamy texture without eggs for allergy-friendly dessert.
- Fresh strawberries blended with sugar, milk, and cream.
- Easy preparation with simple ingredients for homemade delight.
- Rich flavor and versatile for various dietary preferences.
- Enjoy luscious, egg-free strawberry ice cream with no compromise on taste.
Strawberry Ice Cream Ingredients
For making this egg-free strawberry ice cream, gather fresh strawberries, sugar, whole milk, milk powder, and heavy cream.
The key ingredient in this delectable treat is, of course, the fresh strawberries. These juicy berries are tossed in sugar to enhance their natural sweetness before being blended with the other components.
To achieve that creamy texture, heavy cream plays an essential role in this recipe. It's added to the strawberry mixture, churned thoroughly, and then frozen to perfection. The heavy cream contributes to the richness of the ice cream without the need for eggs.
How to Make Homemade Strawberry Ice Cream
Consider blending ripe strawberries, sugar, milk, cream, and vanilla extract to create a delightful homemade strawberry ice cream without eggs. This homemade ice cream recipe is a simple yet delicious treat that captures the essence of ripe strawberries.
Start by pureeing the strawberries and mixing them with sugar, milk, cream, and vanilla extract until well combined. Once the mixture is smooth, pour it into an ice cream maker and churn according to the manufacturer's instructions until it reaches a creamy consistency.
The result is a rich and creamy strawberry ice cream that bursts with the natural sweetness of the strawberries. This egg-free version is perfect for those with egg allergies or anyone looking for a quick and easy dessert option.
Indulge in this homemade strawberry ice cream as a invigorating and satisfying treat, especially during the warm summer months when fresh strawberries are in season.
How to Store Strawberry Ice Cream
When storing your strawberry ice cream, remember to use an airtight container to keep it fresh.
For easy scooping, run your ice cream scoop under hot water before serving.
Maintaining proper storage will guarantee your ice cream stays delicious for weeks to come.
Storage Recommendations
Store your homemade egg-free strawberry ice cream in an airtight container in the freezer to maintain its freshness and prevent ice crystals.
Securing the ice cream is stored in a proper storage container can help prevent freezer burn; simply press a piece of plastic wrap directly onto the surface of the ice cream before sealing the container.
It's important to avoid placing the ice cream near strong-smelling foods in the freezer to prevent any flavor transfer.
When stored correctly, egg-free strawberry ice cream can preserve its taste and texture for up to 2-3 weeks in the freezer.
To enjoy a scoop of this delightful treat, run the ice cream scoop under hot water before serving to make scooping out the frozen dessert easier.
Serving and Enjoying
To fully savor your homemade egg-free strawberry ice cream, make sure you have the right tools and techniques for serving and enjoying this delightful frozen treat. After storing your ice cream properly in an airtight container or zip-top freezer bag to maintain its freshness, it's time to scoop and serve. Here are some tips to enhance your ice cream experience:
Serving and Enjoying Tips |
---|
Run your ice cream scoop under hot water before scooping to make it easier. |
Add fresh strawberry slices or a dollop of whipped cream for extra flavor. |
Enjoy your homemade strawberry ice cream within a few weeks for the best taste. |
Serve in chilled bowls to keep the ice cream from melting too quickly. |
Longevity and Quality
For best freshness and flavor preservation of your homemade egg-free strawberry ice cream, make sure you store it in an airtight container or zip-top freezer bag.
By sealing the ice cream in an airtight container, you can prevent the formation of ice crystals and freezer burn, which can degrade the quality of the frozen dessert over time.
It's recommended to consume your homemade strawberry ice cream within a few weeks to enjoy it at its optimum.
Additionally, consider using recycled ice cream containers or zip-top freezer bags for storage, as they can also help maintain the flavor and consistency of the ice cream for longer periods.
Remember that proper storage techniques play an essential role in preserving the delicious taste and texture of your egg-free strawberry delight.
To easily scoop out the frozen dessert when serving, try running your ice cream scoop under hot water before digging in.
Allrecipes Community Tips and Praise
You'll find valuable insights and accolades from the Allrecipes community regarding the egg-free strawberry ice cream recipe. Here's what they've to say:
- Jennifer Summers highly recommends the egg-free strawberry ice cream recipe, praising its delicious flavor and smooth texture.
- Dana Pesce Gisana describes the recipe as a perfect base for eggless ice cream, highlighting its versatility for customization with different mix-ins.
- MarthaF finds the recipe very easy to follow, appreciating its simplicity and the wonderful creamy consistency of the final product.
- Corey Williams has made editorial contributions to the recipe, ensuring that it's well-detailed and user-friendly for all home cooks.
Strawberry Ice Cream With No Eggs
You'll love this egg-free strawberry ice cream recipe for its simplicity and delicious flavor.
It's a no-cook delight that's perfect for satisfying your sweet cravings.
Indulge in a creamy and invigorating treat without the hassle of using eggs.
Egg-Free Ice Cream Recipe
Create a luscious batch of strawberry ice cream without the need for eggs by following this simple recipe. This homemade egg-free strawberry ice cream boasts a creamy texture that will leave you craving more.
Here's why you should try this delectable treat:
- Simplicity: With just a few basic ingredients like fresh strawberries, sugar, milk, milk powder, and heavy cream, this recipe is easy to follow and doesn't require the hassle of tempering eggs.
- Creamy Texture: The absence of eggs doesn't compromise on the rich and creamy texture of this strawberry ice cream. It still delivers a velvety smooth consistency that's a delight to indulge in.
- Balanced Sweetness: The combination of ripe strawberries and sugar in this egg-free ice cream recipe strikes the perfect balance of sweetness, enhancing the natural flavors of the berries.
- Delicious Flavor: Made with fresh strawberries, this homemade strawberry ice cream bursts with a delightful strawberry flavor that's sure to please your taste buds.
Treat yourself to a scoop of this egg-free strawberry delight for an invigorating and satisfying dessert experience.
Simple and Delicious
To whip up a batch of creamy and delightful strawberry ice cream without eggs, gather your fresh or frozen strawberries and essential ingredients like sugar, milk, heavy cream, and vanilla extract. This egg-free homemade strawberry ice cream recipe offers a simple and delicious way to enjoy this classic treat.
By using straightforward ingredients, such as sweet strawberries and creamy dairy products, you can create a delightful dessert without the need for eggs. The simplicity of this recipe not only makes it easy to prepare at home but also results in a lighter texture compared to traditional recipes that include eggs.
No-Cook Strawberry Delight
For a quick and easy frozen treat, indulge in the delightful flavors of a no-cook strawberry ice cream that skips the eggs but doesn't skimp on taste. Making your own egg-free strawberry ice cream at home has never been easier with this no-cook recipe.
Here's why you'll love this homemade delight:
- Simplicity: This no-cook recipe eliminates the need for tempering eggs, making the process straightforward and hassle-free.
- Fresh Ingredients: Using fresh strawberries, heavy cream, and sugar ensures a rich, creamy texture and a burst of fruity flavor in every bite.
- Easy Preparation: Simply blend the fresh strawberries with milk, cream, and other ingredients before churning in an ice cream maker for a smooth and luscious dessert.
- Allergy-Friendly: Perfect for those with egg allergies or dietary preferences, this egg-free strawberry ice cream allows everyone to enjoy an invigorating summer treat without worries.
More Strawberry Recipes
Discover a variety of other strawberry recipes to indulge in beyond just strawberry ice cream. Expand your culinary horizons by trying out dishes like invigorating strawberry soup, sweet and tangy strawberry peach jam, and creamy strawberry milk. These recipes offer a delightful way to enjoy the vibrant flavors of strawberries in different forms.
For more inspiration and to connect with like-minded food enthusiasts, join the Allrecipes community on Pinterest, Instagram, and Facebook. By becoming part of this community, you can explore a treasure trove of recipes, share your culinary creations, and engage in discussions with fellow foodies. Don't forget to sign up for the free recipe club to receive weekly recipe suggestions and stay updated on the latest cooking trends.
If you have any questions or feedback about the recipes, feel free to leave a comment on the recipe page. Your interactions not only help you connect with others but also contribute to the growing community of passionate cooks. Remember to rate the recipes based on your experience and subscribe to receive updates for more delicious culinary content.
Reader Interactions
Let's chat about the recipe interactions and serving suggestions for this egg-free strawberry ice cream.
Share your experience with making this delightful summer treat and any tweaks you made to the recipe.
Do you have any favorite toppings or accompaniments that elevate the flavor of this creamy dessert?
Recipe Interactions
Engage with the recipe community by leaving a comment or question to start a conversation with fellow readers. Sharing your thoughts and experiences with the ice cream recipe not only enriches the community but also helps others who might be trying it for the first time.
Here are some ways you can interact with the recipe and fellow readers:
- Leave a Comment: Share your feedback, modifications, or any challenges you faced while making the ice cream. Your comment could spark a helpful discussion or inspire others to try the recipe.
- Rate the Recipe: By rating the recipe, you contribute to the community by helping others discover delicious recipes. Your rating can guide someone looking for the perfect strawberry ice cream recipe.
- Join the Recipe Club: Sign up for the free recipe club to receive more delightful recipes weekly. Interacting with the club allows you to stay connected with fellow cooking enthusiasts and explore new culinary creations.
- Share via Email: Receive your favorite recipes via email for easy access and inspiration. Sharing these recipes with friends and family can introduce them to the joys of homemade treats.
Serving Suggestions
Considering different serving options can enhance your enjoyment of this egg-free strawberry ice cream recipe. Whether you prefer a classic bowl or a gluten-free cone, the presentation can add to the overall experience of indulging in this homemade strawberry ice cream.
Serving the ice cream in a bowl allows for easy customization with toppings like fresh strawberries, whipped cream, or a drizzle of chocolate sauce. On the other hand, opting for a gluten-free cone adds a delightful crunch to each creamy bite.
For a more creative approach, experiment with different serving suggestions to elevate your dessert game. Try topping your strawberry ice cream with a homemade strawberry coulis for an extra burst of fruity flavor. Alternatively, transform your ice cream into delectable ice cream sandwiches by sandwiching a scoop between two cookies or brownies.
These unique serving ideas are sure to impress your guests and make your dessert even more memorable. Share your favorite serving suggestions in the comments below to inspire other readers to get creative with their egg-free strawberry delight.
Primary Sidebar
Consider incorporating a visually appealing and informative primary sidebar on your website to enhance user experience and navigation.
Here are some reasons why having a primary sidebar can benefit your readers:
- Quick Navigation: A sidebar can provide easy access to different sections of your website, allowing users to find relevant information efficiently.
- Highlighted Recipes: Showcase popular recipes like the egg-free strawberry ice cream prominently in the sidebar to attract visitors and keep them engaged.
- Featured Ingredients: Display key ingredients such as fresh strawberries, sugar, and vanilla extract in the sidebar to give a sneak peek into what your recipes offer.
- Helpful Tips: Include tips for making easy-to-make desserts like this strawberry ice cream without eggs, enhancing the user experience and encouraging them to explore further.
We Care About Your Privacy
To safeguard your online privacy is protected, we prioritize data processing transparency and provide options for managing how your personal information is handled by both us and our partners.
When you engage with our strawberry ice cream recipe content, rest assured that we're committed to respecting your privacy. We recognize the importance of keeping your information secure and offer choices to control how your data is processed.
Whether it's exploring our delicious strawberry ice cream recipe or learning more about privacy practices, we aim to empower you with the necessary information.
Recipe Highlights
Indulge in a delectable egg-free strawberry ice cream recipe featuring fresh ingredients like strawberries, sugar, milk, cream, and vanilla extract.
Here are some highlights of this delicious recipe:
- Fresh and Natural Ingredients: This strawberry ice cream recipe uses only fresh strawberries and basic pantry staples, ensuring a natural and flavorful dessert without any artificial additives.
- Simple and Gluten-Free: Being egg-free and gluten-free, this recipe caters to various dietary preferences and restrictions, making it a versatile option for many.
- Easy Preparation: With no eggs to temper, this recipe is straightforward and easy to follow, perfect for both novice and experienced home cooks looking to whip up a delightful treat.
- Creamy Texture: The natural pectin in strawberries acts as a thickening agent, contributing to a creamy and luscious texture in the final strawberry ice cream, enhancing its overall taste and appeal.
Frequently Asked Questions
What Is a Substitute for Eggs in Ice Cream?
For your ice cream, try cornstarch, gelatin, agar-agar, or commercial egg replacers as substitutes for eggs. These options can help maintain texture and creaminess without using eggs, catering to dietary restrictions or preferences.
Is Ice Cream Good Without Eggs?
Ice cream without eggs can be great! It's delicious, creamy, and perfect for those who prefer a simpler recipe. You'll still enjoy a tasty frozen treat without worrying about egg allergies or dietary restrictions.
Does Strawberry Ice Cream Contain Eggs?
Seriously, who needs eggs in strawberry ice cream? You're in luck! This delightful treat doesn't contain eggs. Enjoy the pure, fresh strawberry flavor without the unnecessary richness. Whip up a batch and savor every spoonful!
Is There Egg Free Ice Cream?
Yes, there is egg-free ice cream available for those with egg allergies or dietary preferences. You can enjoy a creamy and delicious treat without eggs by using a mix of heavy cream, milk, sugar, and flavors.
Can I Use the Non-Dairy Ice Cream Recipe to Make Egg-Free Strawberry Ice Cream?
Yes, you can use the best non dairy recipe to make egg-free strawberry ice cream. Simply substitute any egg or dairy ingredients with non-dairy alternatives like coconut milk or almond milk. The result will be a delicious and creamy strawberry ice cream that everyone can enjoy.
Conclusion
To wrap it up, this egg-free strawberry ice cream recipe is a delightful treat that's ideal for a hot summer day.
With just a few straightforward ingredients and simple steps, you can create a batch of creamy, fruity goodness in no time.
So feel free to treat yourself to this delightful dessert and savor a taste of summer in every spoonful.
It's reminiscent of days gone by, but with a contemporary twist that's bound to satisfy your taste buds!
Mario’s creativity shines through his ability to describe the sensory experience of enjoying ice cream. Whether he’s discussing the velvety texture, the explosion of flavors, or the delightful combinations of toppings and sauces, his words transport readers to a world of mouthwatering sensations. His descriptive language allows readers to imagine and savor the flavors even before taking the first bite.
-
Vetted3 weeks ago
15 Best Father's Day Gifts for Your Husband That Will Make Him Feel Extra Special
-
Frozen Delights4 days ago
This New Ice Cream Trend Is Taking Over the Internet – Have You Tried It?
-
Frozen Delights2 months ago
Beginner’s Guide to Ice Cream Making: Tips and Tricks on Page 9!
-
Vetted1 month ago
15 Best Ice Cream Makers Under $200 to Satisfy Your Sweet Tooth
-
Frozen Delights2 weeks ago
Weird Ice Cream Flavors: Dare to Try These Unusual Treats!
-
Frozen Delights1 month ago
Ice Cream and Diarrhea: Understanding the Link and How to Avoid It!
-
Frozen Delights1 month ago
The Difference Between Ice Cream and Popsicles: Explained!
-
Frozen Delights2 weeks ago
Indulge in Creamy Plant Based Ice Cream Today!