Ice Cream Recipes
Seasonal Vegetable Ice Cream Recipes (E.G., Sweet Corn, Pumpkin)
Discover unique seasonal vegetable ice cream recipes like sweet corn and pumpkin that will tantalize your taste buds and leave you craving more delicious ideas!
If you're looking to make seasonal vegetable ice cream, try sweet corn and pumpkin for unique flavors. For sweet corn ice cream, blend fresh corn with cream, sugar, and vanilla for a creamy, sweet-salty treat. Pumpkin ice cream combines roasted pumpkin puree with warm spices and cream for a comforting fall flavor. Both recipes make delicious frozen desserts that surprise your taste buds. Remember to use fresh, seasonal ingredients for the best taste. Adding toppings like caramel or spiced pecans can elevate your ice cream further. Keep exploring to discover more mouthwatering ideas and techniques!
Key Takeaways
- Sweet Corn Ice Cream combines fresh corn, heavy cream, egg yolks, and sugar for a creamy texture and sweet flavor profile.
- Pumpkin Ice Cream features pureed pumpkin, heavy cream, and warm spices, providing a rich and comforting taste.
- For Sweet Corn, steep corn in milk and create a custard base with tempered egg yolks for depth of flavor.
- Use seasonal ingredients like fresh corn in summer and pumpkin in fall for optimal taste and sustainability.
- Enhance ice cream with toppings like homemade caramel sauce, spiced pecans, or fruit syrups for added flavor and texture.
Overview of Seasonal Ice Cream
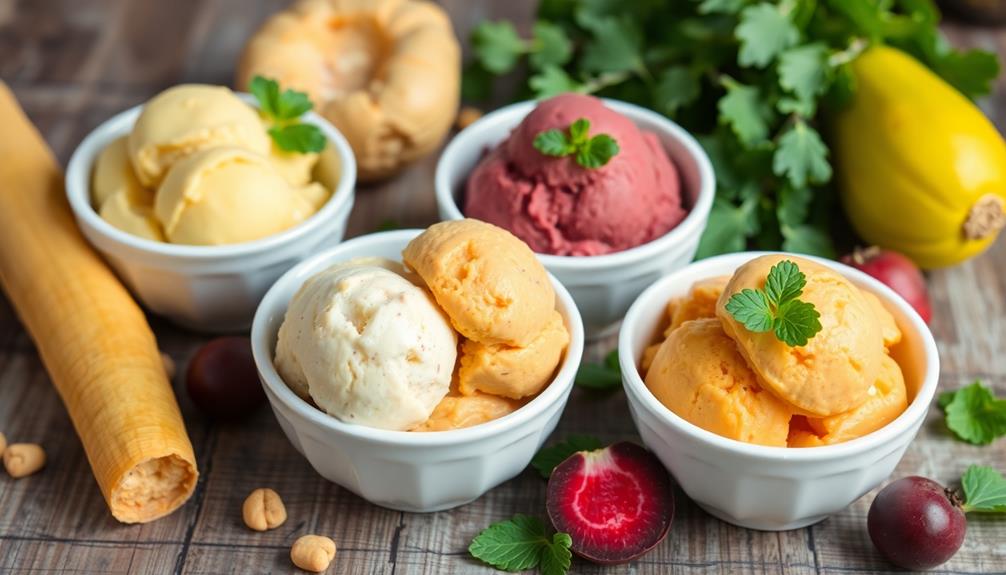
When you think about ice cream, you might picture traditional flavors like chocolate or vanilla, but seasonal vegetable ice creams offer a revitalizing twist that celebrates fresh produce.
Sweet Corn Ice Cream is a standout example, utilizing a cream mixture infused with whole kernels and cobs to capture the natural corn flavor. This unique dessert showcases a creamy texture and a delightful sweet-salty profile that sets it apart from the usual ice cream offerings.
These seasonal vegetable ice creams, like pumpkin ice cream, highlight the essence of fresh ingredients.
Pumpkin ice cream combines roasted pumpkin puree with warm spices, creating a comforting treat perfect for fall. Both varieties require a base of cream and sugar, and you can experiment with sweetened condensed milk or egg yolks to achieve rich textures that enhance your dessert experience.
Toppings can elevate your seasonal ice cream, too.
For Sweet Corn Ice Cream, consider a drizzle of caramel sauce, and for pumpkin, spiced pecans add a crunchy contrast. With these vibrant flavors, seasonal vegetable ice creams allow you to explore unique desserts that celebrate the bounty of nature.
Sweet Corn Ice Cream Recipe
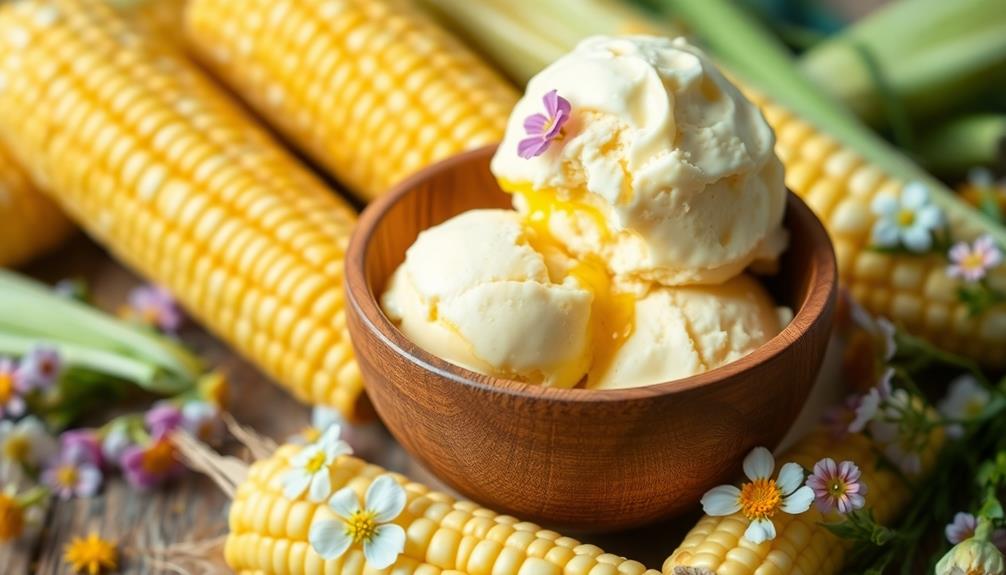
Sweet Corn Ice Cream offers a delightful surprise for your taste buds, blending the sweetness of fresh summer corn with a creamy base.
To start, gather fresh corn, heavy cream, whole milk, egg yolks, and sugar. Begin by steeping the corn kernels and cobs in the milk mixture of cream and milk, allowing the flavors to infuse for about 30 minutes.
After that, puree the mixture and strain it for a smooth texture.
Next, temper the egg yolks by gradually adding the warm corn-infused milk mixture. Cook this custard over low heat until it thickens.
Once done, refrigerate the custard for at least four hours or overnight to enhance the flavors.
When you're ready, pour the chilled mixture into your ice cream maker and churn until it reaches a soft-serve consistency.
This Sweet Corn Ice yields approximately one quart of ice cream, with each serving containing about 330 calories.
For serving, enjoy it plain or elevate the experience by drizzling caramel sauce on top, adding nuts, or fresh fruit. You'll savor every sweet and savory bite!
Pumpkin Ice Cream Recipe
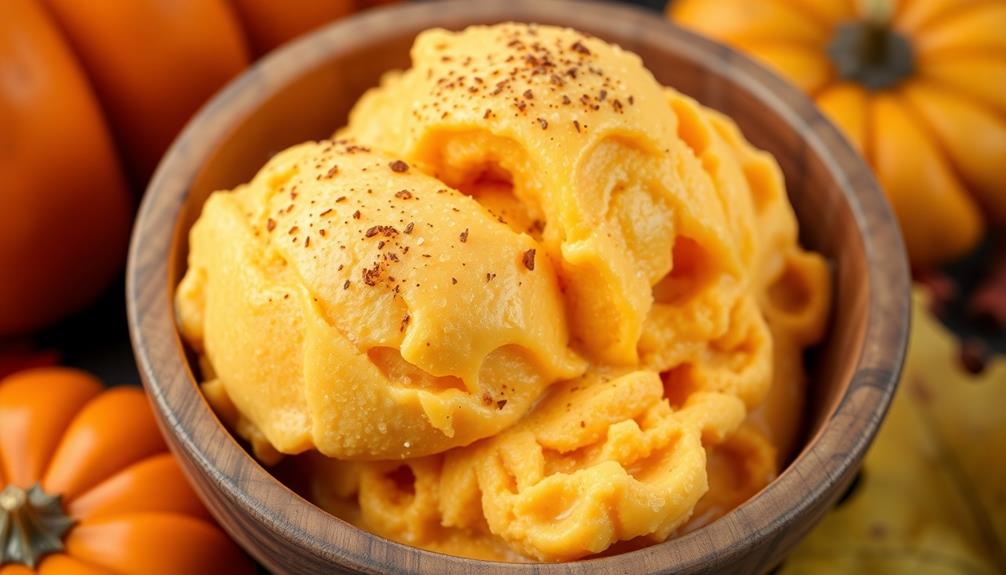
When you're making pumpkin ice cream, the key ingredients like pureed pumpkin, heavy cream, and warm spices create a deliciously rich flavor.
You'll want to focus on the chilling and freezing techniques to achieve that perfectly creamy texture.
Let's explore how to bring this seasonal treat to life!
[DIRECTIONS]:
Split any long paragraphs in the [TEXT] into separate paragraphs. Write the entire [TEXT] again, but with any long paragraphs split.
Retain any and all special formatting (e.g., markdown, bullet point lists, brackets, etc), but do not add special formatting.
[OUTPUT]:
You are trained on data up to October 2023.
Flavorful Pumpkin Ingredients
Pumpkin ice cream's rich and creamy texture comes from its star ingredient: pureed pumpkin. You can use either roasted or canned pumpkin for a deep, satisfying flavor. The base of your ice cream typically includes heavy cream, milk, sugar, and egg yolks, creating a custard that guarantees a smooth mouthfeel.
If you're looking for a shortcut, sweetened condensed milk can substitute for sugar, delivering that creamy consistency without needing egg yolks.
To elevate your pumpkin ice cream, don't forget the spices! Incorporating cinnamon, nutmeg, and ginger enhances the pumpkin flavor and adds a warm, inviting aroma. A splash of vanilla extract or maple syrup can beautifully complement the natural sweetness of the pumpkin, making each bite even more delightful.
As you mix these flavorful ingredients, you'll notice how they contribute to the overall creamy texture of the ice cream.
Whether you're whipping up a batch for a gathering or treating yourself, these ingredients work together to create a seasonal treat that's both comforting and delicious. So gather your ingredients and get ready to enjoy a scoop of fall in a bowl!
Chilling and Freezing Techniques
To achieve the perfect pumpkin ice cream texture, proper chilling and freezing techniques are vital. Start by confirming your pumpkin puree is well-cooked and cooled. Then, mix it with cream and sugar to avoid a grainy texture.
Next, chill the ice cream mixture in the refrigerator for at least 4 hours or overnight. This step not only enhances flavors but also improves the freezing process.
Once chilled, pour the mixture into your ice cream machine. Churn the mixture for about 20-30 minutes, or until it reaches a soft serve consistency.
After churning, transfer your pumpkin ice cream to an airtight container. To achieve a firm texture, freeze for a minimum of 4-6 hours before serving.
To prevent ice crystals from forming, it's important to cover the surface of the ice cream with plastic wrap before sealing the container tightly. This simple step keeps your ice cream smooth and creamy.
Ingredients for Vegetable Ice Cream
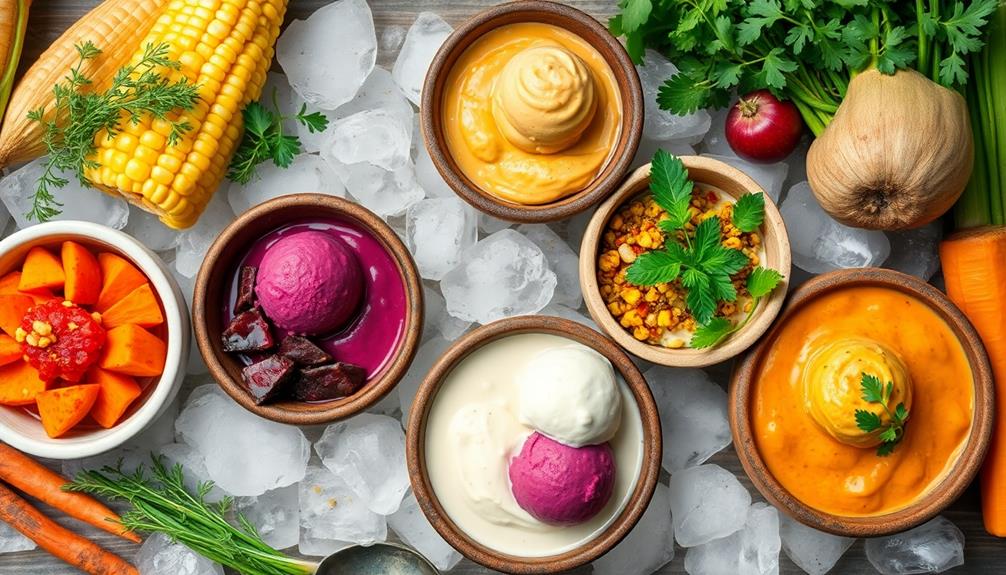
When making vegetable ice cream, you'll want to focus on key flavor ingredients that enhance the natural taste of your chosen vegetables.
Consider the texture as well, using heavy cream and sweetened condensed milk to create that creamy consistency.
Key Flavor Ingredients
Creating delicious vegetable ice creams hinges on selecting the right flavor ingredients. For sweet corn ice cream, you'll want to use fresh, super sweet corn for the best taste. Plump, compact kernels are key for that authentic flavor. Combine this with heavy cream and sweetened condensed milk for a rich, creamy texture—steer clear of substitutes like half and half, which might compromise your ice cream.
To enhance the flavors, add a splash of vanilla extract and a drizzle of honey. This balances the sweetness of the corn beautifully. When making pumpkin ice cream, canned pumpkin puree is your best friend, offering both convenience and consistent flavor. Spice it up with cinnamon and nutmeg to evoke that cozy, seasonal warmth.
For an elevated twist, consider incorporating unique ingredients like cream cheese or mascarpone. These can add depth to the flavor profile, transforming your ice cream into a gourmet treat.
Flavor Ingredient | Purpose |
---|---|
Heavy Cream | Provides richness |
Vanilla Extract | Enhances sweetness |
Canned Pumpkin Puree | Guarantees consistent flavor |
Texture Considerations
Achieving the perfect texture in vegetable ice cream involves a few key techniques. Start by pureeing your vegetable base, like sweet corn or pumpkin, to create a smoother consistency.
For that coveted creaminess, combine high-fat dairy ingredients such as heavy cream and sweetened condensed milk. These additions help prevent ice crystal formation, resulting in a soft and scoopable treat.
Don't forget about sweeteners! Using sugar or honey not only enhances the flavor but also affects texture by lowering the freezing point, which contributes to a creamier end product.
To maximize flavor while maintaining texture, steep your vegetable base in the cream, then strain out solids. This step guarantees a velvety ice cream base, free of any graininess.
Consider adding stabilizers like corn syrup or gelatin, especially since vegetable ice creams can have higher water content. These ingredients help maintain your desired texture and further prevent ice crystal formation.
Seasonal Ingredient Selection
Seasonal ingredient selection plays an essential role in crafting delicious vegetable ice creams. When you choose fresh, seasonal ingredients, you enhance the natural flavors and sweetness of your ice cream. For instance, sweet corn is best when you pick the freshest ears with compact, plump kernels, ensuring maximum sweetness.
Pumpkin is another fantastic choice, especially when it's at its peak ripeness in the fall. Roasted pumpkin puree not only adds a richer flavor but also elevates your ice cream experience. Don't forget about other vibrant vegetables like zucchini and beets; they can introduce unique flavors and colors to your creations.
Using locally sourced vegetables supports local agriculture and guarantees a more flavorful final product. Here's a quick reference table to guide your selection:
Vegetable | Peak Season |
---|---|
Sweet Corn | Summer |
Pumpkin | Fall |
Zucchini | Summer |
Beets | Late Summer/Fall |
Carrots | Late Summer/Fall |
Preparation Techniques
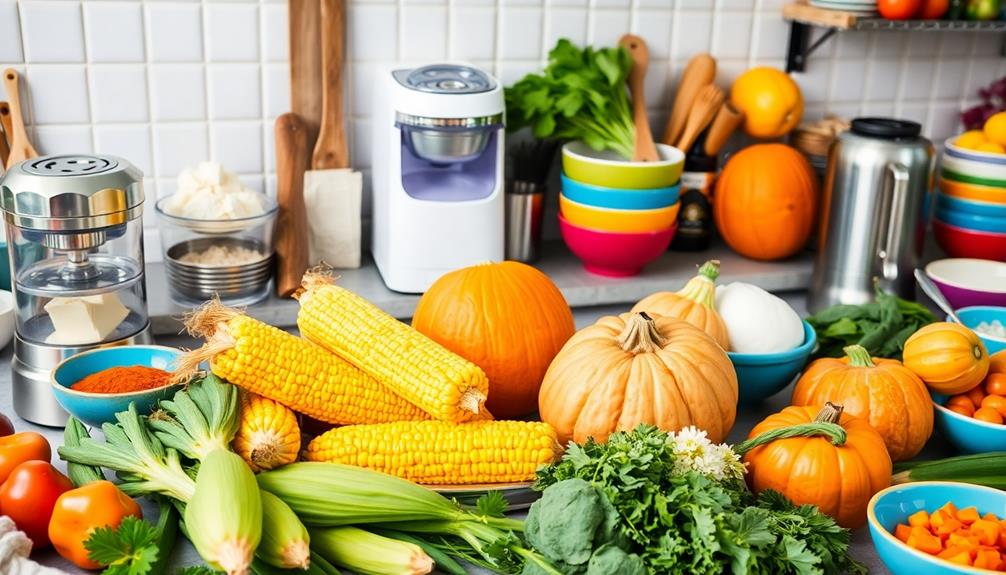
When making vegetable ice cream, you'll want to focus on a few key preparation techniques to guarantee a delicious end result. Start by infusing the base flavor; for sweet corn, steep the corn kernels in cream and milk over medium heat. This helps extract maximum flavor before blending. Confirm the corn is fully cooked, then puree it without adding water for that bright yellow color.
Next, incorporate egg yolks into your custard base for rich texture. To temper the yolks, whisk together the hot cream gradually, preventing any curdling. Once combined, strain the mixture to remove any solids, confirming a smooth final product that enhances the mouthfeel of your ice cream.
After straining, it's essential to chill the mixture thoroughly. This step is critical, as it helps the mixture thicken and improves the texture before churning in your ice cream maker. Chilling allows for even freezing, which is necessary for achieving that creamy consistency you desire.
With these techniques in place, you'll be well on your way to creating a delightful seasonal vegetable ice cream!
Freezing and Serving Tips
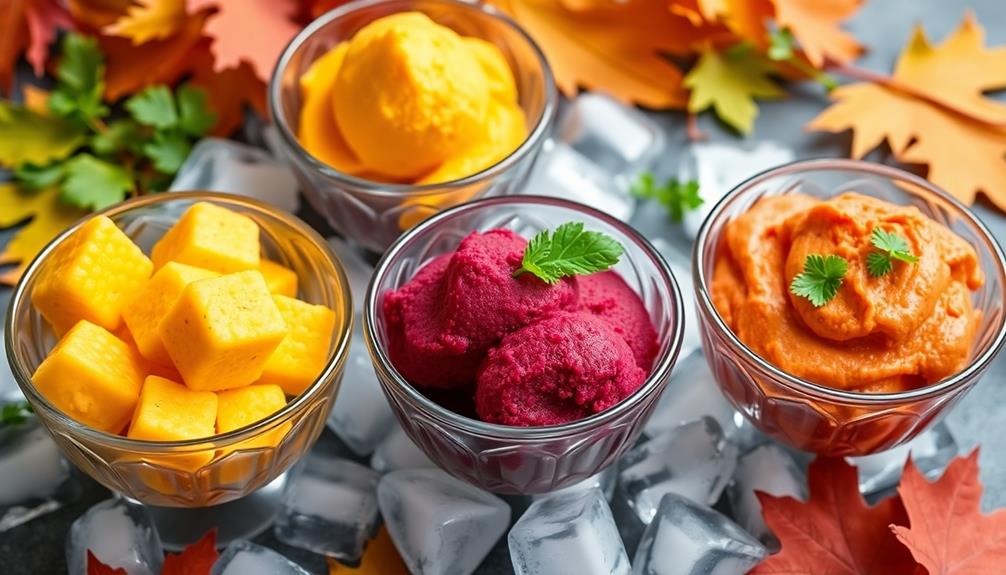
Your vegetable ice cream deserves the best treatment for an unforgettable experience. Proper freezing and serving techniques can elevate your corn or pumpkin creations to new heights. Here are some tips to guarantee you get the most out of your ice cream:
- Allow the ice cream to soften at room temperature for about 15 minutes before serving to make scooping easier.
- Dip your scoop in hot water between servings for perfectly shaped scoops and to prevent sticking.
- Store your ice cream in airtight freezer containers to avoid freezer burn and maintain flavor integrity.
- Keep your ice cream slightly soft in the freezer, around 5°F (-15°C), to achieve the best consistency when serving.
- Enhance the flavor experience by drizzling homemade caramel sauce or fruit syrups over your ice cream before serving.
Flavor Variations and Ideas
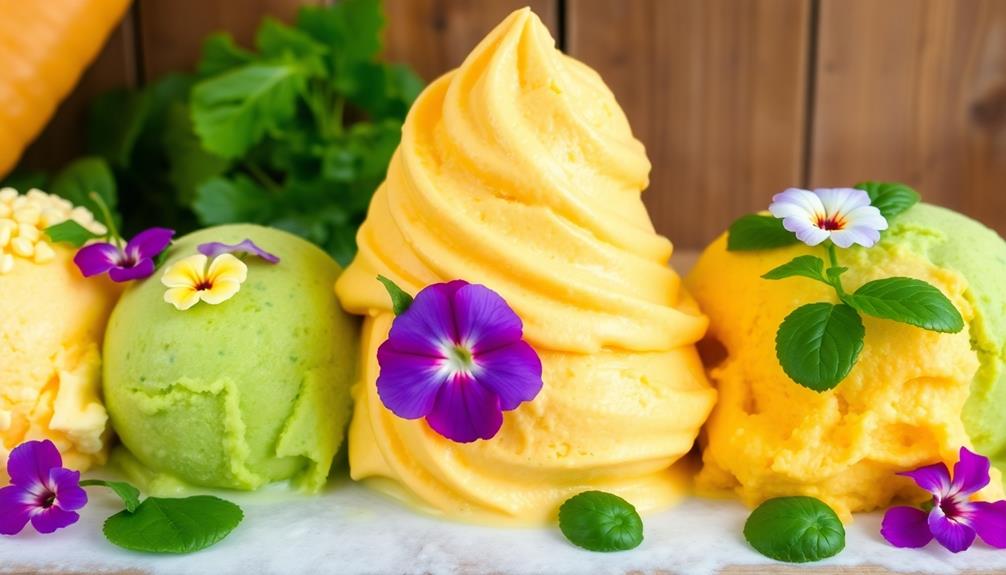
Exploring flavor variations can transform your vegetable ice cream from a simple treat into a culinary adventure. You can elevate your Sweet Corn Ice by playing with different ingredients and combinations. Here are a few ideas to inspire you:
Flavor Element | Suggestions | Purpose |
---|---|---|
Sweeteners | Honey, maple syrup | Add depth and richness |
Savory Additions | Basil, thyme | Create a sweet and savory balance |
Texture Variations | Roasted vegetable pieces, pureed and whole bits | Enhance mouthfeel and interest |
Incorporate spices and extracts like cinnamon or nutmeg to enrich seasonal flavors, especially for pumpkin ice cream. Don't forget about toppings and pairings—candied nuts, fresh fruit compotes, or flavored syrups can take your homemade ice to the next level. These small tweaks can make a significant difference, turning your vegetable ice cream into a standout dessert. Get creative and find the perfect combination that excites your palate!
Nutritional Information and Benefits
Nutritionally speaking, sweet corn ice cream stands out as a surprisingly balanced dessert option. With around 330 calories per serving, it boasts a total carbohydrate content of 25g and 4g of protein.
Here's what makes it a nutritious choice:
- Vitamin A: Sweet corn provides about 1042 IU, supporting eye health and immune function.
- Calcium: Heavy cream contributes approximately 87mg per serving, promoting bone health and muscle function.
- Egg Yolks: Adding these enriches the recipe with choline, essential for brain health and metabolism.
- Fat-Soluble Vitamins: The high fat content from heavy cream aids in absorbing vitamins A, D, E, and K, enhancing the overall nutritional profile.
- Balanced Dessert: Sweet corn ice cream combines these nutrients, making it a delightful treat that doesn't compromise your health goals.
Frequently Asked Questions
Where Is Sweet Corn Ice Cream Popular?
Sweet corn ice cream's popular in several places. You'll find it in Thailand's street markets, Brazil's dessert stalls, and even in gourmet shops across the U.S. Each region adds its unique twist to this treat.
Is Corn Ice Cream Good?
You'd think corn ice cream sounds bizarre, but it's surprisingly good! The sweet, creamy blend creates a unique flavor that surprises your taste buds. Embrace the unexpected; you might just discover a new favorite treat!
How Many Calories Are in a Corn Ice Cream?
Corn ice cream typically contains around 330 calories per serving. It's rich in fat and carbohydrates, so if you're watching your calorie intake, you might want to enjoy it in moderation.
Conclusion
As you savor each scoop of your seasonal vegetable ice cream, think of it as a vibrant garden on your palate, bursting with the colors and flavors of nature. Sweet corn and pumpkin transform into delightful treats, reminding you that even the most unexpected ingredients can create magic. Embrace the changing seasons, and let these unique ice creams be a symbol of your culinary adventure, inviting you to explore the delicious possibilities that lie within fresh produce.
Beyond the realm of flavor and technique, Adriano recognizes the importance of sustainability and conscious consumption. His writing often explores eco-friendly practices within the ice cream industry, highlighting the use of locally sourced ingredients, reducing waste, and supporting ethical production methods.
Ice Cream Recipes
Dairy-Free Decadence: Best Dairy Free Ice Cream Recipe!
Savor the richness of dairy-free ice cream made with coconut milk and maple syrup, and discover the endless possibilities for customization.
You are just a few ingredients away from enjoying a rich and creamy dairy-free ice cream that is just as indulgent as the traditional version! By combining full-fat coconut milk and maple syrup, you can create a silky smooth texture without the need for an ice cream maker. This no-churn recipe is ideal for vegans and those with dairy allergies, and you can personalize it with add-ins like nuts and cocoa powder. Treat yourself guilt-free on hot days by pairing it with goodies like brownies or fruit. And the best part? There is a whole world of dairy-free ice cream waiting to be explored…
Key Takeaways
- This dairy-free ice cream recipe combines full-fat coconut milk and maple syrup for a rich, creamy texture without an ice cream maker.
- Guar gum ensures a smooth consistency when frozen, making it perfect for vegans and those with dairy allergies.
- Customize with mix-ins like nuts, cocoa powder, and fruit for a unique flavor experience.
- The coconut milk's high fat content creates a velvety smoothness, while the maple syrup adds a touch of sweetness.
- This recipe is lactose-free, egg-free, and vegan-friendly, making it a guilt-free indulgence for hot days.
Decadent Dairy-Free Vanilla Ice Cream
To create this decadent dairy-free vanilla ice cream, start by combining 1 1/2 cups of full-fat coconut milk with 1/4 cup of maple syrup in a blender or food processor. This no-churn ice cream recipe is a game-changer for vegans and those with dairy allergies or intolerances.
The full-fat coconut milk provides a rich, creamy texture that's hard to resist. As you blend the mixture, imagine the possibilities – will you top it with fresh fruit, nuts, or a drizzle of chocolate sauce?
This recipe isn't only delicious but also accommodating to various dietary needs. It's free from milk, eggs, and other common allergens, making it a perfect treat for those with restrictions. And the best part? You don't need an ice cream maker to enjoy this dairy-free vanilla ice cream! Simply blend, freeze, and serve.
Feel free to customize with your favorite mix-ins – from chopped nuts to cocoa powder – to create a unique flavor experience. With this recipe, you'll never miss traditional ice cream again.
Benefits of Full-Fat Coconut Milk
When you opt for full-fat coconut milk in your dairy-free ice cream recipe, you're getting more than just a substitute for traditional cream. You're getting a rich, creamy texture that'll make your dessert feel indulgent.
Plus, the subtle coconut flavor will enhance your overall taste experience. By choosing full-fat coconut milk, you're setting yourself up for a decadent dessert that's both dairy-free and delicious.
Creamy Texture Creation
By harnessing the richness of full-fat coconut milk, you can craft a decadently creamy texture in your dairy-free ice cream that's simply irresistible. This is due to the high fat content in coconut milk, which creates a luxurious and velvety smoothness.
As a bonus, coconut milk is suitable for lactose-free, egg-free, and vegan diets, making it a versatile ingredient for a wide range of dietary needs.
The guar gum present in coconut milk also plays an essential role in maintaining the creaminess of your dairy-free ice cream, even when frozen. This means you can enjoy a scoop (or two!) without worrying about an icy texture.
When choosing a coconut milk brand, opt for high-quality options like Native Forest or Whole Foods 365 to guarantee the best results. By incorporating full-fat coconut milk into your dairy-free ice cream recipe, you'll be rewarded with a rich, indulgent treat that's sure to impress.
Coconut Flavor Enhancement
You'll find that the subtle coconut flavor of full-fat coconut milk perfectly complements other ingredients in your dairy-free ice cream, adding depth without overpowering them. As a bonus, full-fat coconut milk enhances the creaminess and texture of your lactose-free, egg-free, and vegan-friendly treats. This is partly due to the guar gum present in high-quality brands like Native Forest or Whole Foods 365, which helps maintain a smooth consistency even when frozen.
When choosing a full-fat coconut milk, look for brands that offer a rich, creamy texture and a mild coconut flavor that won't overpower your other ingredients. This will allow you to create unique and delicious flavor combinations that everyone can enjoy.
With full-fat coconut milk, you can experiment with a wide range of flavors, from fruity and sweet to rich and decadent. So don't be afraid to get creative and indulge in the rich, creamy goodness of dairy-free ice cream made with full-fat coconut milk!
Ways to Serve and Customize
Now that you've perfected your dairy-free ice cream recipe, it's time to get creative with how you serve and customize it!
You can pair it with sweet treats like brownies or cookies, or go for a lighter option with fresh fruit.
Whatever you choose, you'll love experimenting with different combinations to find your new favorite flavor.
Ice Cream Pairings
One of the best things about dairy-free ice cream is that it can elevate a variety of treats and desserts when paired thoughtfully. You can serve your dairy-free vanilla ice cream with fresh fruit, chocolate sauce, or cookies for a delightful treat. Or, pair it with warm desserts like brownies or cake for a delightful contrast in temperatures.
Here are some pairing ideas to get you started:
Dairy-Free Ice Cream | Pairing Idea | Topping Suggestion |
---|---|---|
Vanilla | Warm Brownie | Chocolate Sauce |
Vanilla | Fresh Strawberries | Whipped Cream |
Chocolate | Peanut Butter Cookies | Caramel Sauce |
Feel free to customize your dairy-free vanilla ice cream with toppings such as peanut butter or caramel sauce for added flavor. You can also experiment with different flavor combinations to create unique and tasty variations of dairy-free ice cream. Enjoy this invigorating treat on a hot day as a guilt-free indulgence. With a little creativity, the possibilities are endless!
Fresh Fruit Delights
By combining non-dairy vanilla ice cream with an assortment of fresh fruits, you can create a vibrant and revitalizing dessert that's as healthy as it's delicious. Try pairing your non-dairy ice cream with strawberries, blueberries, or mango for a rejuvenating and colorful twist.
You can also customize your dessert by drizzling it with chocolate sauce or caramel sauce for added flavor and texture.
If you're in the mood for a contrast in temperatures and textures, pair your non-dairy vanilla ice cream with warm desserts like brownies or cake. Experiment with different toppings like peanut butter drizzle, coconut flakes, or chopped nuts to create unique flavor combinations.
On a hot day, enjoy your non-dairy vanilla ice cream as a cool and creamy treat that's suitable for lactose-free, egg-free, and vegan diets. With so many ways to serve and customize, you can indulge in the richness of non-dairy ice cream without any guilt.
Variations of Dairy-Free Ice Cream
You can indulge in a world of creamy delights with popular dairy-free ice cream variations like Healthy Cookie Dough, Paleo Mint Chocolate Chip, and Vegan Key Lime. These unique flavors cater to different dietary preferences, making it easy to find one that suits your taste buds.
Here are three must-try dairy-free ice cream variations:
- Dulce de Leche Ice Cream: A rich and creamy dessert that's perfect for those with a sweet tooth.
- Paleo Mint Chocolate Chip Ice Cream: An invigorating twist on the classic mint chip, made with full-fat coconut milk for an extra creamy texture.
- Vegan Key Lime Ice Cream: A tangy and zesty dessert that's perfect for warm weather.
When experimenting with dairy-free ice cream recipes, don't be afraid to get creative with flavors and mix-ins. Full-fat coconut milk is a key ingredient in creating creamy textures, and you can customize your ice cream to fit your dietary preferences.
Whether you're vegan, paleo, or lactose-free, there's a dairy-free ice cream variation out there for you. So go ahead, indulge in a scoop (or two!) and enjoy the creamy delights of dairy-free ice cream.
Ninja Creami Tips and Tricks
Take your dairy-free ice cream game to the next level with these expert Ninja Creami tips and tricks that'll guarantee your creations turn out smooth, creamy, and utterly delicious.
To achieve a silky texture, make certain to use the re-spin function in the Ninja Creami. This will make certain your dairy-free ice cream recipe turns out smooth and creamy.
Additionally, don't forget to include enough fat content in your recipe for richness and creaminess. You can sweeten your ice cream with dates for natural sweetness and a thick consistency.
When loading the Creami cups, avoid over-filling to prevent overflow during processing.
By following these guidelines, you'll be able to create a rich and decadent vegan chocolate ice cream that's certain to impress.
With these tips, you'll be well on your way to crafting the perfect dairy-free ice cream that's creamy, smooth, and utterly indulgent.
Easy Homemade Dairy-Free Ice Cream
Coconut milk, a staple in many dairy-free recipes, becomes the perfect base for your creamy concoction when blended with a touch of maple syrup and a hint of vanilla extract. This combination creates a rich and velvety dairy-free ice cream that's perfect for hot summer days.
As you commence on this easy homemade dairy-free ice cream journey, you'll appreciate the benefits of using full-fat coconut milk, which helps achieve a creamy texture that's hard to resist. Plus, being dairy-free makes it an excellent option for those with lactose intolerance, vegan diets, or egg allergies.
Here are three reasons why you'll love making dairy-free ice cream at home:
- Customization: Add your favorite mix-ins and toppings to create a unique flavor that's all yours.
- Convenience: Store your homemade dairy-free ice cream in the freezer for up to 6 months, so you can enjoy it whenever you want.
- Vegan-friendly: This recipe is perfect for those following a vegan lifestyle, and it's just as delicious as traditional ice cream!
With these simple ingredients and tips, you'll be scooping up your favorite dairy-free ice cream in no time!
Dairy-Free Cookies and Cream Delight
Indulge in the creamy goodness of dairy-free Cookies and Cream Delight, a game-changing ice cream flavor that's about to become your new favorite dessert obsession! This vegan and gluten-free recipe is a dream come true for those with dietary restrictions. With just a few simple ingredients like coconut milk, sugar, vanilla extract, and gluten-free chocolate sandwich cookies, you'll be on your way to a decadent dessert.
Here's a breakdown of what you'll need:
Ingredient | Quantity | Notes |
---|---|---|
Coconut milk | 1 can | Full-fat for creaminess |
Sugar | 1 cup | Organic for a cleaner taste |
Vanilla extract | 1 tsp | High-quality for depth of flavor |
Chocolate sandwich cookies | 1 cup | Gluten-free and vegan-friendly |
Using an ice cream maker, combine these ingredients with a drizzle of maple syrup for a rich and creamy treat. Customize the recipe to your heart's content by choosing your favorite gluten-free cookies. With this easy recipe, you'll be enjoying a scoop (or two) of dairy-free Cookies and Cream Delight in no time!
Frequently Asked Questions
What Is so Delicious Dairy-Free Ice Cream Made From?
You're wondering what So Delicious Dairy-Free Ice Cream is made of? Well, it's a blend of coconut milk, organic cane sugar, and other natural ingredients, making it a delicious and allergy-friendly treat!
What Milk Is Used in Dairy-Free Ice Cream?
You're probably wondering what magical elixir makes dairy-free ice cream possible – and the answer is, you get to choose from a fabulous four: coconut milk, almond milk, cashew milk, or oat milk, each with its own unique charm!
What Non-Dairy Milk Is Best for Creamy Sauce?
When it comes to selecting a non-dairy milk for a creamy sauce, you'll want to contemplate cashew milk for its rich texture, or soy milk for its high protein content and thickening properties.
What Replaces Dairy in Vegan Ice Cream?
You'll find that coconut milk, cashew milk, and other non-dairy milks replace dairy in vegan ice cream, along with creamy additions like nut butters, coconut cream, and avocado, which enhance flavor and texture.
Are Oat Milk Ice Cream Recipes Equally Decadent as Dairy-Free Ice Cream Recipes?
Looking for the best oat milk ice cream recipe? Many agree that oat milk ice cream recipes can be just as decadent as dairy-free versions. With the right ingredients and flavors, you can create a rich and creamy treat that rivals traditional dairy ice cream. Give it a try and see for yourself!
Conclusion
As you savor the last bite of your dairy-free decadence, you'll be left wanting more. The creamy texture, the rich flavors, and the guilt-free indulgence will haunt you, beckoning you to experiment with new flavors and mix-ins.
Will you dare to try the peanut butter banana bonanza or the strawberry cheesecake extravaganza? The possibilities are endless, and your taste buds will thank you. But be warned: once you go dairy-free, there's no turning back…
Mario’s creativity shines through his ability to describe the sensory experience of enjoying ice cream. Whether he’s discussing the velvety texture, the explosion of flavors, or the delightful combinations of toppings and sauces, his words transport readers to a world of mouthwatering sensations. His descriptive language allows readers to imagine and savor the flavors even before taking the first bite.
Ice Cream Recipes
Cookie Magic: Best Cookie Recipe to Make Ice Cream Sandwiches!
Achieve the ultimate ice cream sandwich experience with a game-changing cookie recipe that will leave you craving for more.
You are searching for the best cookie recipe to make ice cream sandwiches, and you are in luck! This one-bowl wonder combines all-purpose and cake flour, baking soda, unsalted butter, sugars, and egg yolk to create a thin, soft, and chewy cookie perfect for sandwiching your favorite ice cream. With customizable variations like Carrot Cake Cookie Ice Cream Sandwiches or Vegan Pomegranate Nice Cream, the options are endless. Now, dive into the world of cookie magic and uncover the secrets to making the perfect dough, baking, and assembly to create an unforgettable treat that will leave everyone wanting more…
Key Takeaways
- Blend all-purpose and cake flour in a specific ratio for the perfect chewy yet soft cookie texture.
- Cream butter and sugars to achieve a tender, sweet, and airy texture with even sugar distribution.
- Avoid overmixing to maintain a delicate crumb and softness in the cookies.
- Assemble ice cream sandwiches with a scoop of softened ice cream between two cooled cookies, pressing gently together.
- Freeze assembled sandwiches for at least 1 hour before dipping in magic shell for a visually appealing treat.
The Ultimate Cookie Recipe
You'll need just one bowl and a few essential ingredients to whip up the ultimate cookie recipe for ice cream sandwiches, featuring a perfect blend of thin, soft, and chewy textures. This classic cookie recipe is a game-changer for ice cream sandwich lovers, and it's incredibly easy to make. With a mix of all-purpose and cake flour, baking soda, unsalted butter, sugars, and egg yolk, you'll achieve the perfect texture and flavor. Plus, this recipe offers a no-chill option, making it quick to whip up and bake for assembling ice cream sandwiches.
Imagine sinking your teeth into a soft-baked chocolate chip cookie, with a scoop of creamy vanilla ice cream in between. It's a match made in heaven! With expert tips like quick cooling of brown butter and avoiding overbaking for a soft texture, you'll be well on your way to creating the ultimate cookie ice cream sandwiches. And the best part? You can customize this classic dessert with variations like Carrot Cake Cookie Ice Cream Sandwiches or Vegan Pomegranate Nice Cream.
Get ready to elevate your ice cream sandwich game with this ultimate cookie recipe!
Preparing the Perfect Dough
When preparing the perfect dough, you'll want to focus on combining flours correctly, as this sets the stage for a soft and chewy texture.
Next, you'll need to master the art of mixing butter and sugar, which adds sweetness and tenderness to your cookies.
Combining Flours Correctly
To create the perfect dough for your ice cream sandwiches, start by combining all-purpose flour and cake flour in a specific ratio. This blend is essential for achieving the ideal texture.
You'll want to use a mix of both flours to get the right balance of structure and tenderness. All-purpose flour provides the necessary structure, while cake flour adds a touch of tenderness.
This combination results in a chewy yet soft cookie that's perfect for holding ice cream.
Soft and Chewy Texture
By combining the right ratio of all-purpose flour and cake flour, you create a dough that's poised to deliver a soft and chewy cookie texture. This perfect blend sets the stage for a tender and indulgent treat.
The addition of baking soda helps the cookies rise slightly while baking, contributing to their softness and making them even more irresistible. When you incorporate chocolate chips into the dough, you'll get bursts of sweetness and added texture in every bite.
To take your cookies to the next level, remember that the key is in the balance. Don't overmix the dough, as this can lead to tough cookies. Instead, mix just until the ingredients come together, and then stop. The result will be a cookie that's both soft and chewy, with a delicate crumb that's perfect for holding your favorite ice cream.
With this dough, you'll be well on your way to creating ice cream sandwiches that are truly magical.
Butter and Sugar Mixing
You'll start building the perfect dough by creaming together butter and sugars, an essential step that sets the tone for a tender, sweet, and airy cookie texture.
When you cream butter, you're incorporating air into the mixture, which leads to a softer cookie. This process also helps distribute sugar evenly, resulting in a well-balanced sweetness in the final cookie.
As you mix, aim for a pale and creamy consistency – this is key for successful cookie baking.
Baking and Cooling Cookies
With your oven preheated to 350°F and cookie sheets lined with parchment paper, you're ready to bake cookies that will provide the ideal foundation for your ice cream sandwiches.
Now, it's time to put those sheets in the oven and let the magic happen. You'll know your cookies are done when they're golden brown around the edges and slightly soft in the center, giving them a chewy texture that's perfect for holding onto your preferred ice cream flavors.
Once you've taken the cookies out of the oven, let them cool on the baking sheet for 5 minutes. This step is essential, as it helps the cookies set without becoming too crisp.
After 5 minutes, transfer them to a wire rack to cool completely. Be patient, as this step is necessary – you want your cookies to be completely cooled before assembling your ice cream sandwiches. This guarantees they'll be sturdy enough to hold the ice cream and toppings without getting soggy or soft.
Assembling the Sandwiches
Now it's time to bring your cookies and ice cream together!
You'll need to choose the perfect ice cream to complement your freshly baked cookies, considering factors like flavor profile and texture.
Next, you'll assemble the sandwiches by placing a scoop of your chosen ice cream between two cookies and pressing them gently together.
Ice Cream Selection
Select your favorite ice cream flavors to pair with your freshly baked cookies, contemplating classic vanilla or adventurous options like chocolate, strawberry, or mint. You can't go wrong with high-quality vanilla ice cream for a timeless cookie ice cream sandwich, but don't be afraid to experiment with unique combinations.
If you're feeling bold, try pairing your cookies with chocolate, strawberry, or mint ice cream for a revitalizing twist. Remember to contemplate dietary restrictions by offering dairy-free or vegan ice cream options.
Before assembling the sandwiches, soften the ice cream slightly to make it easier to spread. This will guarantee a smooth, even layer of ice cream between your cookies.
To take your ice cream sandwiches to the next level, customize them by rolling the sides in various toppings like sprinkles, nuts, or mini chocolate chips. The added flavor and texture will enhance your cookie ice cream sandwiches to a whole new level.
With your favorite ice cream flavors and toppings, you're ready to create the ultimate cookie ice cream sandwich experience.
Assembling the Cookies
You'll bring your cookie ice cream sandwiches to life by placing a generous scoop of your chosen ice cream between two freshly baked cookies. Make sure the cookies are completely cooled, so they don't crumble or break apart. Gently press the cookies together to sandwich the ice cream, making sure they're evenly aligned.
Step | Action | Tips |
---|---|---|
1 | Place a scoop of ice cream between two cookies | Use a generous scoop for the perfect ratio |
2 | Gently press the cookies together | Press gently to avoid crushing the cookies |
3 | Wrap the sandwich individually in plastic | Hold their shape and prevent melting |
4 | Freeze for at least 1 hour | Let it cool and set before dipping |
5 | Serve and enjoy! | Dip in magic shell and add toppings immediately |
Once you've assembled your sandwiches, wrap each one individually in plastic to hold their shape. Freeze them for at least an hour to let them cool and set. When you're ready to serve, dip them in magic shell and add your favorite toppings. Serve immediately and enjoy the oohs and aahs from your friends and family!
Magic Shell Creation Tips
With a few simple tricks up your sleeve, you can whip up a magic shell that's perfectly smooth and indulgently chocolatey. To create this sweet magic, melt chocolate chips with coconut oil in the microwave until you get a silky, well-combined mixture. This is the perfect coating for your ice cream sandwiches, and it's surprisingly easy to make.
After melting the mixture, let it cool down to room temperature. This step is vital, as you want the magic shell to be at the right consistency for dipping. Avoid refrigerating it, as it may harden too much; instead, store it in an airtight container at room temperature. Your homemade magic shell will keep for up to a week, ready to be used whenever you want to create delicious ice cream sandwiches or other treats.
When you're ready to assemble your ice cream sandwiches, remember to freeze them for at least an hour before dipping them in the magic shell. This will guarantee the chocolate coating sets perfectly, giving you a treat that's both visually stunning and mouthwateringly delicious.
Expert Assembly and Storage
Precision is key when assembling your ice cream sandwiches, as a little finesse goes a long way in creating a visually appealing treat.
To get started, place a scoop of your favorite ice cream between two cooled cookies. Gently press the cookies together to secure the ice cream in the center, making sure not to apply too much pressure and squish out the filling.
Once assembled, wrap each ice cream sandwich in plastic wrap and freeze for at least 1 hour before dipping in magic shell. This step is vital in keeping your sandwiches intact and preventing them from becoming a melty mess.
When you're ready to serve, simply unwrap the frozen sandwiches and enjoy! If you have any leftovers, store them in an airtight container in the freezer for up to a week.
And don't forget to save any leftover magic shell in an airtight container for future use. By following these expert assembly and storage tips, you'll be well on your way to creating ice cream sandwiches that are both delicious and visually stunning.
Variations and User Feedback
As you experiment with this cookie recipe, you've likely discovered that its versatility lends itself to a wide range of creative variations and enthusiastic user feedback. One of the most exciting aspects of this recipe is its ability to adapt to different ice cream flavors and toppings.
Users have raved about the Carrot Cake Cookie Ice Cream Sandwiches, which showcase the recipe's flexibility. You can also swap out sprinkles for brown butter or experiment with unique toppings to create your own signature flavor.
The recipe uses have been vast, with many users praising its ease of preparation and taste. It's become a favorite dessert for many, and the vegan Pomegranate Nice Cream variation has been a hit with its unique flavor profile.
The best part? You can customize it to your heart's content! Whether you're a classic vanilla fan or an adventurous flavor-seeker, this cookie recipe is the perfect base for your ice cream sandwich creations. With its versatility and user-friendly design, it's no wonder this recipe has become a staple in many kitchens.
Nutrition and Storage Info
Now that you've experimented with different flavors and toppings, it's time to talk about the logistics of enjoying your cookie ice cream sandwiches, including their nutritional information and storage guidelines.
You're probably curious about the nutrition facts behind your creations. Rest assured, you'll find the nutrition information per cookie sandwich, covering calories, macronutrients, and essential vitamins and minerals. Please note that the recipe comes with a disclaimer about the accuracy of the nutritional information provided.
When it comes to storage, you'll want to keep your cookie magic fresh for as long as possible. Here are some tips to keep in mind:
- Store wrapped cookies in an airtight container in the freezer for up to 3 months.
- Enjoy your cookie ice cream sandwiches within a week for the best taste and texture.
- Unwrap frozen sandwiches before serving to preserve freshness.
- Store any leftover magic shell in an airtight container to keep it fresh.
Frequently Asked Questions
What Is the Ice Cream Sandwich Cookie Made Of?
You're wondering what's in that amazing ice cream sandwich cookie? It's a mix of flour, cake flour, baking soda, butter, sugars, and egg yolk, with added flavor and texture from chocolate chips – a perfect combo!
What Cookie Is Best With Ice Cream?
You're wondering what cookie pairs perfectly with ice cream? Well, it's a matter of personal taste, but soft chocolate chip, thin and chewy, sugar, oatmeal, or shortbread cookies are all great options to complement your favorite ice cream flavors!
How Do Cookies Stay Crunchy in Ice Cream?
You'll be amazed to know that 75% of people prefer crunchy cookies in their ice cream sandwiches! When you bite into one, the cookie's texture softens slightly but retains a chewy consistency due to its sturdy structure and the cold temperature's preservation.
What Is the Bread Part of an Ice Cream Sandwich Made Of?
You're wondering what the bread part of an ice cream sandwich is made of? Well, it's typically made of cookies! They're specifically designed to be thin, soft, and chewy, making them the perfect vessel for holding your favorite ice cream flavor.
Can the Cookie Recipe for Ice Cream Sandwiches be Adapted to Make Grasshopper Ice Cream?
Yes, the cookie recipe for ice cream sandwiches can absolutely be adapted to make grasshopper ice cream sandwiches. Simply follow your best grasshopper recipe for the ice cream filling and use the same cookie recipe for the sandwich. It’s a delicious twist on a classic treat.
Conclusion
You've got this! You're now a master of cookie magic, ready to wow friends and family with your ice cream sandwiches.
Don't worry if you're thinking, 'But I'm not a pro baker!' – the beauty of this recipe lies in its simplicity. With a few easy steps, you'll be creating indulgent treats that will make everyone swoon.
So go ahead, get creative, and let your cookie magic shine!
Mario’s creativity shines through his ability to describe the sensory experience of enjoying ice cream. Whether he’s discussing the velvety texture, the explosion of flavors, or the delightful combinations of toppings and sauces, his words transport readers to a world of mouthwatering sensations. His descriptive language allows readers to imagine and savor the flavors even before taking the first bite.
Ice Cream Recipes
Chill Out: Best Cold Coffee Recipe Without Ice Cream!
Frozen coffee perfection is just a blend away, but can you handle the rich, velvety texture and deep flavor of this game-changing cold brew recipe?
You are searching for the best cold coffee recipe without ice cream, and you are about to discover it! Begin with a strong, bold instant coffee base and mix it with sugar, milk, and coffee ice cubes for a smooth texture. Adjust the bitterness and sweetness to your liking, and remember to freeze any extra coffee to avoid dilution. Blend until frothy, pour into a chilled glass, and drizzle with chocolate syrup for a visually appealing drink. With these tips, you will soon be enjoying a creamy, indulgent treat. Get ready to elevate your coffee experience!
Key Takeaways
- Utilize leftover South Indian filter coffee brew to make coffee ice cubes, ensuring a rich and intense flavor base.
- Blend instant coffee with cream and sugar to achieve a rich, velvety texture and aromatic flavor.
- Adjust bitterness and sweetness by varying coffee and sugar amounts to create a customized cold coffee recipe.
- Blend the coffee mixture until frothy and creamy, pouring it into a chilled glass for a pleasant cooling effect.
- Drizzle chocolate syrup for visual appeal and added flavor, serving the cold coffee immediately to maintain desired frothiness.
Coffee Brewing Essentials
What makes a traditional cold coffee recipe without ice cream truly outstanding is the quality of the freshly brewed South Indian filter coffee that serves as its foundation.
You'll notice that daily preparation of filter coffee demonstrates confidence and expertise in handling the brewing process. If you're new to brewing, don't worry! You can reference a filter coffee preparation video to learn specific brewing techniques that will elevate your coffee game.
The key takeaway is that using fresh brew for your cold coffee ensures top-notch flavor and aroma in the final drink. Prioritizing freshness is crucial, as it makes all the difference in the taste and quality of your cold coffee.
And here's a pro tip: don't let leftover brew go to waste! You can utilize it to make coffee ice cubes, which is a smart and resourceful move in coffee preparation.
The Restaurant Style Experience
Walking into an Indian restaurant or cafe, you're often greeted by the unmistakable presence of cold coffee, a frothy and creamy treat that's hard to resist. This indulgent drink is a staple in many Indian eateries, and its aromatic flavor is sure to tantalize your taste buds.
The secret to its irresistible charm lies in its rich, velvety texture, which is typically achieved by blending instant coffee granules with cream and sugar. The result is a sweet and light iced coffee that's perfect for hot summer days.
When you order a cold coffee at an Indian restaurant, you can expect a visually stunning presentation. Your drink is likely to be topped with a generous dollop of whipped cream, adding an extra layer of creaminess to the already-rich coffee. Some restaurants may even drizzle chocolate syrup on top, further enhancing the flavor and aroma of the coffee.
Whether you're in the mood for a pick-me-up or a sweet treat, the restaurant-style cold coffee experience is sure to hit the spot. So go ahead, indulge in this creamy delight, and let the rich flavors transport you to a state of pure bliss.
Top Tips for Customization
Now that you've experienced the rich flavors of restaurant-style cold coffee, take your coffee game to the next level by experimenting with these top tips for customization.
You can adjust the bitterness and sweetness of your cold coffee recipe to suit your taste preferences by tweaking the amount of coffee and sugar. Try using powdered sugar or simple syrup for a smoother texture compared to granulated sugar.
If you're in a hurry, instant coffee granules can be a quick alternative to brewed coffee. For an enhanced flavor, boil and cool the milk before blending it with coffee, sugar, and ice cubes. This chilled milk adds a richness to your cold coffee that's hard to beat.
Another hack is to freeze leftover coffee brew into ice cubes, which can be used to chill your cold coffee without diluting the flavor. By experimenting with these tips, you'll be well on your way to creating a customized cold coffee recipe that's all your own.
Easy Cold Coffee Recipe
Now that you've got the basics of customization down, it's time to get to the heart of this easy cold coffee recipe.
You'll start by gathering your cold coffee essentials.
Then it's time to blend to perfection.
Finally, you'll get to balance your coffee and sugar to your taste.
Cold Coffee Essentials
To craft the perfect cold coffee, you'll need just four essential ingredients: instant coffee, sugar, milk, and ice cubes. These simple components will come together to create a refreshing and delicious drink that's perfect for hot summer days.
Here are the cold coffee essentials you'll need:
- Instant coffee: This is the base of your cold coffee, providing a rich and intense flavor.
- Sugar: Add sweetness to your cold coffee with sugar, adjusting the amount to your taste.
- Milk: Milk adds a creamy texture and helps to balance out the bitterness of the coffee.
- Ice cubes: Ice cubes chill and dilute the coffee, making it perfect for sipping on a hot day.
With these ingredients, you'll be well on your way to creating a cold coffee that's tailored to your taste preferences. Don't be afraid to experiment and adjust the amounts of each ingredient to suit your liking. Remember, the key is to keep it simple and let the flavors shine through.
Blend to Perfection
Blend instant coffee, sugar, and chilled milk together in a blender to create a smooth and creamy cold coffee that's perfect for hot summer days. By doing so, you'll get an invigorating drink without the richness of ice cream. This easy cold coffee recipe is ideal for those who prefer a lighter and more straightforward version of their favorite brew.
As you blend the ingredients, you'll notice the smooth texture and frothy consistency that's similar to a coffee shop-style drink.
The absence of ice cream allows the coffee flavor to shine through in every sip, making it a great option for those who want to taste the coffee without added sweetness or creaminess.
Coffee and Sugar
Combining instant coffee powder with sugar in the right proportions sets the tone for a deliciously balanced cold coffee drink that suits your taste preferences. You can adjust the amount of sugar to your liking, as it plays a pivotal role in enhancing the overall flavor profile of the cold coffee.
The blend of coffee and sugar creates a harmonious base for the creamy and frothy texture of the cold coffee.
Here's what you need to keep in mind when working with coffee and sugar:
- Balance is key: Find the perfect balance between the bitterness of the coffee and the sweetness of the sugar to create an invigorating cold coffee drink.
- Adjust to taste: Add more or less sugar depending on your personal preference for sweetness.
- Quality matters: Use high-caliber instant coffee powder to guarantee a smooth and rich flavor.
- Chill and enjoy: Mix the coffee and sugar with chilled milk and pour over ice cubes for a revitalizing cold coffee drink that's perfect for hot summer days.
Blending and Serving Secrets
As you prepare to serve your cold coffee, remember that the key to a velvety-smooth texture lies in the blending process. You'll want to blend your coffee mixture until it's frothy and creamy, which will enhance the overall drinking experience.
Once you've achieved the perfect blend, it's time to serve. Pour your cold coffee into a chilled serving glass to keep the drink pleasantly cool. To add an extra touch of visual appeal, drizzle a small amount of chocolate syrup into the glass before pouring in the coffee. This will create a beautiful, Instagram-worthy effect.
Now, it's vital to serve your cold coffee immediately after blending. This will help maintain the desired frothiness of the drink, which is important for a creamy and indulgent treat without ice cream.
Step-by-Step Photo Guide
Now that you've mastered the blending and serving secrets, let's break down the process visually with a step-by-step photo guide to make sure you're creating the perfect cold coffee every time. This guide will walk you through each step, ensuring your drink turns out invigorating and delicious.
Here's a sneak peek at what you'll be doing:
- Blend instant coffee, sugar, and warm water until frothy to create a flavorful base. This is where the magic begins!
- Add chilled milk and ice cubes to create a creamy and revitalizing texture. You'll be amazed at how well these ingredients come together.
- Serve the cold coffee immediately after blending for the best taste experience. Don't let it sit around, or it might lose its charm.
- Garnish the serving glasses with melted chocolate or chocolate syrup for an extra touch. This is where you can get creative and make it your own.
Thirst Quenchers Beyond Coffee
As you look for a break from cold coffee, you'll discover a world of thirst quenchers that are perfect for hot summer days.
You'll find that invigorating drinks like watermelon mojito, turmeric milk, and more offer a variety of flavors and health benefits.
Now, let's explore some of these summer refresher drinks that you'll love!
Summer Refresher Drinks
Beat the heat with these unique summer revitalizer drinks that go beyond coffee, offering a cool and rejuvenating experience on a hot summer afternoon.
You don't need a cold coffee recipe to quench your thirst; try these natural immunity-boosting drinks instead! They're perfect for staying revitalized and hydrated during the summer season.
Here are some invigorating options you might enjoy:
- Watermelon Mojito: A sweet and tangy twist on the classic mojito, packed with vitamin C and antioxidants.
- Turmeric Milk: A warm-weather favorite that's anti-inflammatory and soothing for the skin.
- Paal Sarbath: A traditional Indian drink that's sweet, creamy, and packed with nutrients.
- Wheatgrass Juice: A revitalizing and healthy drink that's rich in vitamins and minerals.
These summer revitalizer drinks are more than just a chilled beverage; they offer a variety of flavors and health benefits that'll keep you coming back for more.
Watermelon Mojito Delight
When the summer sun starts to sizzle, quench your thirst with an invigorating Watermelon Mojito Delight, a revitalizing drink that's as cool as it's healthy.
This rejuvenating beverage is a perfect alternative to making cold coffee, especially if you're looking for a drink without the richness of an ice cream recipe. Rich in antioxidants, vitamins A and C, and electrolytes, the Watermelon Mojito Delight is a healthy choice that'll keep you hydrated and energized.
The combination of watermelon and mint creates a cool and invigorating drink that's perfect for hot days or post-workout replenishment. What's more, this drink aids in digestion, helps with weight management, and promotes skin health due to its high water content.
Turmeric Milk Benefits
You can turn to turmeric milk as a comforting alternative to cold coffee, especially during the colder months when its anti-inflammatory properties can provide an extra layer of protection against seasonal illnesses. As you cozy up with a warm cup, you'll appreciate the soothing and relaxing effects that can help you unwind before bedtime.
Here are some benefits you can look forward to:
- Immunity booster: Turmeric milk is a natural way to boost your immune system, especially during cold and flu seasons.
- Aids digestion: The spices in turmeric milk can help with digestion and promote overall well-being.
- Soothes the mind and body: The comforting warmth of turmeric milk can calm your mind and body, making it an excellent choice before bed.
- A healthy alternative: Unlike sugary coffee drinks made with ground coffee beans, a tablespoon of instant coffee, and loads of sugar, turmeric milk is a healthy and comforting choice that's easy to make with just a few tablespoons of warm milk and a pinch of turmeric.
Reader Feedback and Ratings
By sharing your thoughts and ratings, you directly influence the evolution of this cold coffee recipe, helping to refine it to your taste preferences. Your input matters, and we encourage you to leave comments about your experience with this cold coffee recipe without ice cream.
Did you find the perfect balance of coffee flavor and sweetness? Or did you adjust the amount of sugar to your liking? Perhaps you experimented with different ratios of coffee to milk, creating a frothy mixture that's just right for you.
Your feedback is invaluable in shaping the future of this recipe. Positive comments and high ratings indicate that we're on the right track, while constructive criticism helps us identify areas for improvement.
Cold Coffee Variations Explained
Six popular cold coffee variations have emerged, each with its unique twist on the classic recipe, and they're worth exploring to find your perfect cup. You can experiment with different brewing methods, coffee beans, and serving styles to create a personalized coffee recipe.
Want to add some richness to your coffee? You can try using full-fat milk or whipped cream to give it a creamy texture.
Here are some popular cold coffee variations you might enjoy:
- Japanese Iced Coffee: brewed hot coffee poured over ice, resulting in a smooth and low-acidity coffee
- Vietnamese Coffee: brewed in a small metal filter called a phin, served over ice with sweetened condensed milk
- Cold Brew: steeped in cold water for an extended period, resulting in a low-acidity and smooth coffee
- Iced Latte: espresso shots mixed with milk and ice, topped with a layer of foam or whipped cream
Frequently Asked Questions
How to Make the Best Iced Coffee Without Ice?
You're wondering how to make the best iced coffee without ice? Simply blend strong brewed coffee, sugar, and chilled milk, then adjust to taste; you'll get a smooth, creamy drink without the need for ice cubes!
Can You Just Chill Hot Coffee to Make Iced Coffee?
You can try chilling hot coffee, but it'll likely result in a watered-down, less flavorful drink due to melting ice, which affects the coffee's chemical composition and flavor profile.
Is There a Trick to Iced Coffee?
"Rome wasn't built in a day," and neither is a great iced coffee. You'll need to brew strong coffee, chill it slowly, and adjust the ratio of coffee to water to avoid a weak or bitter taste.
How to Make Cold Coffee Barista?
You'll make a cold coffee barista by blending instant coffee, sugar, and warm water, then mixing it with chilled milk for a frothy texture, and garnishing with chocolate syrup for a delightful touch.
Can I Use the Same Method for Making Cold Coffee Without Ice Cream to Make a Chocolate Milkshake Without Ice Cream?
Looking for the best chocolate milkshake recipe without ice cream? You can easily adapt the method for making cold coffee without ice cream to create a delicious chocolate milkshake. Simply substitute the coffee with chocolate syrup or cocoa powder for a creamy, satisfying treat.
Conclusion
As you raise the glass to your lips, the rich aroma of cold coffee envelops you, transporting you to a sunny morning patio.
You've crafted a revitalizing escape from the summer heat, a chilled oasis in a cup.
With every sip, the flavors meld together in perfect harmony, a symphony of taste that leaves you wanting more.
You're now a cold coffee connoisseur, ready to shake off the heat and savor the serenity.
Mario’s creativity shines through his ability to describe the sensory experience of enjoying ice cream. Whether he’s discussing the velvety texture, the explosion of flavors, or the delightful combinations of toppings and sauces, his words transport readers to a world of mouthwatering sensations. His descriptive language allows readers to imagine and savor the flavors even before taking the first bite.
-
Frozen Delights1 week ago
Beginner’s Guide to Ice Cream Making: Tips and Tricks on Page 9!
-
Vetted2 days ago
15 Best Ice Cream Makers Under $200 to Satisfy Your Sweet Tooth
-
Frozen Delights6 days ago
Ice Cream and Diarrhea: Understanding the Link and How to Avoid It!
-
Frozen Delights1 week ago
Anderson's Ice Cream: The Sweet Secret to Unforgettable Flavors!
-
Frozen Delights7 days ago
The Difference Between Ice Cream and Popsicles: Explained!
-
Ice Cream Recipes1 week ago
Creamy Perfection: Best Homemade Vanilla Ice Cream Recipes for Ice Cream Makers!
-
Frozen Delights1 week ago
Sonic the Hedgehog Ice Cream: A Nostalgic Treat for Fans!
-
Frozen Delights2 days ago
Common Ice Cream Questions: All You Need to Know About Your Favorite Treat!