Connect with us

Frozen Delights

How to Properly Store Ice Cream to Prevent Freezer Burn

Keep your ice cream fresh and creamy by learning essential storage tips to prevent freezer burn; discover the secrets to perfect preservation!

Published

on

prevent freezer burn effectively

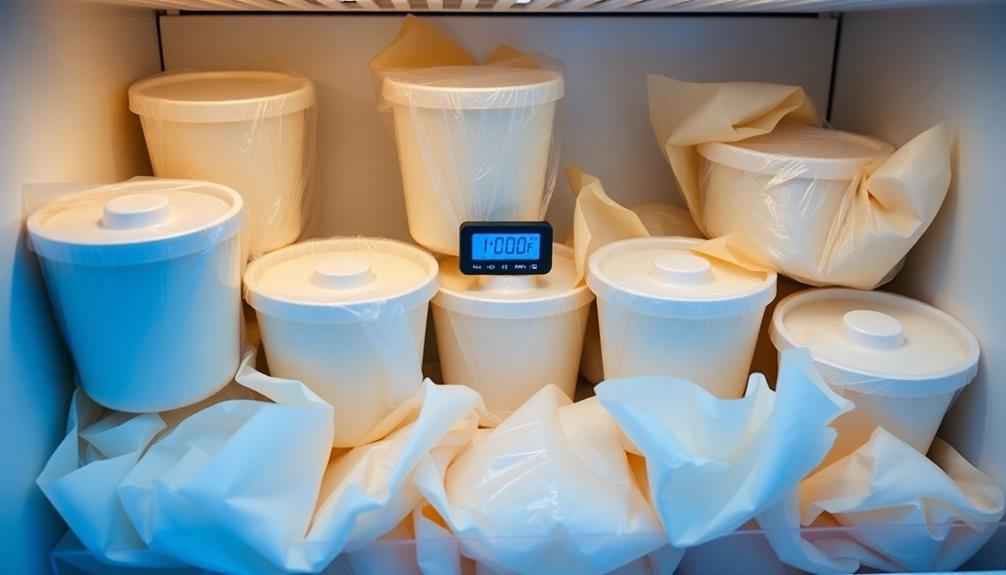
To properly store ice cream and prevent freezer burn, keep it in an airtight container and seal it tightly. This limits air exposure, which causes moisture loss. Store your ice cream at the back of the freezer, away from the door, to avoid temperature fluctuations. Consider placing a piece of plastic wrap on the surface before sealing to trap moisture. Regularly check the seals on your containers to guarantee they're still airtight. Following these tips will help maintain your ice cream's creamy texture and flavor. You're just steps away from perfecting your storage techniques.

Key Takeaways

  • Store ice cream in airtight containers to limit air exposure and reduce the risk of freezer burn.
  • Keep ice cream in the back of the freezer for stable temperature and minimal fluctuations.
  • Cover the surface of the ice cream with plastic wrap before sealing to minimize moisture evaporation.
  • Maintain a freezer temperature of 0°F or colder for optimal preservation.
  • Regularly check container seals and organize items to reduce door opening time.

Understanding Freezer Burn
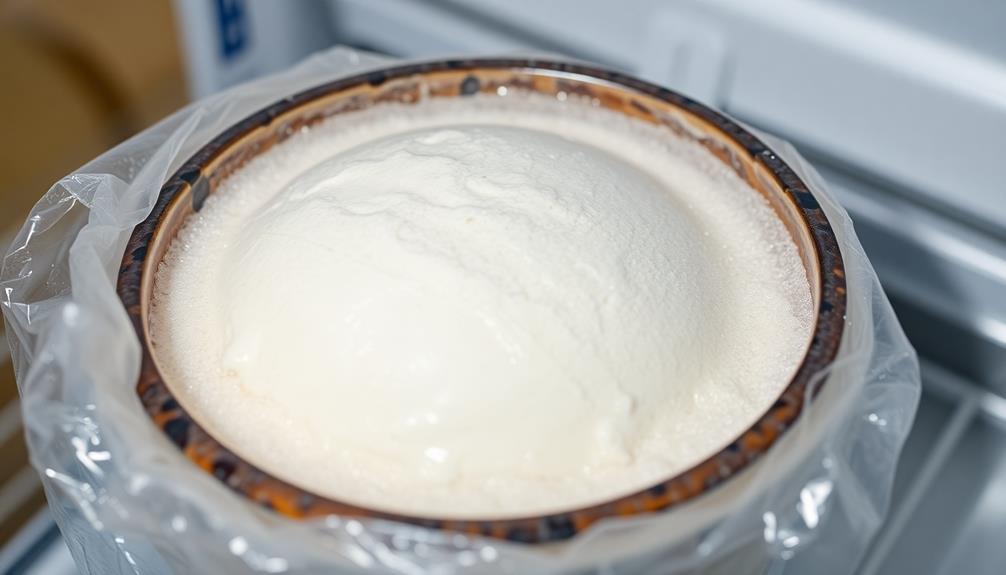
causes and effects explained

Freezer burn is a common issue that can ruin your ice cream experience. It happens when your ice cream is exposed to cold, dry air, leading to moisture loss and resulting in unsightly ice crystals on the surface.

You might notice a dry, discolored layer forming, which can make your once-smooth treat icy and crunchy, severely impacting its texture. While it's important to be aware of freezer burn, don't worry—it's still safe to consume, though it mightn't taste as good.

To maintain your ice cream's original quality, understanding freezer burn is vital. The main culprit is cold, dry air that seeps into your ice cream container.

To combat this, consider using airtight containers or filling them to the brim to minimize air exposure. Also, make sure your freezer is set to the right temperature, as fluctuations can lead to moisture loss.

Implementing these prevention techniques can help you enjoy your ice cream just as it was meant to be: creamy and delicious. By taking a few simple steps, you can keep freezer burn at bay and savor every scoop!

Advertisement

Signs of Freezer Burn

ice crystals on food

When you dig into a tub of ice cream, it's important to watch out for signs of freezer burn that can spoil your treat. One of the first things to look for is a top layer covered in ice crystals or frost. This often indicates moisture loss, which is a clear sign that your ice cream isn't in ideal condition.

Depending on the severity, you might see anything from minor crystals to a thick frost layer that makes the ice cream look unappetizing.

Another telltale sign of freezer burn is a change in texture. Ice cream should be creamy, but freezer-burned ice cream often becomes grainy or icy, greatly detracting from that expected smoothness.

Finally, don't overlook flavor quality. Freezer burn can lead to a bland or off taste, indicating that the ice cream has lost its deliciousness due to moisture evaporation.

To avoid disappointment, always perform a visual inspection before indulging. If you notice any of these warning signs, it might be time to rethink your ice cream storage practices.

Prevention Techniques
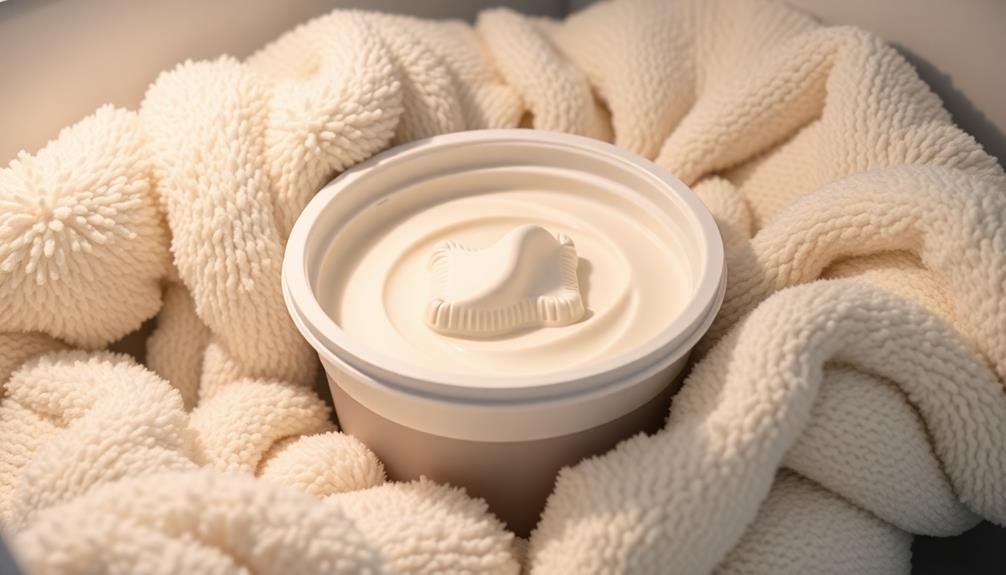
effective risk mitigation strategies

To keep your ice cream in top condition and prevent freezer burn, you can implement a few effective strategies.

First, maintain your freezer temperature at 0°F or colder. This greatly reduces the risk of freezer burn, ensuring your ice cream stays creamy and delicious.

Advertisement

Next, store ice cream upside down. This traps any melted moisture against the lid, preventing warm air from reaching the ice cream's surface.

Using an airtight container is essential. If you don't have one handy, tightly cover your ice cream with plastic wrap to minimize air exposure, which is a primary cause of freezer burn.

Additionally, keep your ice cream at the back of the freezer, away from the door. This placement helps avoid temperature fluctuations that can lead to freezer burn.

Proper Storage Practices
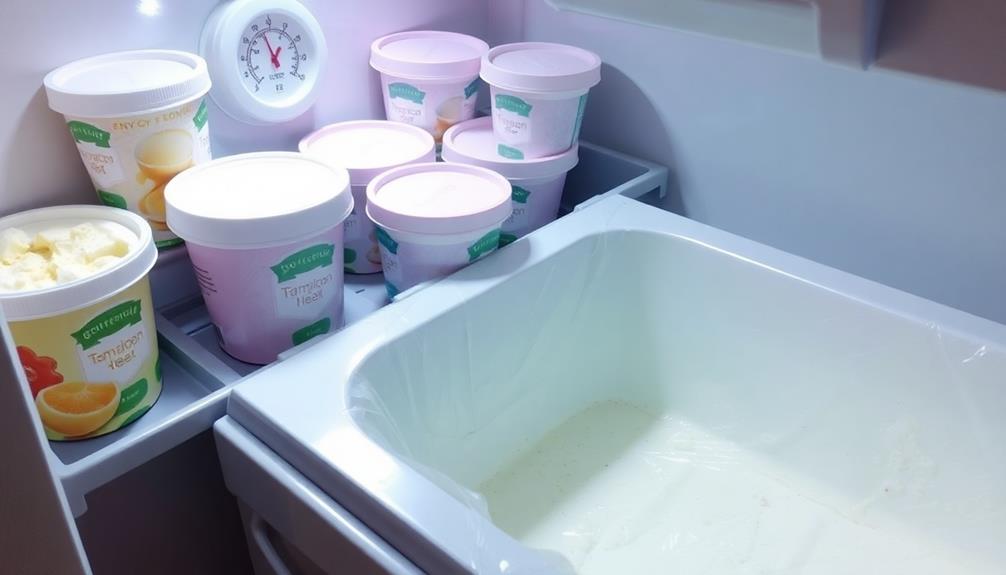
effective storage techniques guidelines

To keep your ice cream in top shape, store it in the back of the freezer where it's consistently cold.

Using airtight containers is key to preventing freezer burn, so make sure to seal them tightly.

Ideal Freezer Location

The best place for your ice cream is in the back of the freezer, where temperatures stay more stable. This perfect freezer location helps you avoid freezer burn and maintain that ideal creamy texture. Avoid placing your ice cream in the freezer door; that area experiences the most temperature fluctuations due to frequent opening, compromising the temperature for ice cream.

Advertisement

To enhance insulation, position your ice cream behind other items, like frozen vegetables or leftovers, creating a consistent cold environment. Here's a quick reference table for best storage:

Location Benefits Tips
Back of Freezer Stable temperature, minimal exposure Store ice cream here
Middle Shelf Moderate temperature fluctuations Good for regular items
Freezer Door Frequent temperature changes Avoid storing ice cream
Behind Insulation Extra protection from warm air Use other frozen items

Remember to perform regular checks on your ice cream containers to verify they have a secure seal. This prevents air from entering and causing freezer burn, keeping your ice cream fresh and delicious.

Airtight Container Importance

Using airtight containers is essential for keeping your ice cream fresh and preventing freezer burn. These containers considerably limit air exposure, which is a primary contributor to freezer burn. Make sure the lid fits tightly to prevent cold, dry air from entering and causing moisture loss.

Before sealing, consider covering the surface of the ice cream with plastic wrap or parchment paper. This simple step can further reduce air space and minimize evaporation, enhancing the quality of your ice cream.

Regularly check the integrity of seals on your containers; compromised seals can increase the risk of freezer burn.

Advertisement

For ideal preservation, store ice cream in shallow, wide containers. This shape helps maintain a more consistent temperature and reduces air exposure, further preventing freezer burn.

When you choose the right storage methods, your ice cream will remain creamy and delicious, making every scoop a treat.

Consumption of Freezer Burned Ice Cream
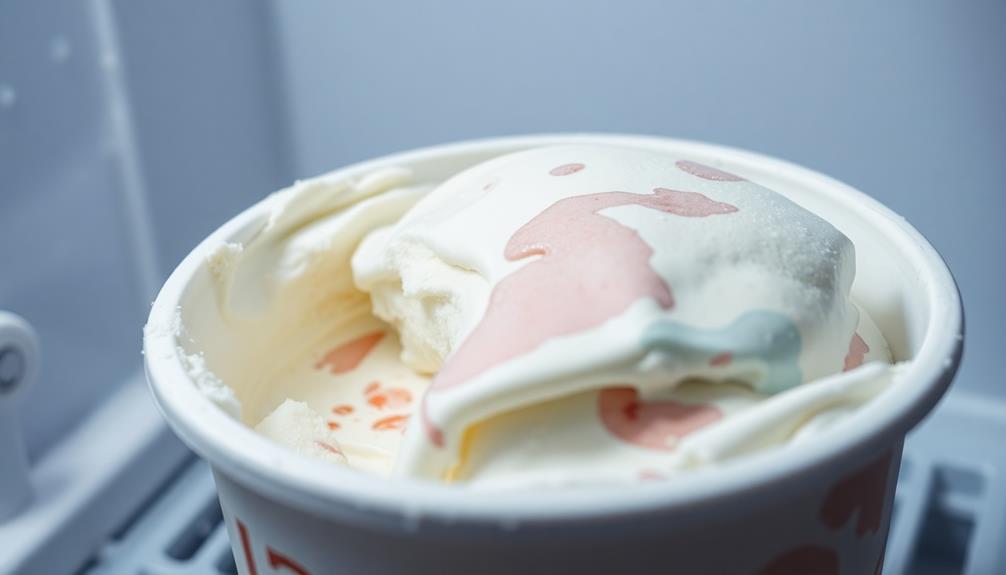
freezer burned ice cream consumption

If you find freezer burned ice cream in your freezer, don't worry—it's still safe to eat.

However, the texture and flavor mightn't be as enjoyable as fresh ice cream.

You can try scraping off the top layer to improve the experience, but keep in mind that it may not fix everything.

Safety of Consumption

Many people worry about the safety of consuming freezer burned ice cream, but there's good news: it's completely safe to eat.

Advertisement

Freezer burn doesn't mean your ice cream is spoiled or contaminated. Instead, it simply indicates compromised texture and flavor, which can result in a less enjoyable experience.

Here are some key points to keep in mind:

  • Freezer burned ice cream poses no food safety concerns.
  • Scraping off the top layer may improve taste, but it won't restore the original quality.
  • Proper storage can help prevent freezer burn from happening in the first place.
  • If you love ice cream, you might as well enjoy it, even if it's freezer burned!

Flavor and Texture Impact

While freezer burned ice cream is safe to eat, its flavor and texture can be greatly affected. When ice cream suffers from freezer burn, you'll notice a bland or off taste due to moisture loss and the development of ice crystals. This alteration can ruin the original flavor profile you expect from your favorite treat.

Additionally, the texture becomes grainy or icy, making each bite less enjoyable than fresh ice cream.

Although scraping off the affected top layer may improve the taste and texture, it won't guarantee a return to the original quality. You might find that some unpleasant flavors still linger.

To truly savor your ice cream experience, it's crucial to store it properly to minimize freezer burn. Regularly check your ice cream storage and verify it's sealed tightly to prevent air exposure, which leads to moisture loss.

Advertisement

Additional Storage Tips

maximize space efficiently

Proper ice cream storage is essential for maintaining its creamy texture and delightful flavors. To keep your ice cream fresh and prevent freezer burn, consider these additional storage tips:

  • Use vacuum-sealed bags for long-term storage to eliminate air exposure.
  • Regularly label containers with dates to track freshness.
  • Store different flavors separately to prevent flavor transfer.
  • Rotate stock in your freezer by placing newer containers behind older ones.

By following these tips, you can effectively store your ice cream and guarantee it remains delicious.

When you label containers, it helps you consume older ice cream first, reducing the risk of freezer burn. Also, keeping distinct flavors in separate containers prevents unwanted mingling of tastes.

Minimizing how often you open the freezer is key, as each time you do, warm air enters, causing temperature fluctuations that can harm your ice cream.

Frequently Asked Questions

How to Prevent Ice Cream From Getting Freezer Burn?

To prevent ice cream from getting freezer burn, store it in airtight containers, keep it at 0°F or lower, and position it at the back of the freezer, away from temperature fluctuations.

What Is the Best Way to Store Ice Cream in the Freezer?

To store ice cream effectively, keep it at the back of the freezer in an airtight container. Make sure it's tightly sealed to minimize air exposure, ensuring it stays fresh and delicious for longer.

How Do You Store Ice Without Freezer Burn?

To keep ice pristine, treat it like treasure. Seal it tight in an airtight container, chill it at zero degrees, and store it deep in the freezer—away from fickle doors and shifting temperatures.

Advertisement

How Long Does Ice Cream Last Before Freezer Burn?

Ice cream typically lasts up to a year in the freezer before freezer burn sets in, but homemade varieties are best enjoyed within three months. Always check for signs of freezer burn to guarantee quality.

Conclusion

Storing ice cream isn't just about keeping it frozen; it's like preserving a moment of joy. By preventing freezer burn, you're safeguarding those sweet memories, ensuring each scoop tastes as delightful as the first. Treat your ice cream like a cherished keepsake—wrap it up snugly and store it wisely. When you take the time to protect what you love, you're not just saving dessert; you're savoring life's little pleasures, one creamy bite at a time.
Beyond the realm of flavor and technique, Adriano recognizes the importance of sustainability and conscious consumption. His writing often explores eco-friendly practices within the ice cream industry, highlighting the use of locally sourced ingredients, reducing waste, and supporting ethical production methods.

Advertisement

Frozen Delights

DIY Ice Cream Scoop Cleaning and Maintenance Guide

Discover essential tips for DIY ice cream scoop cleaning and maintenance that will elevate your scooping game, and find out what you might be missing!

Published

on

By

ice cream scoop care guide

To keep your ice cream scoop clean and in great shape, start by rinsing it under lukewarm water immediately after use. Use a non-abrasive sponge with warm, soapy water to scrub it, paying attention to hard-to-reach areas. After rinsing thoroughly, dry it completely to prevent moisture build-up. Regularly inspect your scoop for wear, and replace it if you notice significant damage. Remember, maintaining your scoop can enhance the quality of every scoop of ice cream. Want to guarantee you're doing everything right for peak performance? You'll discover even more helpful tips ahead.

Key Takeaways

  • Regularly clean ice cream scoops using warm, soapy water to maintain hygiene and prevent bacteria buildup.
  • Hand washing is preferred to avoid oxidation and preserve the scoop's integrity.
  • Disassemble the scoop for thorough cleaning, soaking parts in warm, soapy water for at least 15 minutes.
  • Inspect scoops for wear or damage regularly and replace them if significant tarnish or malfunctions are noticed.
  • Establish a regular cleaning schedule, including daily washing and weekly inspections, to ensure optimal performance.

Importance of Regular Cleaning

consistent cleanliness promotes health

When you regularly clean your ice cream scoop, you not only guarantee hygiene but also enhance your ice cream experience. Regular cleaning is essential to prevent the buildup of bacteria and old mix residue. This maintains hygiene and safety, which is especially important when preparing food.

By hand washing your scoop instead of using a dishwasher, you preserve its integrity and avoid oxidation, which can cause tarnishing. Rinsing your scoop immediately after each use is another important step. This simple act prevents flavor crossover, so you'll enjoy the distinct taste of each ice cream flavor without mixing them.

Cleaning your scoop with warm water further enhances its performance; it helps prevent ice cream from sticking, making scooping easier and more efficient. Maintaining and regularly cleaning your scoop not only extends its lifespan but also improves the overall quality and presentation of the ice cream you serve.

A well-cared-for scoop makes a noticeable difference in the ice cream experience, guaranteeing every scoop is as delightful as the last. So, make regular cleaning a habit, and you'll elevate your ice cream enjoyment to a whole new level!

Essential Cleaning Supplies

must have cleaning essentials

To keep your ice cream scoop in top condition, having the right cleaning supplies is vital. Start with a non-abrasive sponge or cloth, as this will help you clean without scratching the surface.

Don't forget a food-grade brush; it's perfect for getting into those hard-to-reach areas that a sponge might miss.

Advertisement

Next, you'll need a sanitizer solution, like Stera-Sheen, which is important for disinfecting your scoop after cleaning. This step eliminates harmful bacteria and guarantees your scoop remains food safe.

Additionally, using a food-safe lubricant on the scoop's moving parts will help maintain peak performance and prevent wear over time.

Storing your cleaning supplies properly is key; keep them in a cool, dry place to preserve their effectiveness.

Make sure all chemicals are sealed tightly to prevent leaks or spills. Regularly check your supplies and replace any worn or damaged items to uphold hygiene standards and prolong your scoop's lifespan.

Step-by-Step Cleaning Process

systematic cleaning procedure guide

A thorough cleaning process guarantees your ice cream scoop stays in excellent condition. Follow these steps for ideal maintenance:

Step Action
1. Drain Leftovers Remove any leftover ice cream mix from the scoop.
2. Rinse Rinse the scoop under lukewarm clean water to eliminate residues.
3. Disassemble Carefully disassemble the scoop following the manufacturer's guidelines.
4. Soak Soak the parts in warm, soapy water for at least 15 minutes to loosen debris.
5. Scrub and Rinse Use a non-abrasive sponge to scrub the parts and rinse thoroughly with warm water.

After rinsing, make certain to dry all components completely. This step is essential; moisture can lead to mold growth, which you want to avoid. By regularly maintaining your ice cream scoop with this cleaning process, you can guarantee it's always ready for your next delicious treat. Keep it clean, and your scoop will serve you well for years to come!

Advertisement

Common Issues and Solutions

challenges and resolutions identified

Ice cream scoops can encounter a variety of common issues that affect their performance and longevity. By addressing these problems early, you can keep your scoop in great shape and guarantee that you can enjoy your favorite frozen treats without hassle.

Here are some common issues and their solutions:

  1. Tarnishing: If you notice tarnishing, it's likely due to oxidation from the dishwasher. To prevent this, always hand wash your scoop and regularly clean it after use.
  2. Malfunctioning Scoop: If your scoop struggles to penetrate frozen tubs, it may have been exposed to extreme temperatures. Avoid using boiling water or excessive heat to protect its integrity.
  3. Wear and Damage: Regularly inspect your scoop for cracks or wear. This is vital for performance and helps prevent cross-contamination. If you find any damage, consider replacing it.

For best results, remember to rinse your scoop with warm water after each use and allow it to dry thoroughly.

Enhancing Ice Cream Quality

improving ice cream standards

To enhance your ice cream quality, start by selecting the freshest ingredients you can find.

You'll also want to keep a close eye on your storage temperatures, ensuring they stay between -18°C to -12°C.

These steps help maintain the flavor and texture you're aiming for in every scoop.

Optimal Ingredient Selection

Crafting exceptional ice cream hinges on the quality of your ingredients. To elevate your ice cream mix, focus on using the best practices that enhance flavor and texture. Here are three key components to take into account:

  1. Fresh, High-Quality Ingredients: Always opt for fresh cream, milk, and sugar. These foundational components greatly impact the overall taste and texture of your ice cream.
  2. Natural Flavorings: Choose pure vanilla extract or fresh fruit purees over artificial additives. This switch can profoundly improve the authenticity and richness of your ice cream.
  3. Fat and Sugar Ratio: Monitor your fat and sugar levels closely. Aim for a fat content of around 14-20% for a creamier texture, while maintaining balanced sugar levels to prevent iciness during freezing.

Additionally, think about using natural stabilizers and emulsifiers like guar gum or lecithin to enhance mouthfeel and prevent ice crystal formation.

Regular taste tests with seasonal ingredients can further refine your flavor profiles, helping you craft a truly delightful ice cream experience.

Advertisement

Consistent Temperature Monitoring

Maintaining consistent temperatures is essential for producing high-quality ice cream. To achieve the perfect texture and flavor, you should store soft-serve ice cream between -18°C and -12°C. Regular temperature checks guarantee that these conditions are met, preventing any fluctuations that could compromise your ice cream's consistency and safety.

It's important to calibrate your equipment frequently. This practice helps eliminate temperature variations that could negatively affect the ice cream quality. Utilize thermometers to monitor both storage and serving temperatures; this step is critical for food safety and quality assurance in your operations.

Don't forget to document temperature checks. Keeping a reliable record not only aids compliance with health and safety standards but also guarantees that every batch of ice cream is safe for consumption.

Lastly, train your staff on the importance of temperature control. They need to understand how essential it's to preserve the integrity of your ice cream flavors and textures.

Dishwasher Risks for Scoops

dishwasher safety for scoops

When you toss your aluminium ice cream scoop in the dishwasher, it risks oxidizing and tarnishing, which can affect its look and performance.

The heat can also cause the conductive fluid inside to solidify, impairing its functionality.

Advertisement

To keep your scoop in top shape, hand washing is the best option.

Oxidation and Tarnish Issues

Oxidation and tarnish can quickly diminish the beauty and functionality of your aluminium ice cream scoop, especially if you toss it in the dishwasher. The exposure to harsh dishwasher detergents can initiate a chemical reaction that leads to blackening and tarnishing of the scoop's surface. This oxidation process not only affects the aesthetic appeal but also compromises its functional quality.

Here are three key risks associated with dishwasher use for your scoop:

  1. Chemical Reactions: Detergents can react with aluminium, causing oxidation that's often permanent.
  2. Heat Damage: The excessive heat from dishwashers can solidify the conductive fluid inside hollow scoops, impairing heat transfer and performance.
  3. Long-Term Effects: Repeated dishwasher exposure may lead to irreversible tarnish and potential malfunction of your scoop.

If you notice oxidation, natural remedies like lemon juice, vinegar, or oxalic acid can help remove some of the tarnish, but they mightn't completely solve the issue.

To maintain your scoop's integrity and functionality, hand washing is the best option.

Hand Washing Recommendations

To keep your aluminium ice cream scoop in top shape, hand washing is the way to go. The dishwasher might seem convenient, but it poses risks that can damage your scoop over time. High heat and harsh detergents can lead to oxidation, causing blackening and tarnishing. Plus, the conductive fluid inside hollow scoops can solidify, impairing performance.

Advertisement

Instead, use warm water and a mild detergent to gently clean your scoop. After washing, be sure to dry it thoroughly to prevent moisture buildup. Avoid using boiling water, as extreme temperatures can harm the material and functionality.

Here's a quick reference for maintaining your ice cream scoop:

Action Recommended Approach Notes
Washing Hand wash with warm water Prevents oxidation
Drying Thoroughly dry Avoid moisture buildup
Storage Cool, dry place Extends lifespan of the scoop

Proper Water Contact Guidelines

safe water interaction practices

How can you guarantee your ice cream scoop stays in top shape? Proper water contact is key. Using warm water effectively not only helps melt the gelato but also makes scooping a breeze. Here are some guidelines to follow:

  1. Warm Water Rinse: Before you start scooping, rinse your scoop in warm water. This softens the ice cream, making it easier to scoop out perfect portions.
  2. Avoid Boiling Water: While warm water is beneficial, never use boiling water. Extreme temperatures can damage your scoop's integrity and reduce its lifespan.
  3. Regular Maintenance: Clean your scoop with warm water regularly. This practice keeps it functioning efficiently and prevents any unwanted flavor crossover between different ice cream flavors.

Maintenance Tips for Longevity

extend lifespan with care

Maintaining your ice cream scoop is essential for ensuring it lasts and performs well over time. After each use, hand wash your scoop with warm soapy water. This simple step prevents oxidation and keeps the scoop's integrity intact, as dishwasher exposure can lead to unwanted tarnishing.

Store your scoop in a cool, dry place, away from extreme temperatures. This helps protect the conductive fluid within the hollow design. Regularly inspect your scoop for any signs of wear or damage. If you notice significant tarnish that can't be cleaned or any malfunctions, it's time to replace it.

Avoid prolonged exposure to extreme heat or cold; this can impair your scoop's performance and lead to premature wear.

To enhance the scoop's longevity, consider resting it in warm water before use. This not only facilitates easier scooping but also reduces stress on the material.

Advertisement

Equipment Hygiene Best Practices

maintain clean equipment standards

To keep your ice cream scoops safe and sanitary, you need a regular cleaning schedule.

Clean and disinfect your scoops with food-safe agents after each use, and set aside time for a thorough deep clean weekly.

This routine will help you prevent bacterial contamination and guarantee your equipment stays in top shape.

Regular Cleaning Schedule

Establishing a regular cleaning schedule for your ice cream scoops is essential to guarantee they stay hygienic and perform at their finest.

This routine not only guarantees the cleanliness of your tools but also prevents any flavor crossover between different ice cream varieties.

Here's how you can manage your cleaning effectively:

Advertisement
  1. Daily Cleaning: After each use, wash and dry your ice cream scoop by hand using warm soapy water. Avoid boiling temperatures, as they can damage the scoop's material.
  2. Weekly Inspection: Take a moment each week to inspect your scoop for any signs of wear or damage. If you notice any issues, replace the scoop immediately to maintain peak performance.
  3. Proper Storage: Store your scoop in a cool, dry place, away from extreme temperatures that could impair its functionality.

Additionally, document your cleaning and maintenance procedures to guarantee compliance with hygiene standards and track the longevity of your equipment.

Following this regular cleaning schedule will keep your ice cream machine running smoothly and your scoops ready for delicious creations.

Proper Cleaning Agents

When it comes to keeping your ice cream scoop in top condition, using the right cleaning agents is essential. Always opt for food-safe cleaning agents as per the manufacturer's instructions. This guarantees that your scoop remains hygienic and safe for use.

Regularly wash your scoop by hand with warm, soapy water to prevent oxidation and maintain its integrity.

Avoid abrasive cleaners or sponges, as they can scratch the scoop's surface and create hiding spots for bacteria. Instead, stick with soft cloths or sponges designed for delicate items.

After cleaning, rinse the scoop thoroughly to remove any residual cleaning agents, which could affect the flavor of your ice cream.

Advertisement

Store all your cleaning supplies, including sanitizers, in a cool, dry place to maintain their effectiveness and prevent spills. This simple practice helps guarantee that your cleaning routine remains efficient and safe.

Staff Training for Safety

safety focused staff training

Training your staff on safety is essential for maintaining a clean and hygienic environment in your ice cream shop. By prioritizing food safety, you not only protect your customers but also foster a responsible workplace culture.

Here are three key areas to focus on during staff training:

  1. Handwashing and Glove Use: Make certain employees understand the importance of regular handwashing and proper glove usage when handling ice cream and toppings. This helps prevent cross-contamination.
  2. Allergen Awareness: Educate your team about common allergens found in ice cream and toppings. They should know how to handle customer inquiries regarding ingredient safety confidently.
  3. Routine Checks and Refresher Courses: Implement regular refresher courses on hygiene and safety protocols. Monitor staff performance through routine checks, providing constructive feedback to promote accountability in food safety.

Additionally, encourage your staff to utilize hand sanitizers at service points to enhance hygiene measures.

Frequently Asked Questions

How Do You Clean Ice Cream Scoops?

To clean ice cream scoops, wash them by hand with warm, soapy water and a non-abrasive sponge. Rinse well, soak in lemon juice or vinegar occasionally, and dry completely before storing to prevent moisture buildup.

How to Fix an Oxidized Ice Cream Scoop?

To fix an oxidized ice cream scoop, mix equal parts lemon juice and baking soda into a paste, apply it, and gently scrub. For tough tarnish, soak in vinegar-water solution before scrubbing with a food-safe brush.

How to Make Ice Cream Scoops Ahead of Time?

To make ice cream scoops ahead of time, pre-scoop into portions, freeze them on a parchment-lined sheet, and store in an airtight container. This way, you'll always have ready-to-serve ice cream on hand.

Advertisement

Why Do My Ice Cream Scoops Get Pitted?

Your ice cream scoops can get pitted like a weathered stone, primarily due to oxidation from harsh detergents and moisture trapped inside. Regular hand washing and inspecting for damage can help maintain their integrity and performance.

Conclusion

By keeping your ice cream scoop clean and well-maintained, you're not just prolonging its life; you're also ensuring every scoop is a delight. Think of it as giving your favorite dessert the royal treatment! Regular cleaning and proper maintenance will enhance the quality of your ice cream, making each serving a creamy masterpiece. So, don't overlook those simple steps—your customers (and their taste buds) will thank you for it!

Continue Reading

Frozen Delights

Pomegranate Spritz

Glimmering with pomegranate juice and sparkling wine, the Pomegranate Spritz is a refreshingly sophisticated cocktail that invites you to indulge in its vibrant flavors.

Published

on

By

refreshing pomegranate cocktail recipe

The Pomegranate Spritz is a refreshing Italian-inspired cocktail that combines tart pomegranate juice, effervescent sparkling wine, and a touch of citrusy lemon. Popularized in the 2000s, this sophisticated drink has become a beloved summertime favorite across Europe and the U.S. To make, you'll muddle pomegranate seeds, add the sparkling wine and lemon juice, then strain into a chilled coupe glass. Top it off with a garnish of pomegranate arils for a vibrant, visually stunning presentation. This easy-to-prepare cocktail encourages creativity and can be adjusted to suit your taste preferences – perfect for both intimate gatherings and larger celebrations.

Key Takeaways

  • The Pomegranate Spritz is a refreshing cocktail originating in Italy, combining pomegranate juice, sparkling wine, and soda water for a sophisticated flavor profile.
  • The cocktail features a balance of tart and sweet notes, making it a popular summertime favorite enjoyed in various settings.
  • The recipe requires minimal ingredients, including pomegranate juice, sparkling wine, lemon juice, and honey, allowing for quick preparation.
  • Garnishing the Pomegranate Spritz with pomegranate arils adds color, crunch, and extra flavor, enhancing the overall visual appeal and taste experience.
  • The Pomegranate Spritz represents a blend of tradition and innovation, encouraging creativity in mixology and cocktail crafting.

History

understanding our past events

Though the pomegranate has been cultivated for centuries, the pomegranate spritz is a relatively modern cocktail. The origins of this refreshing beverage can be traced back to Italy, where mixologists began experimenting with the tart, sweet flavor of pomegranate juice in the early 2000s.

Traditionally, the pomegranate spritz is made by combining pomegranate juice, sparkling wine, and a touch of soda water. This combination creates a vibrant, effervescent drink that perfectly balances the pomegranate's natural acidity with the lightness of the sparkling wine.

As the pomegranate spritz gained popularity in Italy, it soon began to spread across Europe and eventually made its way to the United States.

Today, this cocktail has become a beloved summertime favorite, offering a unique and sophisticated twist on the classic spritz formula. Whether enjoyed on a sunny patio or as a refreshing aperitif, the pomegranate spritz has cemented its place as a modern classic.

Recipe

cooking instructions and ingredients

Pomegranate Spritz is a refreshing and vibrant cocktail that captures the essence of the pomegranate fruit. This fizzy beverage combines the tart and sweet flavors of pomegranate juice with the effervescence of sparkling wine, creating a delightful balance that's perfect for any occasion.

Whether you're hosting a sophisticated dinner party or simply seeking a refreshing sip on a warm day, the Pomegranate Spritz is sure to impress. Its vibrant hue and elegant presentation make it a visually stunning addition to any gathering.

Advertisement

Ingredients:

  • 4 oz pomegranate juice
  • 2 oz dry sparkling wine
  • 1 oz freshly squeezed lemon juice
  • 1 tbsp honey (or to taste)
  • Ice cubes
  • Pomegranate arils for garnish (optional)

To prepare the Pomegranate Spritz, start by adding the pomegranate juice, lemon juice, and honey to a cocktail shaker filled with ice. Shake vigorously until well-chilled. Strain the mixture into a champagne flute or wine glass.

Top with the sparkling wine and stir gently to combine. Finally, garnish with a few pomegranate arils, if desired.

When making the Pomegranate Spritz, be sure to use a high-quality pomegranate juice and a dry, crisp sparkling wine to achieve the perfect balance of flavors.

Adjust the honey to your desired sweetness level. The garnish of pomegranate arils not only adds a beautiful touch but also provides a burst of fresh pomegranate flavor in every sip.

Cooking Steps

recipe preparation instructions

First, you'll want to muddle the pomegranate seeds in a cocktail shaker to release their juices.

Then, add the sparkling wine and a splash of lemon juice.

Advertisement

Step 1. Muddle Pomegranate Seeds in Cocktail Shaker

muddle pomegranate seeds cocktail

In your cocktail shaker, gently muddle the pomegranate seeds. Use the back of a spoon or a muddler to crush the seeds, releasing their vibrant juice and tangy aroma.

This action will create a luscious, ruby-red base for your Pomegranate Spritz. The invigorating scent of pomegranate can also uplift your mood, similar to how aromatherapy can stimulate the limbic system, enhancing your overall experience.

Next, add the vodka and freshly squeezed lemon juice. The acidity from the lemon will help balance the sweetness of the pomegranate.

Secure the lid and shake vigorously for about 10 seconds to thoroughly combine the ingredients.

Now, fill a highball glass with ice cubes. Strain the shaker contents over the ice, then top with chilled soda water.

The sparkling water will add a refreshing, effervescent touch to the cocktail.

Advertisement

Step 2. Add Sparkling Wine

incorporate sparkling wine

Why not add a splash of sparkling wine to your Pomegranate Spritz? Doing so will elevate the drink, adding a touch of effervescence and a hint of dryness to balance out the sweetness of the pomegranate.

Simply pour 2-3 ounces of your favorite dry sparkling wine into the cocktail shaker, being careful not to overfill it.

Once the sparkling wine is added, give the mixture a gentle stir to incorporate all the ingredients. This will help create a harmonious blend of flavors.

Strain the Pomegranate Spritz into a chilled glass, ensuring the fizz is preserved. You can garnish the drink with a few fresh pomegranate seeds or a lemon twist for a vibrant finishing touch.

The sparkling wine adds a festive touch to the Pomegranate Spritz, making it the perfect cocktail for celebrating special occasions or enjoying a relaxing evening.

The combination of the sweet pomegranate and the dry, bubbly wine creates a refreshing and sophisticated sip.

Advertisement

Step 3. Add Lemon Juice

incorporate lemon juice

To add a fresh, citrusy note to your Pomegranate Spritz, squeeze a generous amount of lemon juice into the cocktail shaker. This bright, acidic element will help balance the sweetness of the pomegranate and create a more dynamic, refreshing flavor profile.

When selecting your lemon, opt for a juicy, ripe variety that's heavy for its size. Roll it firmly on the counter before cutting to help release more of the aromatic oils.

Slice the lemon in half and, using a citrus reamer or the tines of a fork, extract as much juice as possible, being careful to avoid any seeds.

Add the lemon juice to the shaker, along with the pomegranate juice and simple syrup. Secure the lid and shake vigorously for 10-15 seconds to fully incorporate the ingredients.

Strain the mixture into your serving glass and top with chilled sparkling wine. Garnish with a lemon twist for an extra pop of citrus.

Step 4. Strain Into Chilled Coupe Glass

strain into chilled glass

After vigorously shaking the ingredients, it's time to strain the cocktail into a chilled coupe glass. This step is crucial for achieving the desired texture and appearance of the Pomegranate Spritz.

Using a fine-mesh strainer, carefully pour the mixture through, ensuring to catch any pulp or ice chips. The strainer will help create a smooth, well-integrated drink, free from any unwanted solids.

Advertisement

Once strained, the vibrant, ruby-red liquid should be poured directly into the chilled coupe glass. This style of glass, with its wide, shallow bowl, is perfect for showcasing the Pomegranate Spritz's beautiful color and aroma.

The chilled glass will also help maintain the cocktail's refreshing temperature, allowing you to fully enjoy its balanced flavors.

With the cocktail now strained and in its serving vessel, you're ready to garnish and serve this refreshing Pomegranate Spritz. The final touch will elevate the drink's presentation and amplify its aromatic qualities.

Step 5. Garnish With Pomegranate Arils

garnish using pomegranate arils

For the final touch, garnish the Pomegranate Spritz with a few pomegranate arils. These ruby-red jewels not only add a burst of color, but they also provide a delightful crunch and a sweet-tart flavor that complements the drink perfectly.

Additionally, pomegranate arils are rich in antioxidants, which may help support overall health and boost your immune system, making your drink not just delicious but also beneficial for you health benefits.

Pomegranate arils are the edible seeds found inside the pomegranate fruit. To extract them, simply cut the pomegranate in half, then use your fingers to gently pull the arils away from the bitter white pith.

Advertisement

Discard the pith, and you're left with a handful of beautiful, glistening arils. Carefully drop 3-5 pomegranate arils into the chilled Pomegranate Spritz, ensuring they float atop the vibrant pink liquid.

The arils will sink slightly, creating a visually striking effect as they dance and bob in the drink. Serve the Pomegranate Spritz immediately, allowing your guests to enjoy the interplay of flavors and textures with each sip and bite.

Final Thoughts

concluding reflections and insights

With a refreshing and light-hearted twist, the Pomegranate Spritz is a delightful cocktail that's sure to impress. The vibrant ruby-hued arils not only add a pop of color but also a burst of tart, sweet flavor that perfectly complements the effervescent bubbles.

Whether you're hosting a summer soiree or simply indulging in a relaxing evening at home, this versatile spritz is a crowd-pleasing choice. Its balance of flavors – from the tartness of the pomegranate to the subtle sweetness of the simple syrup – creates a truly unique and memorable sipping experience.

As you savor each refreshing sip, let the Pomegranate Spritz transport you to a world of refreshment and delight. With its easy-to-follow recipe and stunning presentation, this cocktail is sure to become a new favorite in your repertoire.

Raise a glass and toast to the perfect blend of tradition and innovation – the Pomegranate Spritz.

Advertisement

Frequently Asked Questions

Where Can I Purchase Pomegranate Juice Concentrate?

You can purchase pomegranate juice concentrate at your local grocery store, specialty food shop, or online retailers. Look for it near other fruit juices and concentrates. Many brands offer pomegranate concentrate for making juices, cocktails, and other recipes.

How Long Does the Pomegranate Spritz Stay Carbonated?

The carbonation in your drink will typically last for a few hours, though it may start to dissipate over time. To maintain the fizz, be sure to keep your spritz chilled and avoid letting it sit out at room temperature.

Can I Use a Different Type of Sparkling Wine?

You can absolutely use a different type of sparkling wine in your cocktail. Experiment with different styles, like Prosecco or Cava, to find the flavor profile that best suits your taste. Just be mindful of the carbonation level.

Is the Pomegranate Spritz Suitable for Vegetarians/Vegans?

Is the drink suitable for vegetarians and vegans? To determine this, you would need to check the ingredient list to ensure there are no animal-derived ingredients. As long as the ingredients are plant-based, the drink should be suitable for those following a vegetarian or vegan diet.

What Is the Ideal Glassware for Serving the Pomegranate Spritz?

For the best presentation, you'll want to serve the drink in a stemmed wine glass or a coupe glass. These elegant glassware options will showcase the vibrant color and bubbles of the cocktail.

Advertisement
Continue Reading

Frozen Delights

Lemon Basil Spritz

Discover the refreshing and aromatic Lemon Basil Spritz, a Mediterranean-inspired cocktail that combines the zesty flavors of lemon and the fragrant aromas of fresh basil.

Published

on

By

refreshing citrus herbal drink

The Lemon Basil Spritz is a refreshing Mediterranean-inspired cocktail that combines the zesty flavors of lemon and the fragrant aromas of fresh basil. Originating in the Mediterranean region and influenced by Italian culinary traditions, this light and effervescent cocktail is perfect for summer gatherings, palate cleansers, or year-round enjoyment. You'll find it features a mix of vodka, fresh lemon juice, simple syrup, basil leaves, and sparkling water. To craft this cocktail, you'll muddle the ingredients, add the fizzy water and ice, then stir and garnish for a delightful tipple. Continue reading to discover more about the history and preparation of this versatile spritz.

Key Takeaways

  • The Lemon Basil Spritz is a light, effervescent cocktail that originated in the Mediterranean region, combining zesty lemon and fragrant basil flavors.
  • The cocktail is typically made with vodka, fresh lemon juice, simple syrup, basil leaves, and sparkling water, providing a refreshing and versatile drinking experience.
  • Preparation involves muddling the lemon and basil, adding the other ingredients, and garnishing with a lemon slice and basil sprig for an optimal presentation.
  • The Lemon Basil Spritz is well-suited for summer gatherings, as a palate cleanser, or year-round enjoyment, and can also be enjoyed as a non-alcoholic version.
  • The cocktail contains natural, low-calorie ingredients, with potential health benefits from the antioxidants in basil and the vitamin C in lemon.

History

historical events and timelines

The origins of the lemon basil spritz can be traced back to the sun-soaked Mediterranean region, where the vibrant flavors of citrus and aromatic herbs have long captivated the palates of locals and travelers alike.

This refreshing cocktail likely emerged from the rich culinary traditions of Italy, where the combination of tart lemon, fragrant basil, and sparkling wine has been celebrated for generations.

Lemon and basil have been prized ingredients in Mediterranean cuisine for centuries, lending their distinct flavors to a vast array of dishes.

As the popularity of aperitif cocktails grew, inventive bartenders began experimenting with these beloved flavors, creating a harmonious balance between the herbal notes of basil and the bright, citrusy punch of lemon.

The result is the lemon basil spritz – a light, effervescent libation that perfectly captures the essence of the Mediterranean.

Advertisement

Recipe

cooking instructions and ingredients

The Lemon Basil Spritz is a refreshing and vibrant cocktail that combines the zesty flavors of lemon and the fragrant notes of fresh basil.

This versatile drink can be enjoyed on its own or as a mixer, making it a perfect choice for summer gatherings or as a palate cleanser between courses.

The key to this cocktail's success lies in the careful balance of its ingredients and the use of fresh, high-quality components. By following this recipe, you'll be able to create a Lemon Basil Spritz that's sure to delight your taste buds.

Ingredients:

  • 2 oz vodka
  • 1 oz fresh lemon juice
  • 1 oz simple syrup
  • 8-10 fresh basil leaves
  • Sparkling water
  • Ice

Instructions:

In a cocktail shaker, muddle the basil leaves with the simple syrup.

Add the vodka and lemon juice, then fill the shaker with ice.

Advertisement

Shake vigorously for 10-15 seconds until well-chilled.

Strain the mixture into a highball or Collins glass filled with ice.

Top with sparkling water and stir gently to combine.

Serve the Lemon Basil Spritz immediately, garnished with a fresh basil leaf or a lemon twist.

For optimal freshness and flavor, use the freshest possible basil and lemon juice.

Advertisement

Additionally, consider adjusting the sweetness to your personal taste by adding more or less simple syrup as desired.

Cooking Steps

step by step cooking guide

In a glass, gently muddle the fresh lemon slices, basil leaves, and a touch of sugar until the flavors meld.

Next, add the fizzy water and a handful of ice cubes.

Stir the mixture well, then garnish with a thin lemon slice before serving the chilled Lemon Basil Spritz immediately.

Step 1. Muddle Lemon, Basil, and Sugar

muddle lemon basil sugar

To begin the Muddle Lemon, Basil, and Sugar, start by grabbing a cocktail muddler or the back of a spoon.

In a sturdy glass or shaker, add the fresh lemon slices and lightly bruise them to release their aromatic oils.

Next, tear or chiffonade the basil leaves and add them to the glass.

Advertisement

Sprinkle in the granulated sugar, then use your muddler or spoon to gently press and twist the ingredients together.

This process, known as muddling, helps to extract the flavors from the lemon and basil, while dissolving the sugar.

Be careful not to over-muddle, as this can result in a bitter, herbaceous flavor.

Once the ingredients are well-combined, you're ready to move on to the next step in creating your refreshing Lemon Basil Spritz.

Step 2. Add Fizzy Water

incorporate sparkling water

Next, add the fizzy water to your muddled lemon and basil mixture. This will help to create a refreshing, effervescent beverage.

The carbonation helps to lift the flavors and provide a light, airy texture. Be sure to add the fizzy water slowly, gently stirring as you pour, to maintain the desired level of fizz.

Advertisement

You can use a variety of carbonated waters, such as club soda, sparkling water, or even a flavored seltzer, depending on your personal preference.

The amount of fizzy water you add will depend on the size of your glass and your taste preferences. Start with a 1:1 ratio of muddled mixture to fizzy water, and adjust from there until you achieve the perfect balance of citrus, herb, and effervescence.

Finish by giving the drink a gentle stir to incorporate all the flavors.

Step 3. Add Ice Cubes

add ice cubes now

After adding the fizzy water, it's time to incorporate the ice cubes. This step is crucial for creating the perfect chilled and refreshing texture of the Lemon Basil Spritz.

Grab a handful of ice cubes and gently drop them into the glass, allowing them to settle at the bottom. The cool temperature of the ice will immediately start to chill the beverage, ensuring it's pleasantly cool and invigorating on a warm day.

As the ice melts, it will also gradually dilute the drink, softening the flavors and creating a more balanced sipping experience. Be sure to leave a bit of room at the top of the glass to allow for the fizz and aromatics to shine through.

Advertisement

Once the ice cubes are in place, give the drink a gentle stir to incorporate everything together.

Now your Lemon Basil Spritz is ready to be enjoyed! The combination of citrus, herbal notes, and refreshing carbonation is sure to delight your taste buds.

Step 4. Stir and Garnish With Lemon Slice

stir and garnish lemon

With the ice cubes in place, it's time to give your Lemon Basil Spritz a final stir. Grab a long spoon or cocktail stirrer and give the drink a gentle swirl, ensuring all the flavors are well-combined.

As you stir, you'll notice the vibrant green basil leaves and the bright lemon slices swirling together, creating a visually appealing and aromatic cocktail. For those considering how to streamline their cleaning routines, investing in a robot vacuum can significantly reduce the time spent on household chores, allowing more time to enjoy refreshing drinks like this one top reasons to consider robot vacuums.

Once the drink is thoroughly stirred, it's time to garnish. Take a thin slice of lemon and gently place it on the edge of the glass, allowing it to elegantly drape over the side.

The lemon slice not only adds a beautiful finishing touch but also provides a burst of citrus aroma when the drink is sipped. Feel free to add an additional sprig of fresh basil as well, further enhancing the herbal notes of the cocktail.

Advertisement

With the final touches in place, your Lemon Basil Spritz is now ready to be enjoyed. Savor the refreshing blend of tart lemon, fragrant basil, and sparkling soda water.

Step 5. Serve Immediately, Chilled

serve chilled immediately enjoy

Serve the Lemon Basil Spritz immediately, chilled and refreshing. This cocktail is best enjoyed when it's ice-cold, as the crisp, zesty flavors truly shine through.

Pour the mixture over fresh ice in a highball glass to chill it quickly. The spritz should have a light, bubbly consistency, so be sure to top it off with the club soda at the last minute.

  • For the perfect presentation, garnish the drink with a lemon slice and a sprig of fresh basil. The basil will release its aromatic oils as it sits in the drink, enhancing the herbal notes.
  • Sip the Lemon Basil Spritz slowly and savor the balance of tart lemon, sweet basil, and effervescent club soda. It's a refreshing and sophisticated cocktail that's ideal for warm weather or as a palate cleanser between courses.
  • Enjoy this spritz immediately for the best flavor and texture. The carbonation will start to dissipate over time, so it's best consumed right away while it's at its most crisp and refreshing.

Final Thoughts

conclusion and reflections

This lemon basil spritz is a refreshing and versatile cocktail that can be enjoyed year-round. The combination of bright lemon, fragrant basil, and effervescent soda water creates a delightful and well-balanced drink.

Whether you're hosting a summer gathering or looking for a light and refreshing option to wind down your day, this spritz is sure to please.

One of the best things about this cocktail is its adaptability. You can adjust the ratios of ingredients to suit your personal taste preferences, making it a perfect canvas for experimentation.

Additionally, the use of readily available ingredients means you can easily whip up a batch on a whim.

Advertisement

As you sip this lemon basil spritz, let the flavors transport you to a warm, sunny day. The bright citrus and herbaceous notes provide a refreshing contrast, making this cocktail a versatile choice for any occasion.

Cheers to enjoying this perfect balance of flavors!

Frequently Asked Questions

How Long Does the Lemon Basil Spritz Keep Fresh?

The freshness of your beverage depends on various factors, but you can generally expect it to remain fresh for 3-5 days when stored properly in the refrigerator. Pay attention to any signs of spoilage and consume it within that timeframe.

Can I Substitute Another Herb for the Basil?

You can absolutely substitute another herb for the basil in this recipe. Thyme, oregano, or even cilantro would work well, adding their own unique flavors to the lemon-based spritz.

Is the Lemon Basil Spritz Suitable for Vegans?

Absolutely! The lemon basil spritz is vegan-friendly as it doesn't contain any animal-derived ingredients. You can enjoy this refreshing beverage without compromising your dietary preferences. Just make sure to use plant-based sweeteners or omit them entirely if desired.

Advertisement

Can I Make the Lemon Basil Spritz in Advance?

Yes, you can make this drink in advance. Simply prepare the ingredients and refrigerate until ready to serve. When it's time, assemble the spritz and enjoy its fresh, vibrant flavors.

How Do I Adjust the Sweetness of the Lemon Basil Spritz?

To adjust the sweetness, start by reducing the amount of simple syrup. You can also experiment with adding more lemon juice or a splash of club soda to balance the flavors. Taste and adjust until it's just right.

Continue Reading
Advertisement
Advertisement

Affiliate disclaimer

As an affiliate, we may earn a commission from qualifying purchases. We get commissions for purchases made through links on this website from Amazon and other third parties.

Vetted

affordable beverage fridges list affordable beverage fridges list
Vetted4 months ago

15 Best Beverage Fridges Under $300 to Keep Your Drinks Cool and Refreshing

Hunting for a budget-friendly beverage fridge under $300 to keep your drinks chilled and ready to enjoy?

chilled drinks at hand chilled drinks at hand
Vetted4 months ago

15 Best Beverage Fridges to Keep Your Drinks Chilled and Ready to Serve

Yearning for the perfect beverage fridge to keep your drinks chilled and ready to serve?

top camping fridge picks top camping fridge picks
Vetted4 months ago

15 Best Dometic Fridges for Camping Adventures – Keep Your Food Fresh Anywhere

Breeze through your camping trips with the top 15 Dometic fridges to keep your food fresh - adventure awaits!

top fridges for freshness top fridges for freshness
Vetted4 months ago

11 Best Denki Fridges to Keep Your Food Fresh and Your Kitchen Stylish

Kickstart your kitchen upgrade with the top Denki fridges for freshness and style, setting the stage for a perfect blend...

secure your beer storage secure your beer storage
Vetted4 months ago

15 Best Beer Fridges With Lock for Keeping Your Brews Safe and Cold

Get ready to safeguard your favorite brews with these 15 top-rated beer fridges featuring locks - the ultimate solution for...

top fridge freezer deals top fridge freezer deals
Vetted4 months ago

15 Best Deals on Fridge Freezers You Need to Check Out in 2024

Need a new fridge freezer? Discover top deals like the RCA Mini Refrigerator and Galanz Retro Fridge in this list...

affordable beer fridge options affordable beer fridge options
Vetted4 months ago

15 Best Beer Fridges Under $200 – Keep Your Brews Chilled Without Breaking the Bank

On the hunt for an affordable beer fridge?

fridge freezer deals galore fridge freezer deals galore
Vetted4 months ago

15 Best Deals for Fridge Freezers That Will Keep Your Food Fresh and Your Wallet Happy

Prepare for freshness and savings with these top 15 fridge freezers that will keep your food fresh and your wallet...

top beer fridge picks top beer fridge picks
Vetted4 months ago

15 Best Beer Fridges to Buy for Keeping Your Brews Chilled and Ready to Enjoy

Find the ultimate beer fridge with the top 15 picks, from Frigidaire's colorful options to Velieta's under-counter gem – your...

upgrade your kitchen now upgrade your kitchen now
Vetted4 months ago

15 Best Deals on Under Counter Fridges That Will Upgrade Your Kitchen

Looking to transform your kitchen? Discover the best deals on under-counter fridges that offer style, efficiency, and convenience.

top beer fridge models top beer fridge models
Vetted4 months ago

15 Best Beer Fridges for Your Ultimate Man Cave Experience

Find the perfect beer fridge for your man cave oasis with these top picks, setting the tone for ultimate relaxation...

save big on mini fridges save big on mini fridges
Vetted4 months ago

15 Best Deals on Mini Fridges With Freezer Compartments – Save Big on Cooling Solutions

Marvel at the savings on mini fridges with freezer compartments - discover top deals for efficient cooling solutions and space-saving...

Advertisement

Trending

Copyright © 2024 Dri Dri Gelato Affiliate disclaimer As an affiliate, we may earn a commission from qualifying purchases. We get commissions for purchases made through links on this website from Amazon and other third parties.