
If your ice cream maker hasn’t been cleaned recently, it could be harboring bacteria, mold, or odors that affect your treats’ flavor and safety. Signs like strange smells, off-flavors, or visible mold mean it’s time for a thorough clean. Disassemble all parts, wash with warm soapy water, and sanitize according to manufacturer instructions. Proper drying and reassembly are key to preventing mold and ensuring the best-tasting ice cream. Stay with us to learn exactly how to do it right.
Key Takeaways
- Visible mold, discoloration, or strange odors indicate your ice cream maker needs immediate cleaning.
- Unusual flavors or inconsistent texture suggest residue buildup or contamination.
- Persistent smells after cleaning point to bacteria or mold lurking inside the components.
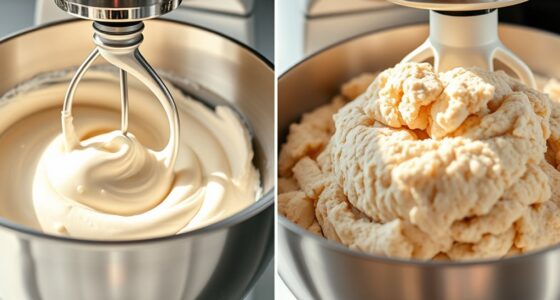
- Ice cream not reaching proper consistency may result from dirty paddles or drum surfaces.
- Regularly inspect and clean all removable parts to prevent bacteria growth and ensure safe operation.

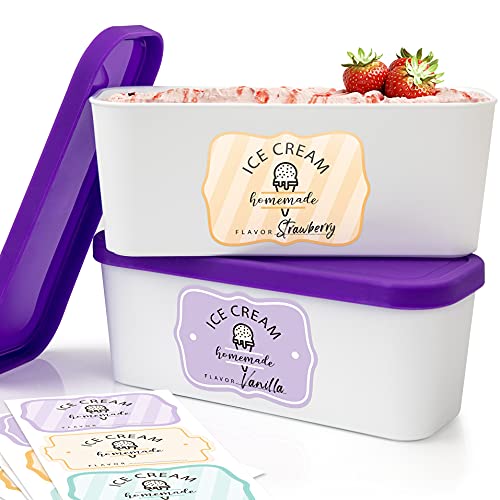
ZICOTO Set of 3 Reusable Ice Cream Containers 1 Quarts ea. - Perfect for Homemade Sorbet, Frozen Yogurt Or Gelato - Stackable Storage Pint Containers, Stickers And Lids Stores Easily In Freezer
Indulge In Homemade Delights: Savor the joy of crafting frozen delights at home and the heavenly pleasure of...
As an affiliate, we earn on qualifying purchases.
Why Regular Cleaning of Your Ice Cream Maker Matters

Regularly cleaning your ice cream maker is essential to guarantee it operates efficiently and produces delicious, safe treats. Proper ice cream hygiene prevents bacteria buildup and cross-contamination, ensuring each batch is fresh and safe to eat. Maintaining the right cleaning frequency depends on how often you use your machine; daily or after every use is ideal for frequent makers, while weekly cleaning suffices for occasional use. Neglecting regular cleaning can cause residue buildup, affecting the taste and texture of your ice cream. It can also damage your machine over time, leading to costly repairs. By sticking to a consistent cleaning routine, you keep your ice cream maker in top condition, ensuring every scoop is as delicious and hygienic as possible. Incorporating proper sanitation practices helps extend your machine’s lifespan and preserves the quality of your frozen treats. Additionally, ensuring thorough cleaning can prevent bacterial growth, which is crucial for maintaining food safety standards. Regular cleaning also helps avoid residue buildup that could lead to unpleasant flavors or odors in future batches. Staying informed about the impact of AI on technology emphasizes the importance of adopting efficient and innovative cleaning solutions to keep your appliances in optimal condition.
Set of 2 Reusable Ice Cream Tub Containers 1.6 Quart Ea. - Perfect for Homemade Sorbet, Frozen Yogurt Or Gelato - Stackable Storage Containers, Stickers And Lids Stores Easily In Freezer
Perfect For Homemade Ice Cream & More: The ice cream tub set of 2 is a great way...
As an affiliate, we earn on qualifying purchases.
Signs That Indicate Your Ice Cream Maker Needs a Deep Clean

Over time, accumulated residues and lingering odors can signal that your ice cream maker needs a thorough cleaning beyond the usual routine. If you notice strange tastes in your favorite ice cream flavors or persistent smells despite cleaning, it’s a sign to deep clean. Additionally, if your ice cream isn’t reaching the desired consistency or if you spot mold or discoloration, those are clear indicators. Proper storage tips, like keeping parts dry and covered, help prevent buildup. Regular deep cleaning ensures your machine runs smoothly and keeps flavors fresh. Look out for these signs:
| Sign | Action Needed |
|---|---|
| Unpleasant odors after cleaning or use | Deep clean and sanitize |
| Strange or off-flavors in ice cream | Clean all parts thoroughly |
| Visible mold or discoloration on parts | Disassemble and sanitize immediately |
A HEPA filter can help remove airborne contaminants that may contribute to odors and residue buildup in your kitchen environment, supporting overall appliance cleanliness. Incorporating regular maintenance routines can further prevent buildup and ensure your ice cream maker stays in optimal condition. Additionally, using proper cleaning agents recommended by the manufacturer can enhance the effectiveness of your cleaning process.

ZICOTO Set of 2 Reusable Ice Cream Tub Containers 2 Quart Each - Perfect for Homemade Sorbet, Frozen Yogurt Or Gelato - Stackable Storage Containers, Stickers And Lids Stores Easily In Freezer
Perfect For Homemade Ice Cream & More: The ice cream tub set of 2 is a great way...
As an affiliate, we earn on qualifying purchases.
Gathering the Supplies Needed for a Thorough Clean

Before you start deep cleaning your ice cream maker, gather all the necessary supplies to make the process smooth and efficient. You’ll want mild dish soap, a soft sponge or cloth, and a brush for scrubbing hard-to-reach areas. Confirm your cleaning products are compatible with your machine’s ingredients—some materials need gentle, non-abrasive cleaners. Consider the cleaning frequency; if you clean more often, less intensive tools may suffice, but a thorough deep clean requires extra supplies like vinegar or baking soda for sanitizing. Having everything ready beforehand prevents interruptions and ensures you don’t miss any spots. Proper preparation helps you maintain ingredient compatibility and prolongs your ice cream maker’s lifespan, so it’s always ready for your next frozen treat. Additionally, understanding cleaning and maintenance guidelines can help you avoid damage and ensure optimal performance. Regularly inspecting your equipment for signs of wear and tear can also extend its longevity and keep your desserts safe to enjoy. Maintaining proper equipment hygiene supports the longevity of your ice cream maker and keeps it operating efficiently. Incorporating sound cleaning techniques can further enhance the effectiveness of your sanitation process and prevent residue buildup.

BALCI - Ice Cream Container - 2 Quart - Perfect Reusable Freezer Storage for Homemade Ice Cream Tubs for Sorbet, Frozen Yogurt and Gelato! - Flexible Silicone Lids, Long Scoop, Stackable - Blue
Tough, Stylish & Reusable Ice Cream Containers: This Ice Cream Container is the perfect addition for your freezer,...
As an affiliate, we earn on qualifying purchases.
Step-by-Step Guide to Disassembling Your Ice Cream Maker
Disassembling your ice cream maker correctly is essential for thorough cleaning and maintenance. Start by unplugging the machine and removing the paddle or dasher, which often touches the ice cream flavors during churning. Next, detach the lid and any removable parts, such as the mixing bowl or freezing container. If your model has a paddle assembly, carefully take it apart to access all surfaces. Pay attention to any seals or gaskets that may trap residue. Remember, proper disassembly ensures no residue from previous flavors or freezing techniques lingers, preventing contamination. Taking care to properly adjust the machine’s angles can also improve its performance and longevity. Proper handling of machine components during disassembly minimizes the risk of damage and ensures all parts are accessible for cleaning. Additionally, inspecting the seal integrity helps prevent leaks and maintain optimal freezing conditions. Ensuring all parts are thoroughly cleaned and dried before reassembling also helps maintain hygienic conditions and prolongs the lifespan of your ice cream maker. Regularly checking the natural materials used in your machine’s components can further help prevent buildup and corrosion. Take note of how parts fit together to make reassembly easier. This step helps maintain ideal freezing performance and keeps your machine in top shape for future batches of your favorite ice cream flavors.
Proper Techniques for Washing All Components

To guarantee your ice cream maker stays clean and functions properly, you need to wash all components thoroughly. Proper techniques for washing all parts ensure peak ice cream hygiene and prevent bacterial buildup. Use warm, soapy water to scrub removable parts like the paddle, lid, and bowl, paying attention to crevices where residue can hide. Avoid abrasive scrubbers that could damage surfaces. Rinse each piece well to remove soap residue. Dry components completely before reassembling to prevent mold. Establish a regular cleaning frequency—after each use or at least weekly if used often—to keep your machine in top condition. Proper washing techniques help maintain ice cream quality, extend your equipment’s lifespan, and reduce health risks linked to improper cleaning. Additionally, inspecting the filtration system periodically ensures optimal air quality and performance. Regular maintenance of air purifiers, such as filter replacements, can also prevent odors and ensure efficient operation. Ensuring all components are thoroughly cleaned can also help prevent bacterial growth, which is crucial for safe and tasty ice cream. Keeping the cleaning tools sanitized is equally important to avoid cross-contamination.
How to Sanitize Your Ice Cream Maker Safely

To sanitize your ice cream maker safely, start by gathering the right cleaning supplies and sanitizers. Make sure to use approved products and follow the instructions carefully. After sanitizing, rinse everything thoroughly and dry it completely before use. Regular cleaning can also prevent buildup of bacteria and mold, ensuring the appliance remains safe and effective. Additionally, proper maintenance of your appliances can contribute to a healthier indoor air quality environment. Using high-quality cleaning agents can enhance the effectiveness of your sanitation process. To ensure optimal results, consider the skin safety guidelines associated with cleaning products and procedures.
Gather Cleaning Supplies
Before you start sanitizing your ice cream maker, gather all necessary cleaning supplies to guarantee a thorough and safe process. You’ll need mild dish soap, a soft sponge or cloth, a clean towel, and a brush for crevices. Following your cleaning schedule helps ensure you don’t skip steps or forget to sanitize, keeping your machine in top shape. Keep storage tips in mind—make sure your supplies are clean and dry before storing them for next time. Having everything ready before you begin prevents interruptions and ensures a smooth cleaning process. Double-check that your supplies are food-safe and appropriate for your machine’s materials. Being prepared saves time and reduces the risk of cross-contamination, helping you keep your ice cream maker spotless and safe to use.
Use Proper Sanitizers
How can you guarantee your ice cream maker is properly sanitized? The key is using the right sanitizer and applying it correctly. Choose a sanitizer known for its effectiveness against bacteria and viruses, and always follow the manufacturer’s instructions for dilution and contact time. Ensuring sanitizer effectiveness depends on proper application—make sure all surfaces are thoroughly coated. Equally important is chemical safety; avoid using harsh chemicals that might leave residues or pose health risks. Rinse surfaces if necessary, and never mix different sanitizers, as harmful reactions can occur. Using food-safe sanitizers designed for kitchen equipment helps keep your ice cream maker hygienic without risking chemical contamination. Proper sanitization protects your health and keeps your treats safe and delicious.
Rinse and Dry Thoroughly
After sanitizing your ice cream maker, it’s essential to rinse all surfaces thoroughly with clean water to remove any remaining sanitizer residues. Use proper rinsing techniques, making sure you reach all crevices and parts to prevent leftover chemicals from contaminating your next batch. Pay attention to areas like the drum, lid, and paddles, rinsing until water runs clear. Once rinsed, drying tips become vital—use a clean, dry towel or allow parts to air dry completely. Make certain no moisture remains, as dampness can promote bacterial growth. Proper drying not only ensures your ice cream maker is safe but also prolongs its lifespan. Taking these simple steps guarantees your equipment stays hygienic and ready for your next delicious batch.
Drying and Reassembling to Prevent Mold Growth

Properly drying and reassembling your ice cream maker is essential to prevent mold growth. When you finish cleaning, make certain all parts are completely dry to avoid moisture buildup. Focus on maintaining airflow to prevent humidity from lingering inside the components. Consider these steps:
- Place parts on a clean towel in a well-ventilated area, allowing air to circulate freely around each piece.
- Use a soft cloth or paper towels to wipe away any remaining water, especially in crevices.
- Store your ice cream maker in a dry, cool spot with good airflow, using storage solutions like airtight containers or covers to protect from dust and humidity.
This approach keeps your maker dry, discourages mold, and promotes long-term freshness.
Tips for Maintaining Your Ice Cream Maker Between Uses

To keep your ice cream maker in top shape between uses, regular maintenance is key. Start by cleaning removable parts promptly after each use to prevent residue buildup, which can affect flavor varieties over time. Store the parts in a dry, airtight container or bag to keep them clean and ready for next time. When not in use, make certain the machine is completely dry to avoid mold growth. Consider wiping down the exterior with a damp cloth to remove dust and debris. Proper storage tips include keeping the machine in a cool, dry place away from direct sunlight. This routine helps preserve the integrity of your ice cream maker, ensures fresh flavors with every batch, and extends its lifespan, making cleanup easier and more efficient.
Common Mistakes to Avoid During Cleaning

One common mistake to avoid during cleaning is using harsh or abrasive cleaning tools that can scratch or damage the surfaces of your ice cream maker. Incorrect cleaning frequency can lead to buildup or mold, so stick to recommended schedules. Also, choosing the wrong detergent can leave residues or cause corrosion. To keep your machine in top shape, watch out for these pitfalls:
- Scrubbing with steel wool or rough brushes that scratch surfaces.
- Overlooking the importance of proper drying after cleaning to prevent mold.
- Using strong or incompatible detergents that aren’t suited for food equipment.
Always select gentle, food-safe detergents and stick to a consistent cleaning frequency to ensure your ice cream maker stays spotless and safe to use.
When to Replace Parts for Optimal Hygiene

Regularly inspecting your ice cream maker’s parts is key to maintaining hygiene. Over time, components like seals, gaskets, and blades can wear out or harbor bacteria, compromising hygiene standards. Replace parts promptly when you notice cracks, tears, or persistent buildup that won’t clean thoroughly. Damaged or worn replacement parts may trap debris or mold, risking contamination of your ice cream. Follow the manufacturer’s guidelines on replacement intervals, and don’t wait until parts break down completely. Keeping all parts in top condition ensures your machine operates safely and produces clean, delicious ice cream. Prioritizing timely replacements helps you meet hygiene standards and prevents potential health issues. Staying proactive with part replacements keeps your ice cream maker safe, hygienic, and ready for use.
Frequently Asked Questions
How Often Should I Deep Clean My Ice Cream Maker?
You should deep clean your ice cream maker at least once a month to maintain proper ice cream maintenance. Regular cleaning helps prevent bacteria buildup and keeps your machine running smoothly. Follow a consistent cleaning schedule, especially after making dairy-based flavors. If you notice any residue or strange odors, don’t wait—deep clean promptly. Proper maintenance ensures delicious, safe ice cream every time and prolongs your machine’s lifespan.
Can I Use a Dishwasher to Clean All Parts?
You can use a dishwasher for some ice cream maker parts, but check dishwasher safety first. Usually, removable parts like the paddle and container are dishwasher safe, but always verify manufacturer instructions. Avoid putting the motor or base in the dishwasher. To maintain proper cleaning frequency, wash parts after every use to prevent bacteria buildup. Regular cleaning with the right method guarantees your ice cream maker stays hygienic and in top shape.
Are There Specific Cleaning Products Recommended for My Model?
Think of your ice cream maker as a delicate garden needing special care. Yes, there are specialized cleaning agents designed for your model, but always follow the model-specific instructions. These guidelines guarantee you don’t damage parts or leave residues that affect taste. Using recommended products is like giving your machine a spa day—gentle, effective, and tailored to keep it running smoothly. Always check the manufacturer’s advice for best results.
How Do I Prevent Mold Buildup Inside the Machine?
To prevent mold buildup inside your ice cream machine, focus on regular machine maintenance. Always clean and dry all parts thoroughly after each use, especially those that come into contact with moisture. Store the machine in a dry, well-ventilated area. Use a vinegar solution periodically to disinfect, and keep an eye out for any signs of mold. Consistent mold prevention steps guarantee your machine stays fresh and safe for sweet treats.
What Are Signs of Bacterial Contamination in My Ice Cream Maker?
Did you know that bacteria can multiply rapidly in moist environments? Signs of bacterial contamination in your ice cream maker include a sour smell, slimy residue, or unusual color changes. If you notice these contamination signs, it’s vital to clean your machine thoroughly to prevent bacterial growth. Regular cleaning not only keeps your ice cream safe but also guarantees it tastes fresh and delicious every time you make it.
Conclusion
Think of your ice cream maker as a garden that needs regular tending. When you clean it, you’re watering the seeds of hygiene and freshness, ensuring every scoop is pure delight. Neglect your maintenance, and weeds of grime take root, spoiling your treats. By caring for your machine, you nurture the magic of homemade ice cream — a sweet harvest born from your attentive hands. Keep it clean, and enjoy a season of delicious, worry-free indulgence.