Drawing ice cream can be a simple task even for beginners. You can start by drawing a rainbow line, a u-shape for the scoop, and a cone. It’s essential to add a cute face with eyes and a smile. Don’t forget to outline the cone for more intricate details. Concentrate on basic shapes and lines to achieve a more realistic appearance. Once you feel comfortable, experiment with different colors and shading techniques to add depth to your drawing. Be creative with patterns and designs to make your ice cream masterpiece unique. Enjoy the creative process as you bring your creation to life! There are plenty of tips and tricks available to enhance your drawing and make it even more delightful.
Key Takeaways
- Start with a rainbow line for color contrast.
- Create a simple u-shape for the ice cream scoop.
- Sketch a basic cone structure.
- Add a face with circles for eyes and a smile.
- Use vibrant colors and shading for a realistic look.

ZICOTO Set of 3 Reusable Ice Cream Containers 1 Quarts ea. - Perfect for Homemade Sorbet, Frozen Yogurt Or Gelato - Stackable Storage Pint Containers, Stickers And Lids Stores Easily In Freezer
Indulge In Homemade Delights: Savor the joy of crafting frozen delights at home and the heavenly pleasure of...
As an affiliate, we earn on qualifying purchases.
Starting the Drawing
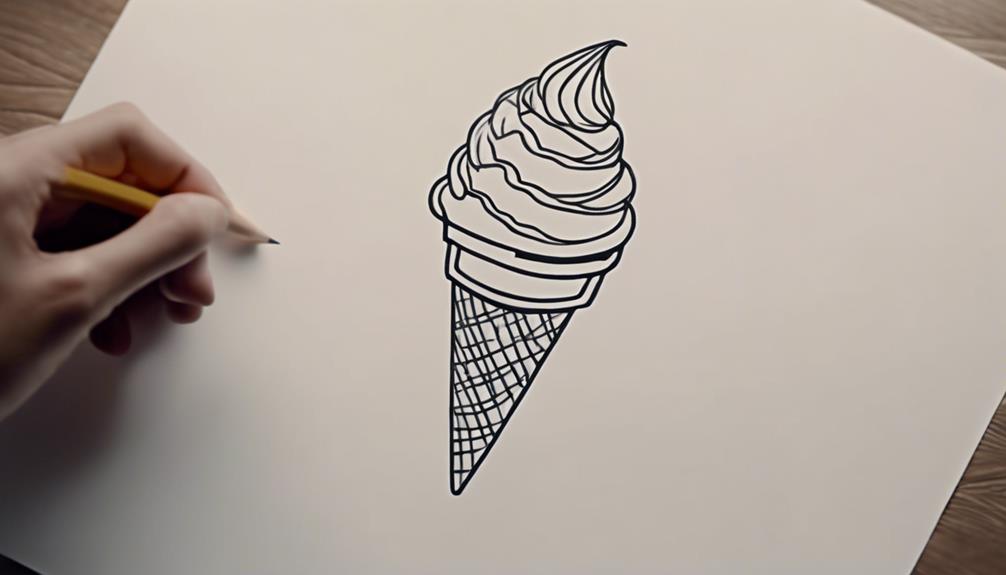
How do you begin drawing ice cream easily?
To start, grab your paper and pencil. Begin by drawing a rainbow line in the center to add a little bit of color to your ice cream cone.
Next, create a simple u-shape at the bottom for the ice cream scoop. Then, sketch the cone with a downward line, v-shape, and upward line to form the classic structure.
Now, it's time to come back to the scoop and add a face. Use circles for eyes and a smile to give your dessert a fun look.
As you move along, remember to outline the basic structure of the cone. This step will provide a foundation for adding more details and coloring later on.
Keep going, and before you know it, you'll have a cute ice cream drawing ready to show off.
Set of 2 Reusable Ice Cream Tub Containers 1.6 Quart Ea. - Perfect for Homemade Sorbet, Frozen Yogurt Or Gelato - Stackable Storage Containers, Stickers And Lids Stores Easily In Freezer
Perfect For Homemade Ice Cream & More: The ice cream tub set of 2 is a great way...
As an affiliate, we earn on qualifying purchases.
Basic Ice Cream Scoop Shape

To begin drawing your ice cream, start with a simple u-shape for the scoop in the center of your paper. This basic shape serves as the foundation for your ice cream design.
Scoop Shape Basics
The basic ice cream scoop shape is typically represented by a simple u-shape to depict the bottom of the scoop. This uncomplicated form serves as the foundation for more intricate ice cream illustrations. To help you grasp the basics of drawing an ice cream scoop, here is a breakdown of the scoop shape:
| Step | Instructions | Image |
|---|---|---|
| 1 | Start by drawing a curved line |  |
| 2 | Connect the ends with a U-shape |  |
| 3 | Add details like texture or face |  |
| 4 | Practice drawing the scoop shape |  |
Simple Ice Cream Design
To create a simple ice cream design, start by drawing a basic u-shape to form the bottom of the ice cream scoop.
Follow these steps to bring your ice cream drawing to life:
- Sketch a downward line to represent the cone coming down from the scoop.
- Add a v-shape on top of the cone to create the ice cream's point.
- Draw an upward line connecting the v-shape to the bottom of the scoop.
- Incorporate a face onto the scoop by drawing circles for eyes and a larger circle for the mouth.
- Enhance the face by adding smaller circles inside the eyes and coloring in the larger circle while leaving the smaller ones white.

ZICOTO Set of 2 Reusable Ice Cream Tub Containers 2 Quart Each - Perfect for Homemade Sorbet, Frozen Yogurt Or Gelato - Stackable Storage Containers, Stickers And Lids Stores Easily In Freezer
Perfect For Homemade Ice Cream & More: The ice cream tub set of 2 is a great way...
As an affiliate, we earn on qualifying purchases.
Drawing the Cone

Begin sketching the ice cream cone by drawing a downward line on your paper. This line will serve as the base of the cone.
Next, create a v-shape at the top of the line to represent the opening of the cone where the ice cream will sit. Connect the v-shape to the top of the downward line with a slightly curved upward line to complete the cone's structure.
Remember to keep the cone simple and proportional to the ice cream scoop you'll add later. Focus on using basic shapes and lines to achieve a realistic cone appearance.
By emphasizing the cone's shape and structure, you can create a visually appealing ice cream treat.
Drawing the cone is an essential step in capturing the essence of an ice cream dessert. Once you have mastered this foundational element, you can move on to adding the ice cream scoop and other embellishments to bring your drawing to life.

BALCI - Ice Cream Container - 2 Quart - Perfect Reusable Freezer Storage for Homemade Ice Cream Tubs for Sorbet, Frozen Yogurt and Gelato! - Flexible Silicone Lids, Long Scoop, Stackable - Blue
Tough, Stylish & Reusable Ice Cream Containers: This Ice Cream Container is the perfect addition for your freezer,...
As an affiliate, we earn on qualifying purchases.
Adding a Face

When adding a face to your ice cream drawing, focus on the details like eyes, mouth, and smile.
Express different emotions by adjusting the size and shape of these facial features.
Consider adding playful elements like eyelashes for a more whimsical touch.
Face Details
Consider enhancing your ice cream character by adding facial details like eyes, a nose, a smile, and unique expressions. To bring your sweet treat to life, follow these steps:
- Add circles for eyes and a bigger circle for the nose to create a face on the ice cream scoop.
- Include a smile by drawing a curved line underneath the nose circle.
- Enhance the face by adding small circles inside the eyes for pupils.
- Consider adding eyelashes above the eyes for a cute touch.
- Personalize the face with unique expressions or decorations to make the ice cream character your own.
Expressing Emotions
To give your ice cream character a more expressive look, start by incorporating a face with eyes, a nose, and a smile. Begin by drawing two circles for eyes and a curved line for a smile. Adding small circles inside the eyes will give your ice cream scoop a cute and expressive appearance.
For added detail, draw smaller circles at the bottom left of the eyes to enhance the face's character. When coloring, fill in the big circle of the face while leaving the small circles white to create a vibrant and fun look.
To further express emotions, draw a smile between the eyes to make the ice cream scoop appear happy and inviting. By following these steps, your ice cream character will come to life with a range of emotions that can make your drawing more engaging and relatable to viewers.
Outlining the Cone

Commence by sketching a downward line extending from the base of the ice cream scoop to outline the cone shape.
To finalize the cone structure, form a v-shape at the bottom of the cone and then extend an upward line from the v-shape.
Remember to maintain the cone's proportion to the ice cream scoop above it for a harmonious appearance.
It's crucial to keep the cone straightforward, concentrating on fundamental shapes for a smoother drawing experience.
- Sketch a downward line beginning from the base of the ice cream scoop.
- Form a v-shape at the bottom of the cone for additional detail.
- Extend an upward line from the v-shape to shape the cone structure.
- It's vital to ensure the cone matches the ice cream scoop proportion.
- Maintain simplicity in the cone design by focusing on basic shapes.
Extra Details

For added charm and personality, embellish your ice cream cone drawing with delightful extra details. Once you've outlined the cone and created the ice cream scoop, consider enhancing your creation with some fun additions.
To bring your ice cream cone to life, try adding small circles inside the top circles of the face to represent eyes. You can also draw smaller circles at the bottom left of the face circles for cheeks, giving your ice cream a cute and friendly look. Color in the big circle of the face while leaving the small circles white to maintain a classic appearance.
To inject some joy into your drawing, add a smile between the eyes, instantly giving your ice cream scoop a happy expression. For a touch of whimsy, think about incorporating extra elements like eyelashes or decorative designs to elevate the character of your ice cream cone and make it truly unique.
Face Details

First, add small circles inside the top circles of the face for eyes.
Then, include smaller circles at the bottom left of the face circles to create cheeks.
Eye and Mouth Details
Add small circles inside the top circles of the face to depict eyes when drawing ice cream in an easy manner.
For additional facial details, draw smaller circles at the bottom left of the face circles.
When coloring, fill in the big circle of the face while leaving the small circles white to represent the eyes.
To give your ice cream scoop character, draw a smile between the eyes.
Consider adding eyelashes or other decorations to enhance the face of the ice cream scoop.
Adding Facial Expressions
To create engaging facial expressions on your ice cream scoop drawing, remember to incorporate small circles for eyes and a smile between them.
Adding small circles inside the top circles of the face will represent the eyes of the ice cream scoop. For a cute and animated look, draw even smaller circles at the bottom left of the face circles.
To enhance the contrast, color in the big circle of the face while leaving the small circles white. Placing a smile between the eyes will give the ice cream scoop a happy and friendly expression.
If you want to personalize the face further, consider adding details like eyelashes or decorations. By paying attention to these facial features, you can make your ice cream scoop drawing come to life with different emotions and personalities.
Experiment with various expressions to find the one that best suits your artistic vision.
Coloring Tips

Experiment with a variety of colors to bring vibrancy and fun to your ice cream cone illustration. When coloring your ice cream drawing, consider these tips to make it stand out:
- Try different colors: Don't limit yourself to traditional ice cream colors; go wild with bright and unexpected hues.
- Add shading: Use shading techniques to give your ice cream scoops a 3D effect and make them look more realistic.
- Include extra details: Sprinkles, chocolate syrup, or whipped cream can add pops of color and make your illustration more appetizing.
- Play with textures: Experiment with smooth gradients for a classic look or bold patterns for a modern twist.
- Mix and match: Combine colors in unique ways to personalize your ice cream cone and make it visually striking.
Creativity in Coloring

When exploring creativity in coloring your ice cream illustration, consider using a variety of vibrant colors to bring excitement and personality to your artwork. Experiment with different shading techniques to add depth and dimension to the drawing, making the ice cream cone appear more realistic.
Don't be afraid to mix and match colors for the ice cream scoop and cone, allowing you to create a unique and eye-catching look. Adding patterns or designs to the cone can give your illustration a personalized touch, showcasing your individual style.
To enhance the overall appearance, try blending colors or using gradients to make the ice cream look more lifelike and delicious. By infusing your artwork with a burst of colors and creative techniques, you can make your ice cream illustration truly stand out and capture the attention of viewers.
Let your imagination run wild as you explore different color combinations and methods to bring your ice cream drawing to life!
Enjoying the Drawing Process

Immerse yourself in the drawing process and savor the joy of bringing your ice cream illustration to life. Embrace creativity and imagination as you add unique details to your drawing.
Remember, variations in your artwork are normal and add to its individuality. Enjoy coloring the ice cream cone, exploring different flavors, and adding toppings like cherries or sprinkles.
Have fun experimenting with various colors and patterns to make your ice cream cone uniquely yours. Let your imagination run wild and pretend to savor the imaginary ice cream once your drawing is complete for added enjoyment.
—
- Embrace creativity and imagination while adding unique details to the ice cream drawing for a fun experience.
- Remember that variations in drawings are normal and contribute to the individuality of each artwork.
- Enjoy the process of coloring the ice cream cone, exploring different flavors, and adding toppings like cherries or sprinkles.
- Have fun with the drawing by experimenting with different colors and patterns to make the ice cream cone uniquely yours.
- Let your imagination run wild and pretend to savor the imaginary ice cream once the drawing is complete for added enjoyment.
Frequently Asked Questions
How to Draw an Easy Ice Cream for Kids?
To draw an easy ice cream for kids, start with a simple u-shape for the scoop and a cone using basic lines. Add a friendly face with circles for eyes and a smile. Get creative with colors and decorations for a fun experience.
How to Draw a Cute Ice Cream Cone?
To draw a cute ice cream cone, start by sketching a rainbow line and a simple u-shape for the scoop. Construct the cone with a downward line, v-shape, and upward line. Add a face with circles and a smile for extra charm.
How Is Ice Cream Made Step by Step for Kids?
To make ice cream, mix cream, sugar, and flavorings. Freeze while stirring to prevent ice crystals. Pour into a container and freeze to harden. Kids can help measure, stir, and add toppings for a fun experience!
How to Draw a Unicorn Ice Cream Easily?
Imagine crafting a unicorn ice cream like a sweet dream come to life. Add a magical horn, a flowing mane of colorful swirls, cute ears, closed eyes with lashes, and pastel or rainbow hues for whimsical charm.
Can the Drawing Techniques for Ice Cream Easy Be Applied in Wacky Wizards Game?
Yes, the drawing techniques for ice cream in Wacky Wizards game are easy to apply. By following the steps, players can get ice cream wacky wizards. The game provides simple tools and instructions to create a variety of ice cream concoctions, allowing players to let their creativity run wild.
Conclusion
To sum up, creating cute and colorful ice cream drawings can be easy and enjoyable! Remember to start with a basic scoop shape, add in a cone, and bring your creation to life with a fun face.
Don't forget to add vibrant colors and let your creativity shine through in the process.
So grab your pencils, get ready to have fun, and let your imagination run wild with your ice cream masterpiece!