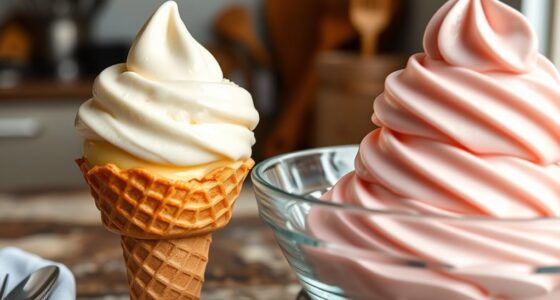
To make ultra-creamy homemade ice cream, start with full-fat dairy and egg yolks for richness. Chill your base thoroughly before freezing to prevent crystals, and add stabilizers like gelatin or cornstarch to keep it smooth. Incorporate a splash of alcohol to lower the freezing point and whisk the mixture to create a light, airy texture. Folding in fats like heavy cream enhances creaminess. Keep these secrets in mind, and you’ll discover even more tips to perfect your ice cream craft.
Key Takeaways
- Use full-fat dairy and egg yolks to create a rich, smooth, and stable base that prevents ice crystal formation.
- Properly chill your mixture and tools before freezing to maintain optimal temperature and texture.
- Incorporate stabilizers like gelatin, cornstarch, or xanthan gum for enhanced creaminess and smoothness.
- Add alcohol and starches such as arrowroot to lower freezing point and prevent large ice crystals.
- Whip and fold in fats like heavy cream or melted butter to boost richness and achieve ultra-creamy consistency.

The Amorino Guide to Gelato: Learn to Make Traditional Italian Desserts―75 Recipes for Gelato and Sorbets
As an affiliate, we earn on qualifying purchases.
Use Full-Fat Dairy for Richness

For the creamiest homemade ice cream, you should opt for full-fat dairy products. Your dairy selection makes a significant difference in achieving that rich, luxurious texture. Use whole milk, heavy cream, or full-fat half-and-half to guarantee maximum creaminess. Low-fat or skim options won’t deliver the same smooth mouthfeel. When choosing dairy, consider how it pairs with your flavor combinations—full-fat dairy enhances the richness of chocolate, caramel, and fruit flavors alike. It provides a creamy base that holds up well during churning, preventing ice crystals from forming. The result is a smooth, velvety ice cream you’ll love. Don’t skimp on quality here; fresh, high-fat dairy is your secret weapon for that ultra-creamy texture every time. Additionally, selecting ingredients with high energy efficiency ratings can help reduce overall costs and ensure optimal performance.
![The Perfect Scoop, Revised and Updated: 200 Recipes for Ice Creams, Sorbets, Gelatos, Granitas, and Sweet Accompaniments[A Cookbook]](https://m.media-amazon.com/images/I/41ypbZfII5L._SL500_.jpg)
The Perfect Scoop, Revised and Updated: 200 Recipes for Ice Creams, Sorbets, Gelatos, Granitas, and Sweet Accompaniments[A Cookbook]
As an affiliate, we earn on qualifying purchases.
Incorporate Egg Yolks for Creamy Texture

Adding egg yolks to your ice cream base boosts creaminess and creates a smoother, richer texture. By incorporating egg yolk emulsification, you guarantee the fats and liquids blend seamlessly, resulting in a luxurious mouthfeel. Using custard base techniques, you gently cook the mixture to thicken it without curdling, locking in flavor and texture.
- Achieve a silky custard that coats the spoon effortlessly
- Use low heat to prevent curdling while thickening
- Whisk yolks constantly for even emulsification
- Strain the custard to remove any cooked eggs or lumps
- Chill thoroughly before churning for ideal texture
These steps help you harness the power of egg yolks, ensuring your ice cream is irresistibly creamy and smooth.

ZICOTO Set of 3 Reusable Ice Cream Containers 1 Quarts ea. - Perfect for Homemade Sorbet, Frozen Yogurt Or Gelato - Stackable Storage Pint Containers, Stickers And Lids Stores Easily In Freezer
Indulge In Homemade Delights: Savor the joy of crafting frozen delights at home and the heavenly pleasure of...
As an affiliate, we earn on qualifying purchases.
Chill Your Base Thoroughly Before Freezing

Make certain your ice cream base is thoroughly chilled before freezing. Use cold ingredients, and consider chilling the mixture overnight for the best results. Avoid touching the base with warm hands to prevent melting and ensure a smoother, creamier texture. Additionally, maintaining optimal temperature control during preparation helps achieve the desired consistency. Incorporating AI-driven solutions in your process can optimize chilling times and improve overall quality. Employing sound healing science principles to maintain a calm environment can also enhance your focus and precision during the process. Proper angle adjustments of your freezer and storage containers can also play a role in maintaining consistent temperature and texture. Leveraging advanced processing power from new AI hardware like Snapdragon 8 Gen 3 can further assist in monitoring and adjusting temperature settings for perfect ice cream.
Use Cold Ingredients
Chilling your ice cream base thoroughly before freezing is essential for achieving that ultra-creamy texture you crave. Using cold ingredients helps maintain proper temperature control, preventing ice crystals from forming and guaranteeing smoothness. When your ingredients are cold, the mixture stays at the ideal temperature for churning, resulting in better ingredient freshness and a creamier end product.
To maximize this effect, keep these items in mind:
- Use chilled milk and cream straight from the fridge
- Keep eggs cold before incorporating
- Pre-cool your mixing bowl and utensils
- Avoid adding warm ingredients
- Guarantee your freezer is at the right temperature
Chill Overnight Recommended
For the best creamy texture, letting your ice cream base rest in the fridge overnight is highly recommended. This chilling period allows flavors to meld, especially when working with seasonal flavors like pumpkin or berry, enhancing the overall taste. Plus, a thoroughly chilled base freezes more smoothly, resulting in a creamier consistency. Before freezing, give your mixture a quick stir and consider pouring it into a chilled container for better presentation tips. When serving, the deep color and rich texture will impress your guests. Taking this extra step also helps prevent ice crystal formation, ensuring your homemade ice cream remains ultra creamy. Incorporating proper storage techniques can further maintain the quality and texture of your ice cream during freezing. Using the right headphone connection can also improve your listening experience while preparing or enjoying your treat. Additionally, understanding the science of freezing can help you troubleshoot common issues like ice crystallization. Properly controlling temperature during storage is crucial for preventing freezer burn and maintaining optimal creaminess. So, don’t rush—patience pays off in creating a luxurious, restaurant-quality dessert that looks as good as it tastes. Remember, the material of your storage container can influence how quickly and evenly your ice cream freezes, impacting its final texture.
Avoid Warm Hands
Having your ice cream base at the right temperature before freezing can make all the difference in achieving that ultra-creamy texture. Warm hands easily transfer heat, leading to hand warming and quick melting of your mixture. Handling the base with cold or gloved hands helps prevent this issue. To guarantee your base stays chilled, avoid touching it directly with warm hands. Instead, use a chilled spoon or spatula when stirring or transferring. Keep your container in a cold environment until ready to freeze. Consider sitting the base in a bowl of ice water briefly before pouring into the freezer. This small step helps maintain a consistent cold temperature, preventing quick melting and ensuring a smooth, creamy result every time.
- Use chilled utensils and containers
- Handle the base with cold or gloved hands
- Keep your mixture in a cold environment
- Avoid direct contact with warm hands
- Briefly sit the base in ice water before freezing
Set of 2 Reusable Ice Cream Tub Containers 1.6 Quart Ea. - Perfect for Homemade Sorbet, Frozen Yogurt Or Gelato - Stackable Storage Containers, Stickers And Lids Stores Easily In Freezer
Perfect For Homemade Ice Cream & More: The ice cream tub set of 2 is a great way...
As an affiliate, we earn on qualifying purchases.
Add Stabilizers to Improve Smoothness

Adding stabilizers can notably boost your ice cream’s smoothness, but choosing the right type matters. You’ll want to learn how to incorporate them properly for the best results, whether using gelatin, cornstarch, or commercial stabilizer mixes. These ingredients help improve texture and prevent ice crystals, making your homemade ice cream irresistibly creamy.
Types of Stabilizers
Ever wondered how to make your homemade ice cream irresistibly smooth and creamy? The key lies in choosing the right stabilizers. You can use natural thickeners like gelatin, cornstarch, or agar-agar, which come from everyday kitchen ingredients. Alternatively, commercial stabilizers such as guar gum, carrageenan, or xanthan gum are popular for their consistent results. These stabilizers prevent ice crystals from forming, ensuring a silky texture. They also help maintain the ice cream’s structure during freezing and storage. When selecting stabilizers, consider your preferences for natural options versus commercial stabilizers. Using the right type can elevate your ice cream’s creaminess and mouthfeel, making every scoop a luxurious experience. Incorporating stabilizer types can significantly improve the smoothness and overall quality of your homemade ice cream. Additionally, combining stabilizers with hydration techniques can enhance their effectiveness and further improve texture. Understanding the role of stabilizers in ice cream can help you choose the best ingredients for perfect results. For example, adding a small amount of gelatin or agar-agar can help reduce the formation of ice crystals during storage, leading to a consistently creamy texture.
Proper Incorporation Techniques
Properly incorporating stabilizers into your ice cream mixture guarantees a smooth, creamy texture that delights every time. To achieve this, use the right mixing techniques to ensure even ingredient integration. Start by dissolving stabilizers thoroughly in a small amount of warm liquid before adding them to your base. This prevents clumping and promotes uniform dispersion. Once dissolved, mix the stabilizer mixture gradually into your ice cream base while stirring continuously. Avoid adding stabilizers all at once, which can lead to uneven distribution. Consistent mixing ensures that stabilizers are fully integrated, providing the desired smoothness. Pay attention to the mixing speed and timing, as proper technique is key to preventing ice crystals and achieving that ultra-creamy consistency you’re after. Additionally, understanding the role of stabilizers in ice cream can help you choose the right type for your recipe and improve overall texture. Using the appropriate incorporation methods is essential for optimal results and can make a significant difference in the final product. When selecting stabilizers, consider their functionality in preventing ice crystal growth and enhancing creaminess, which is essential for a perfect homemade ice cream. Incorporating proper mixing methods can further optimize the texture and quality of your frozen treat, especially considering that security measures in home appliances are increasing to protect your kitchen equipment from electrical issues and theft risks.
Benefits for Texture
Incorporating stabilizers into your ice cream mixture considerably enhances its smoothness and creaminess. They help prevent ice crystal formation, resulting in a silkier, more luxurious texture. Stabilizers also boost dairy benefits by improving the overall mouthfeel and consistency. When added correctly, they guarantee your homemade ice cream stays creamy even after storage. Additionally, understanding aura colors and their meanings can help you better appreciate the subtle emotional and energetic states that influence your mood and well-being. Using custom ingredients can further optimize the texture and flavor of your ice cream, ensuring a superior homemade product. Moreover, selecting appropriate storage techniques can sustain the ideal texture and prevent ice crystallization over time. Utilizing merchant services with secure payment processing can also streamline your business operations, ensuring a smooth experience for your customers and maintaining high-quality service standards.
Use Alcohol to Prevent Ice Crystals

Adding a splash of alcohol to your ice cream mixture can considerably reduce the formation of ice crystals, resulting in a creamier texture. Alcohol lowers the freezing point, preventing large ice crystals from forming during freezing. This technique not only enhances the smoothness but also allows for alcohol infusion, which boosts flavor complexity without compromising creaminess. Use spirits like vodka, rum, or liqueurs, but keep the amount moderate—around 1-2 tablespoons per quart—so it doesn’t overpower the flavor. Here’s a quick guide:
| Spirit | Flavor Profile | Best Uses |
|---|---|---|
| Vodka | Neutral, clean | Base for flavor enhancement |
| Rum | Sweet, spicy | Adds warmth and depth |
| Liqueurs | Fruity, nutty | For unique, rich tastes |
| Brandy | Fruity, woody | Adds sophistication |
Incorporate Cornstarch or Arrowroot for Creaminess

To achieve ultra-creamy ice cream, mixing in cornstarch or arrowroot powder is a game-changer. These thickeners help prevent ice crystals, resulting in a smoother texture. Cornstarch benefits include adding body and richness without altering flavor, while arrowroot serves as a natural alternative that enhances silkiness. When you add these, you’ll notice a creamier, more indulgent finish. Picture a glossy, velvety batch that’s scoopable straight from the freezer. Think of the process like creating a luxurious custard base, with just a small addition for big impact. Using cornstarch benefits your recipe by improving stability, and arrowroot alternatives keep things natural. Incorporate these powders carefully, allowing them to fully dissolve for the best creamy results in your homemade ice cream.
Whip the Mixture for a Light, Airy Result

Whipping the mixture introduces air, which transforms dense ice cream into a light, fluffy treat. Using the right whipping technique is key to achieving the perfect aeration process. Start by chilling your mixture thoroughly; cold ingredients whip faster and better. Using a hand or stand mixer, whip at medium-high speed until soft peaks form—this is when the mixture holds its shape but is still airy. Be careful not to overwhip, as this can cause the mixture to become grainy. Proper aeration creates tiny air bubbles that give your ice cream a smooth, creamy texture. Incorporating this step ensures your homemade ice cream is irresistibly light and fluffy, elevating your dessert game to a whole new level.
Fold in Fats Like Heavy Cream or Butter

After whipping the mixture to incorporate air, the next step is to gently fold in fats like heavy cream or melted butter. This step enhances creaminess and richness, making your ice cream ultra smooth. If you prefer a butter substitution, choose a mild-flavored, unsalted butter melted to avoid overpowering flavors. You can also incorporate a fruit fold-in here, adding pureed or chopped fruit to balance sweetness and texture. As you fold, imagine a delicate swirl—don’t stir vigorously, just gently combine to preserve the airy structure. Picture a bowl with glossy, velvety cream, soft folds of melted butter, and bursts of fresh fruit. This careful process ensures your ice cream develops that luscious, creamy consistency everyone craves.
Frequently Asked Questions
Can I Make Ice Cream Without an Ice Cream Maker?
You can definitely make ice cream without an ice cream maker by using hand crank alternatives or freezer techniques. For example, mix your ingredients, then place the mixture in a freezer-safe container. Every 30-60 minutes, take it out and stir vigorously to break up ice crystals. Repeating this process helps achieve a creamy texture. This simple method mimics churning and yields delicious homemade ice cream without special equipment.
How Long Should I Churn the Mixture for Best Results?
Imagine you’re in a Victorian parlor, but today’s secret is about the perfect churn duration. For the best results, you should churn your mixture for about 20 to 30 minutes, depending on your machine. The ideal timing ensures a smooth, creamy texture without overfreezing. Keep an eye on the consistency, and don’t rush it—this is the key to ultra-creamy homemade ice cream!
What Are Alternative Natural Stabilizers Besides Cornstarch?
If you’re looking for alternative natural stabilizers besides cornstarch, consider plant-based thickeners like agar-agar, arrowroot powder, or guar gum. Natural emulsifiers such as lecithin or xanthan gum can also improve texture and prevent ice crystals. These options help create ultra-creamy ice cream without artificial additives. Just start with small amounts, mix well, and adjust to achieve the desired consistency for your homemade treat.
Can I Substitute Dairy With Non-Dairy Options?
Did you know that the dairy-free ice cream market grew over 20% last year? You can easily substitute dairy with non-dairy options like coconut milk, almond milk, or cashew cream to achieve a creamy texture. Dairy substitutions work well in recipes, but keep in mind they might alter flavor and consistency. Experiment with different non-dairy options to find the perfect match for your ultra-creamy homemade ice cream.
How Do I Prevent Ice Cream From Becoming Icy Over Time?
To prevent your ice cream from becoming icy over time, focus on maintaining a smooth texture consistency through proper storage techniques. Keep it in an airtight container to prevent ice crystal formation and cover the surface with plastic wrap before sealing. Regularly stirring the ice cream during initial freezing helps reduce ice crystals, keeping it creamy. These steps guarantee your homemade ice cream stays deliciously smooth, even after days in the freezer.
Conclusion
Now that you know these secret hacks, your homemade ice cream will be irresistibly creamy—like a scoop of heaven on a spoon! Just remember, patience is key; chilling and whipping properly makes all the difference. Follow these tips, and you’ll create a dessert so luscious, it’ll rival the best shops in the world. Get ready to impress everyone with your ultra-rich, smooth, and totally addictive ice cream mastery—your taste buds will thank you forever!