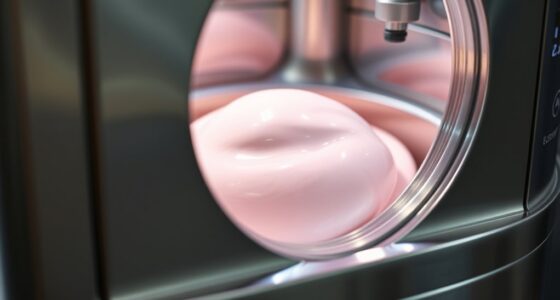

To create stunning swirls and mix-ins in gelato, start with soft-serve at the right temperature and keep all ingredients frozen until use. Carefully layer or fold frozen flavorings like fruit jams or caramel into the gelato for sharp, attractive patterns. Use tools like piping bags or spoons for precise placement, and avoid overmixing to maintain texture. For expert tips on achieving perfect visual effects, continue exploring the techniques that make gelato truly look as good as it tastes.
Key Takeaways
- Use frozen swirl ingredients and gelato at soft-serve consistency to prevent melting and ensure sharp, defined swirl patterns.
- Incorporate swirl components carefully, layering or folding them into the gelato with tools like piping bags or spoons.
- Add mix-ins immediately after churning, pre-freezing them for better shape retention and quick incorporation.
- Layer gelato and swirl elements in a container, finishing with a decorative swirl pattern on top for visual contrast.
- Freeze thoroughly after assembly, then soften slightly before serving to preserve the swirls and mix-in integrity.

Creating swirls and mix-ins in gelato adds visual appeal and enhances flavor complexity, making your homemade treats more enticing. To achieve this, start with your churned base, which should be at a soft-serve consistency but not too warm.
Once you have the gelato ready, the key is to incorporate the swirl and mix-ins carefully to prevent melting and ensure distinct layers. For the swirl, use frozen ingredients like fruit jams, caramel, or other flavorings, which should be fully frozen before adding. This prevents the mixture from melting into the gelato, allowing you to create sharp, eye-catching patterns.
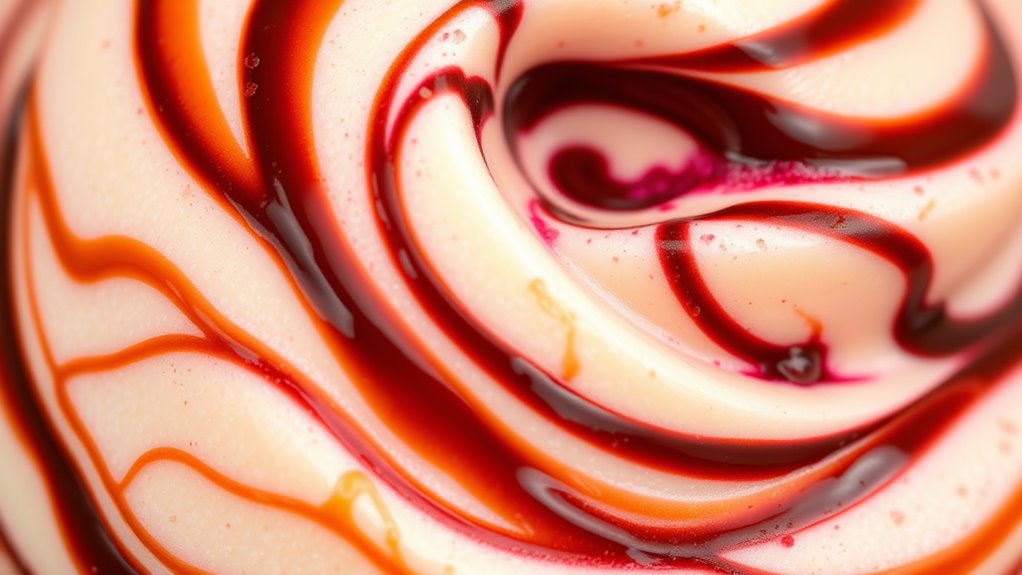
When adding a swirl, the process involves layering or folding the flavored mixture into the churned gelato. To do this effectively, you can use a piping bag or a spoon for precise placement. Carefully insert the frozen swirl into the gelato container, aiming for specific spots rather than mixing it thoroughly. This method allows for defined, contrasting patterns once you finish layering and freezing.
To maximize visual contrast, alternate layers of gelato and swirl components in a loaf pan or similar container, finishing with a final swirl pattern on top. Use a toothpick or skewer to gently create a marbled effect if desired.
Mix-ins, like chunks of chocolate, fruit pieces, or nuts, should be added immediately after the gelato is churned to prevent melting. For best results, pre-freeze your mix-ins in bags or containers to keep them firm and easy to incorporate.
Quickly fold or stir these additions into the churned gelato, being mindful not to overmix, which could cause melting or loss of the layered effect. Keep the additions frozen until just before you combine them to maintain their texture and shape.
Incorporating techniques from butter processing can help ensure the mix-ins stay intact and maintain their shape during blending and freezing. Once you’ve layered or folded in your swirl and mix-ins, transfer the gelato to a storage container and freeze thoroughly. The process of layering—alternating gelato and additions—helps create a visually appealing final product with defined swirls and chunks.
Before serving, give the gelato a few minutes to soften slightly at room temperature for easier scooping. Precision in placement and timing ensures your homemade gelato not only tastes fantastic but also looks professional, with beautiful, distinct swirls and well-distributed mix-ins.
Frequently Asked Questions
Why Do You Put Cornstarch in Gelato?
You put cornstarch in gelato because it acts as a natural thickener, giving your gelato a smoother, creamier texture. It stabilizes water molecules, preventing ice crystals and freezer burn, which helps your gelato stay fresh longer.
When heated, cornstarch gelatinizes, adding body without changing the flavor. Plus, it allows you to reduce fat content, making your gelato healthier while still achieving that rich, indulgent feel.
How to Add Mix-Ins to Homemade Ice Cream?
When adding mix-ins to homemade ice cream, you want to do it at the right time to keep everything intact. Once your ice cream reaches a soft-serve consistency, gently fold in chunks or swirls using a spoon or spatula.
For the best results, add them quickly and evenly distribute, then freeze for several hours. This keeps the mix-ins from sinking or melting, ensuring a delicious, well-blended final product.
How to Get the Perfect Ice Cream Swirl?
Think of your ice cream as a canvas waiting for art. To get that perfect swirl, layer softened ice cream with chilled or frozen swirl mixture, then gently fold or swirl with a spatula—think of a delicate dance.
Use a piping bag or spoon to add the swirl after churning, and avoid overmixing.
Freeze promptly to set the pattern, revealing a beautiful, distinct ribbon of flavor in every bite.
What Makes Gelato Creamier Than Ice Cream?
You notice gelato is creamier than ice cream because it’s churned more slowly, which incorporates less air and creates a denser, silkier texture.
It uses more milk and less cream, giving it a richer, smoother feel. Serving it slightly warmer makes it melt beautifully, highlighting its creaminess.
This slow process and ingredient balance give gelato its distinct, velvety mouthfeel that’s more indulgent compared to traditional ice cream.
Conclusion
Now that you’ve learned how to craft stunning swirls and mix-ins, your gelato becomes a canvas of flavor and art. Imagine swirling ribbons of chocolate or vibrant fruit patches weaving through creamy textures, turning each scoop into a masterpiece. With a little practice, your creations will dance on the tongue like a symphony of colors and tastes, delighting every palate. So, go ahead—let your imagination run wild and craft gelato that’s as beautiful as it is delicious.