Connect with us

Ice Cream Recipes

Creamy Perfection: Best Homemade Vanilla Ice Cream Recipes for Ice Cream Makers!

Obtain the ultimate guide to crafting rich, velvety homemade vanilla ice cream with your ice cream maker, and discover the secrets to creamy perfection.

Published

on

homemade vanilla ice cream

You’re only a few simple ingredients and some quality time with your ice cream maker away from creating the creamiest, most indulgent homemade vanilla ice cream of your dreams. Begin with essential ingredients such as heavy cream, whole milk, sugar, and vanilla extract, and ensure your ice cream maker bowl is frozen for at least 12 hours. Learn the ice cream making process by combining milk and sugar until fully dissolved and following manufacturer instructions for churning and freezing. Experiment with different techniques and ingredients to achieve the perfect consistency, and get ready to enjoy the sweetest results – that’s just the start of your creamy adventure!

Key Takeaways

  • Use an ice cream maker with a frozen bowl to churn creamy vanilla ice cream in under 30 minutes with a smooth, luxurious texture.
  • Combine 3/4 cup of sugar with heavy cream, whole milk, and vanilla extract for a balanced sweetness and ideal consistency.
  • Experiment with milk and cream ratios to achieve your desired level of creaminess and customize the flavor with vanilla bean paste or mix-ins.
  • Freeze the ice cream maker bowl for at least 12 hours and churn at the proper speed to incorporate air and prevent ice crystal formation.
  • Store homemade vanilla ice cream in an airtight container to preserve freshness for up to 2 months in the freezer.

Essential Ingredients and Equipment

To get started on your homemade vanilla ice cream journey, you'll need the right ingredients and equipment. First, let's talk about the essential ingredients. You'll need heavy cream, whole milk, sugar, and vanilla extract to create that classic creamy flavor. If you want to take your ice cream to the next level, consider using vanilla bean paste for a richer taste.

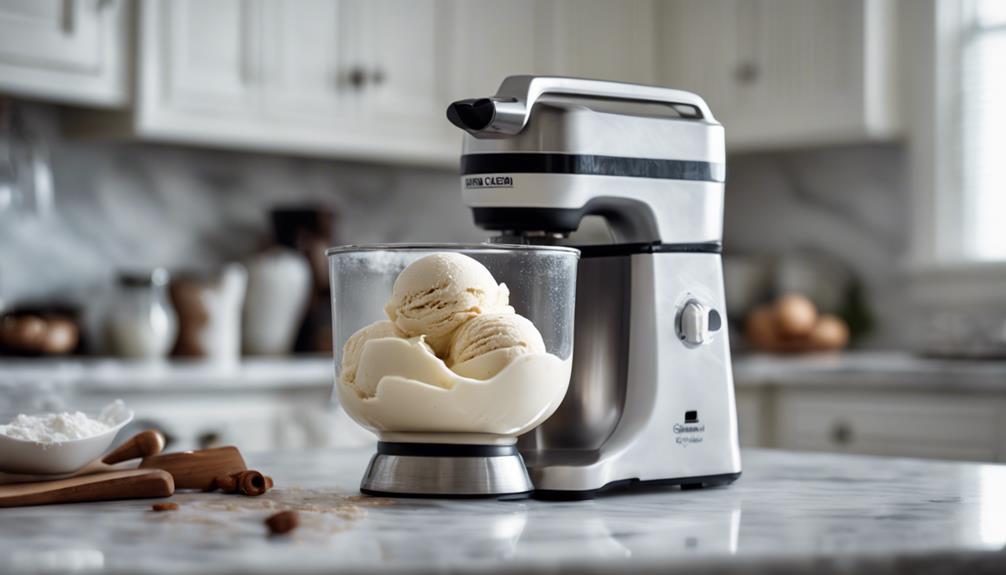
Now, let's move on to the equipment. You can't make homemade vanilla ice cream without an ice cream maker! This machine will churn your mixture into a smooth, creamy consistency. You'll also need mixing bowls, measuring cups, and spatulas to prepare and mix your ingredients. Make sure to freeze your ice cream maker bowl for at least 12 hours before churning to ensure best results.

Using high-quality ingredients and equipment is essential to achieving that perfect scoop. Don't skimp on the good stuff – it's worth the investment.

With the right tools and ingredients, you'll be well on your way to creating delicious, creamy homemade vanilla ice cream that'll impress anyone.

Mastering the Ice Cream Making Process
perfecting homemade ice cream

You'll be producing creamy, dreamy vanilla ice cream in no time once you master the ice cream making process. It's all about following a few simple steps to guarantee your homemade vanilla ice cream recipe turns out smooth and delicious.

StepActionImportance
1Freeze the ice cream maker bowl for at least 12 hoursBest outcomes
2Mix milk and sugar until fully dissolvedSilky base
3Pour mixture into the machine and follow manufacturer instructionsCorrect churning and freezing
4Add mix-ins during the last 10-15 minutes of churningImproved flavor
5Use properly frozen equipment and precise recipe adherenceIntended creamy consistency and texture

Tips for Achieving Perfect Consistency
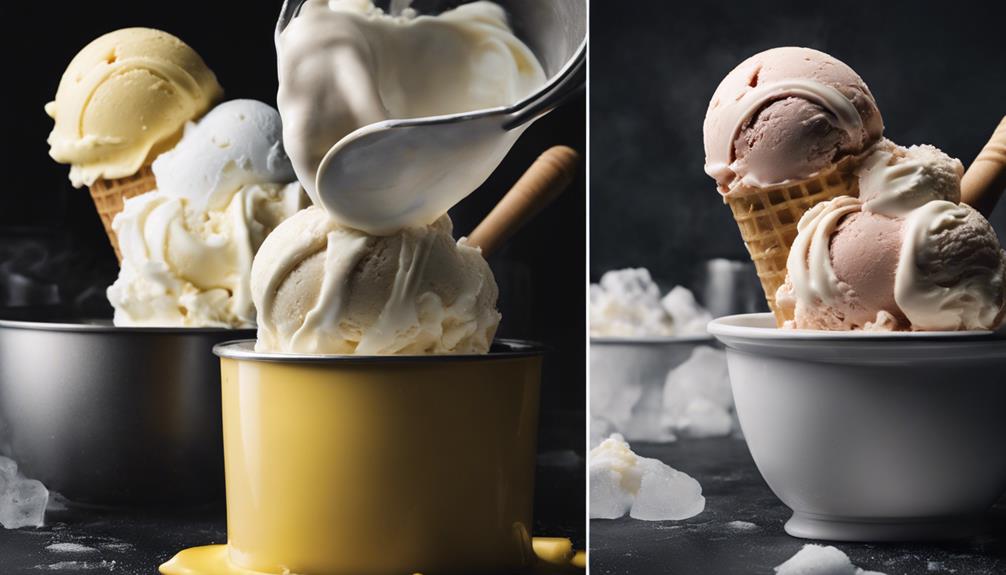
perfecting cooking time textures

When it comes to achieving perfect consistency in your homemade vanilla ice cream, you'll want to focus on perfecting a few key techniques.

You'll need to master the art of churning, get the sugar content just right, and understand the importance of freezing your ice cream to achieve the ideal texture.

Advertisement

Perfect Churning Techniques

Mastering the perfect churning technique is vital, as it directly impacts the final texture of your homemade vanilla ice cream. When making ice cream, you're not just mixing cream, sugar, and flavorings – you're creating a delicate balance of air, water, and fat.

Proper churning speed is essential for incorporating air into the mixture and preventing ice crystal formation. If you over-churn, you'll end up with a grainy texture, while under-churning may result in a dense or icy consistency.

To achieve the perfect creamy texture, follow the recommended churning time specified in your ice cream maker's instructions. Monitor the churning process closely to achieve the desired soft-serve consistency before transferring the ice cream for further freezing.

Don't be afraid to experiment with different churning times and techniques to find the ideal balance between creaminess and firmness in your homemade ice cream. By mastering the perfect churning technique, you'll be on your way to creating creamy, dreamy ice cream that will impress even the most discerning palates.

Ideal Sugar Content

Getting the sugar content just right is essential to achieving perfect consistency in your homemade vanilla ice cream. You want to aim for an ideal sugar content of around 3/4 cup in your recipe, as this will provide a balanced sweetness without compromising the texture.

Advertisement

If you add too much sugar, your ice cream may end up too sweet and struggle to freeze properly. On the other hand, too little sugar can affect the overall flavor and texture, making it icy and unpleasant.

Sugar plays a pivotal role in preventing ice crystals from forming, resulting in a smoother and creamier consistency in your homemade vanilla ice cream. By following the recipe guidelines, you'll be able to achieve the perfect balance of sweetness and texture.

However, feel free to experiment with sugar quantities based on your personal preference to tailor the ice cream to your individual taste. Remember, the key is to find that sweet spot (pun intended!) where your ice cream is both delicious and has a luxurious texture.

Freezing for Texture

Your freezer plays a pivotal role in transforming your churned vanilla ice cream mixture into a creamy, scoopable delight, and understanding the secrets to freezing for texture is crucial to achieving perfect consistency.

To get it right, make sure you properly freeze your ice cream maker bowl for at least 12 hours before churning. This step is fundamental in preventing ice crystals from forming, which can lead to an icy texture.

Advertisement

After churning, it's crucial to freeze the mixture immediately to maintain a creamy and smooth texture. Pre-freezing your equipment also helps in achieving the right consistency.

The longer you freeze your ice cream, the firmer it'll become, making it scoopable and perfect for serving. By following these freezing techniques, you'll be able to achieve the desired texture for your homemade vanilla ice cream.

Exploring Recipe Variations and Substitutions

recipe flexibility and experimentation

You can take your homemade vanilla ice cream to the next level by tweaking the recipe with clever substitutions and variations that cater to your taste preferences. Experiment with different types of milk and cream ratios to achieve your desired creaminess level.

For added flavor and visual appeal, try substituting vanilla extract with vanilla bean paste, which adds real vanilla bean specks to your ice cream.

Here are some ideas to get you started:

  • Imagine a scoop of creamy vanilla ice cream with chunks of crushed cookies or fresh smashed berries mixed in for a sweet surprise.
  • Picture a batch of vanilla ice cream infused with the richness of chopped candy or the crunch of nuts for added texture.
  • Envision a velvety smooth vanilla ice cream with a hint of vodka, which helps prevent crystal formation and results in a silky texture.

Ice Cream Maker Features and Benefits
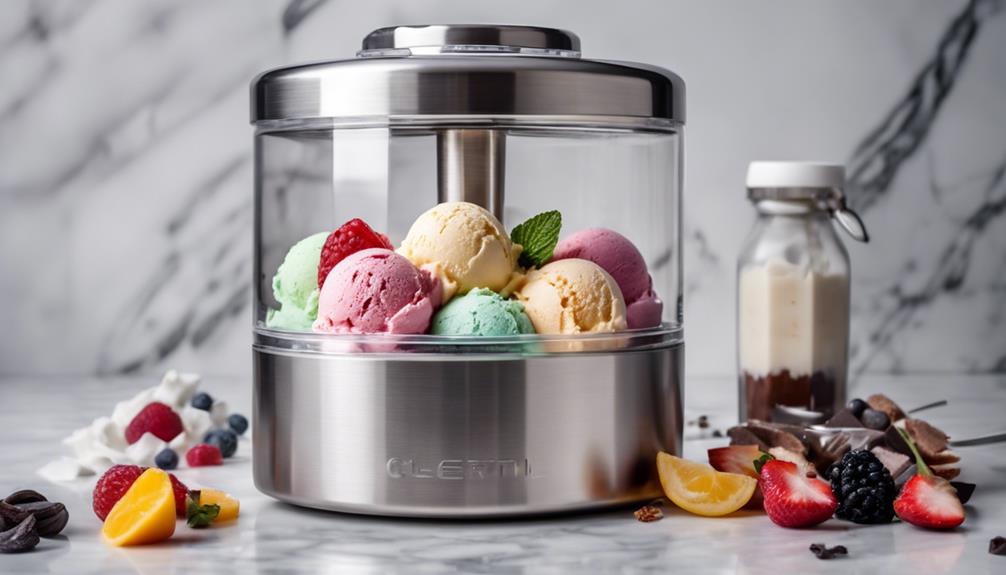
ice cream maker advantages

When you're making homemade vanilla ice cream, an ice cream maker can be a game-changer.

You'll appreciate the features that make the process smooth and hassle-free, like easy cleaning, quick churning, and convenient storage.

Advertisement

Now, let's take a closer look at the benefits these features bring to your ice cream making experience.

Easy Cleaning Process

The dishwasher-safe parts of your ice cream maker make cleaning a breeze, saving you time and effort. You'll appreciate this feature after whipping up a batch of creamy vanilla ice cream using heavy cream and vanilla. When you're done, simply toss the parts in the dishwasher and let it do the work for you.

Imagine being able to make a fresh batch of ice cream without worrying about the hassle of cleaning up afterwards. With your ice cream machine, you can focus on perfecting your recipe rather than scrubbing away at sticky bowls.

Here's what you can look forward to:

  • A stress-free cleaning process that leaves your machine sparkling
  • More time to experiment with new flavors and recipes
  • A cleaner, healthier environment for you and your family to enjoy

Quick Ice Cream Making

With your dishwasher-safe parts cleaned and put away, it's time to get started on making your next batch of creamy vanilla ice cream, courtesy of your ice cream maker's quick and convenient features.

Using a Cuisinart 2-quart machine, you can churn out a fresh batch of real vanilla ice cream in about 30 minutes. Before you start, make sure you've frozen the inner bowl for 12 hours to ensure ideal churning and consistency.

Advertisement

Once you've mixed your ingredients, simply pour them into the machine and let it do the work. With three settings for ice cream, sorbet, or gelato, you can experiment with different recipes and textures, from soft serve to thick and creamy.

The quick ice cream making process allows you to have freshly made ice cream whenever you want, without having to wait hours for it to set. With your ice cream maker, you're just 30 minutes away from indulging in a scoop (or two) of your favorite flavor.

Convenient Storage Options

You'll appreciate the convenient storage options of your Cuisinart 2-quart machine, which allows you to easily stow away its compact design in a crowded kitchen. This feature is especially useful when you're not using the maker, as it won't take up too much space. You can simply store it in a corner or against a wall, freeing up valuable countertop real estate.

Here are a few more benefits of the convenient storage options:

  • You can easily move the maker to a different location, such as a dining table or outdoor patio, when you're hosting a party or gathering.
  • The compact design makes it easy to store the maker in a cabinet or on a high shelf when not in use.
  • The convenient storage options mean you can focus on making the best vanilla ice cream using your maker, without worrying about where to put it when you're done.

With convenient storage options, you can enjoy the benefits of using an ice cream maker without the hassle of finding space for it. This feature is just one of the many reasons why the Cuisinart 2-quart machine is a great choice for anyone looking to make delicious homemade ice cream.

Storage and Serving Suggestions

food preparation and preservation

Preserve the freshness of your homemade vanilla ice cream by storing it in an airtight container. This will prevent other flavors in your freezer from affecting the taste of your creamy treat.

To take it a step further, place plastic wrap directly on the ice cream surface before sealing the container. This trick prevents ice crystals from forming, keeping your ice cream smooth and creamy.

Advertisement

Your homemade ice cream can typically last up to 2 months in the freezer for best quality.

When you're ready to serve, scoop your vanilla ice cream into cones or bowls for a delightful treat. Get creative with your serving suggestions by customizing your scoops with your favorite toppings. Add some fresh fruit, nuts, or drizzle with chocolate sauce to take your ice cream game to the next level.

With these storage and serving tips, you'll be able to enjoy your homemade vanilla ice cream for weeks to come. So go ahead, grab a scoop, and indulge in the creamy perfection you've created!

Frequently Asked Questions

What Is the Secret to Making Ice Cream Very Creamy?

You're wondering what makes ice cream super creamy? It's all about the high fat content from heavy cream and whole milk, plus proper churning and added stabilizers like egg yolks or cornstarch to prevent ice crystals.

What Makes Ice Cream Stay Creamy?

You're wondering what makes ice cream stay creamy? Well, it's all about maintaining the balance of fat content, using proper churning and freezing techniques, and adding sugar to inhibit ice crystallization, ensuring your scoop stays smooth and creamy!

Advertisement

What Is the Secret Ingredient to Ice Cream?

You're the master chef, searching for the magic spark that ignites your ice cream's flavor. The secret ingredient, the ace up your sleeve, is high-quality vanilla extract or vanilla bean paste, elevating your creamy concoction to new heights!

How to Make Homemade Ice Cream Creamy and Not Icy?

When making homemade ice cream, you'll want to use high-fat ingredients, add sugar, and avoid over-churning to prevent iciness. You'll also want to store it properly to maintain that creamy texture you're after.

What Makes Homemade Vanilla Ice Cream Recipes Creamy and Perfect for Ice Cream Makers?

When it comes to making the best vanilla ice cream recipe, using homemade recipes can ensure a creamy and perfect outcome for ice cream makers. The use of high-quality ingredients such as fresh vanilla beans and heavy cream can make a significant difference in the texture and flavor of the final product.

Conclusion

You've finally made it to the end of this exhaustive guide to homemade vanilla ice cream. Congratulations! You're now a certified ice cream expert, and your taste buds (and hips) will never forgive you.

With these recipes, you'll be churning out creamy perfection like a pro, and your friends will be green with envy (or just plain jealous of your ice cream stash).

Advertisement

So, go ahead, indulge in this sweet, sweet sin, and blame us for your newfound addiction.
Mario's creativity shines through his ability to describe the sensory experience of enjoying ice cream. Whether he's discussing the velvety texture, the explosion of flavors, or the delightful combinations of toppings and sauces, his words transport readers to a world of mouthwatering sensations. His descriptive language allows readers to imagine and savor the flavors even before taking the first bite.

Advertisement

Ice Cream Recipes

Churn Up a Storm: Best Ice Cream Recipes for Your Ice Cream Maker!

Satisfy your sweet tooth with unique and delicious flavors, from Summer Peach to Mint to Be Chip, using your electric ice cream maker!

Published

on

By

ice cream maker recipes

Get ready to whip up a storm with your ice cream maker! First, ensure you have the necessary equipment, such as an electric ice cream maker and rock salt, to ensure a smooth and creamy texture. Set up your outdoor stirring station with a stable surface, power source, and organized ingredients. Then, mix your chilled ingredients and stir according to the machine’s instructions. With a two-quart ice cream maker, you can experiment with unique flavors like Summer Peach Ice Cream, Mint to Be Chip, and more. Now, let your creativity flow and uncover the secrets to crafting the perfect scoop!

Key Takeaways

  • Invest in an Electric Ice Cream Maker and essential tools like rock salt and ice for a smooth ice cream making experience.
  • Set up a churning station with a frozen canister, organized ingredients, and a power source for efficient churning.
  • Combine chilled ingredients in the canister and churn following the machine's instructions for a creamy texture and consistent flavor.
  • Experiment with unique flavor creations like Summer Peach Ice Cream, Mint to Be Chip, and Triple Chocolate Chip using a two-quart ice cream maker.
  • Follow precise recipe measurements and add mix-ins like chocolate chips or nuts for extra flavor and texture in your homemade ice cream.

Ice Cream LOVE Story

gelato romance blossoms sweetly

Growing up, you were surrounded by the sweet, creamy essence of ice cream, a family tradition that was lovingly passed down from both parents. Special occasions were made even sweeter with the use of an old-fashioned churner to create homemade ice cream recipes, adding a nostalgic touch to family gatherings. The churning sound and anticipation of that first creamy bite are memories you'll always treasure.

As you grew older, the family upgraded to a 4-Quart Electric Ice Cream Maker, making it easier to create a variety of delicious flavors. This new addition didn't replace the old-fashioned charm, but rather complemented it. You can still experiment with new recipes while holding onto the traditional methods that brought so much joy.

Now, you can share this love for ice cream with your own family and friends. With recipes that cater to different ice cream maker sizes, you can pass down this beloved tradition to the next generation. Whether you're a fan of classic flavors or innovative twists, your electric ice cream maker is ready to churn out memories that'll last a lifetime.

Essential Items for Success

organization adaptability and perseverance

To ensure a successful ice cream making experience, you'll need to gather a few key items, including an Electric Ice Cream Maker, rock salt, and ice (or snow) for the freezing process. These must-haves will help you churn out delicious ice cream recipes with ease.

The Electric Ice Cream Maker is the star of the show, doing the hard work of mixing and freezing your ingredients to the perfect consistency. Rock salt is essential for creating the right temperature environment, allowing your mixture to freeze smoothly and evenly. And, of course, you'll need plenty of ice (or snow) on hand to keep things cool.

With these key elements in place, you'll be free to focus on the enjoyable part – experimenting with different ingredients and flavors to create unique ice cream recipes that showcase your creativity. By having the right tools and ingredients, you'll be well on your way to churning out scoop after scoop of creamy, dreamy goodness.

Advertisement

Two-Quart Ice Cream Recipes

delicious homemade frozen treats

With your two-quart ice cream maker ready to go, you can immerse yourself in a world of flavors, from classic Vanilla Bean and Butter Pecan to unique twists like Peppermint Stick and Pumpkin. Whether you're in the mood for something fruity or chocolatey, there's a recipe out there for you.

Here are some ideas to get you started:

  1. Summer Peach Ice Cream: Combine sliced peaches with a hint of cinnamon and a touch of cream for a sweet and invigorating treat.
  2. Mint to Be Chip: Cut fresh mint leaves and mix them with chocolate chips for a cool and creamy dessert.
  3. Butter Pecan Delight: Add a crunch to your ice cream with chopped pecans and a drizzle of caramel sauce.
  4. Triple Chocolate Chip: Indulge in a rich and decadent treat with three types of chocolate chips – dark, milk, and white.

With these recipes and your two-quart ice cream maker, the possibilities are endless. So go ahead, churn up a storm, and enjoy the fruits of your labor!

Churning Station Setup Guide

churning station installation steps

Now that you're ready to start churning, it's crucial to set up your churning station correctly.

You'll need to prepare your ice cream maker's canister by freezing it beforehand, and then set up an outdoor churning area with the necessary requirements.

Freezing the Canister

You'll want to get a head start on the ice cream-making process by freezing the canister for at least 24 hours before churning, an important step in setting up your churning station. This will guarantee that your electric ice cream maker has a cold canister to work with, which is vital for making delicious homemade ice cream.

Here are some key reasons why freezing the canister is significant:

  1. Even freezing: A frozen canister helps freeze the ice cream mixture evenly, resulting in a smooth and creamy texture.
  2. Cold temperature: Placing the frozen canister into the ice cream maker helps maintain a cold temperature for churning the ingredients effectively.
  3. Ideal churning environment: Creating an ideal churning environment with the frozen canister is important for successfully making delicious homemade ice cream.
  4. Proper churning: A frozen canister allows the ice cream maker to churn the mixture properly, guaranteeing that your homemade ice cream turns out light, fluffy, and full of flavor.

Outdoor Churning Essentials

Set up your outdoor churning station by designating a stable surface for your ice cream maker, making sure a nearby power source, and organizing ingredients and utensils within easy reach. This will help prevent messes inside the house and provide better ventilation for a more enjoyable experience.

Here's a checklist to get you started:

Advertisement
CategoryItemTips
SurfaceTable or counterChoose a stable and level surface
PowerExtension cordEnsure a nearby power source
IngredientsMix-ins and flavoringsKeep them organized and within reach
UtensilsSpatula and spoonHave them ready for scraping and serving
MiscellaneousTrash can and paper towelsPrepare for any messes or spills

Mixing and Churning Process

effective blending and stirring

Now that you've set up your churning station, it's time to focus on the mixing and churning process.

You'll want to make certain you're blending your ingredients properly and have the right essentials at your churning station to guarantee a smooth process.

Next, you'll need to freeze the mix and let the churning magic begin!

Ice Cream Blending Tips

Mix your ice cream ingredients thoroughly before pouring them into the canister to ensure a smooth and creamy texture. This guarantees that all the flavors and ingredients are well combined, resulting in a delicious and consistent taste throughout your ice cream.

When churning your mixture, make sure to follow the manufacturer's instructions and guidelines to achieve the perfect consistency.

Here are some additional tips to keep in mind:

Advertisement
  1. Churn properly: Churning the mixture properly in the ice cream maker helps integrate air and prevent ice crystals from forming, resulting in a creamy texture.
  2. Don't overfill: Avoid filling the canister excessively to allow room for expansion as the mixture churns and freezes.
  3. Check consistency: Regularly check the texture of the ice cream during churning to achieve the desired thickness and creaminess.
  4. Be patient: The churning process typically takes 30 minutes to one hour, depending on the recipe and ice cream maker model, so be patient and let the machine do its job.

Churning Station Essentials

To ensure a smooth and successful ice cream making process, you'll need to gather the right equipment and prepare a suitable space for churning, which we'll explore in more detail below.

Your churning station essentials should include an Electric Ice Cream Maker, rock salt, and ice or snow for the freezing process. It's recommended to set up your churning station outdoors to guarantee proper ventilation and space for the ice cream maker.

Once you've got your equipment in place, it's time to start the mixing and churning process. Begin by freezing the ice cream canister, then mix your ingredients – whether you're making a classic strawberry ice cream recipe or something more unique.

Pour the mixture into the canister and churn for approximately 30 minutes to one hour. The combination of ice and rock salt in the ice cream maker creates the best environment for freezing and churning the ingredients effectively.

Remember to maintain a consistent churning speed throughout the process to achieve the desired creamy texture in your homemade ice cream.

Freezing the Mix

With your churning station set up and equipment ready, you're about to begin on the most exciting part of the ice cream making process: freezing the mix. This is where the magic happens, and your ingredients transform into a creamy, dreamy treat.

Advertisement

To freeze the ice cream, you'll be using your electric ice cream maker. Churning the ice cream in this machine helps incorporate air and prevents ice crystals from forming, resulting in a smooth, even texture.

Here's what you can expect during the churning process:

  1. Combine your chilled ingredients in the canister and churn following the machine's instructions.
  2. The churning time will vary from 30 minutes to one hour, depending on the recipe and machine size.
  3. As the mixture churns, it will gradually freeze and thicken into a creamy texture.
  4. Proper churning guarantees a smooth consistency and even distribution of flavors in your homemade ice cream.

Remember to stay patient and let the machine do its job. Before you know it, you'll be scooping out a delicious batch of freshly churned ice cream!

Four-Quart Ice Cream Creations

delicious homemade ice cream

You'll love whipping up a batch of four-quart ice cream recipes, perfect for satisfying the sweet tooth of a crowd or stocking your freezer with a favorite flavor.

These recipes cater to larger gatherings or big families, offering a rich and creamy texture that's hard to resist. Popular choices include Peanut Butter Ice Cream and Very Berry Strawberry Ice Cream, but you can also experiment with classic flavors like vanilla ice cream or decadent Chocolate Ice Cream.

When it comes to cream ingredients, you can't go wrong with high-quality cream, sugar, and a pinch of salt. The result is a smooth and indulgent treat that's sure to please.

If you're feeling adventurous, try mixing in nuts, candy pieces, or fruit to create unique flavor combinations. With four-quart recipes, the possibilities are endless, and you can indulge in a big batch of your favorite flavor.

Advertisement

Tips for Perfect Homemade Ice Cream

homemade ice cream advice

One vital step in achieving perfect homemade ice cream is preparing your equipment beforehand, as freezing the ice cream canister before churning helps maintain the ideal temperature for the ice cream mixture. This guarantees that your ice cream maker can work its magic efficiently.

To take your homemade ice cream to the next level, follow these additional tips:

  1. Set up a churning station outdoors to secure proper ventilation and space for your ice cream maker.
  2. Follow recipe measurements precisely, as this is essential for achieving the desired consistency and flavor.
  3. Store freshly churned ice cream in a freezer-safe container to prevent it from melting and maintain its texture.
  4. Experiment with different mix-ins like chocolate chips or nuts to add extra flavor and texture to your homemade ice cream.

Frequently Asked Questions

How Long to Churn Ice Cream in an Ice Cream Maker?

When making ice cream, you'll typically need to churn it for 20-30 minutes to get that perfect creamy consistency. However, you should check the manufacturer's instructions and monitor the mixture to avoid over- or under-churning!

Is It Better to Churn Ice Cream Fast or Slow?

You're wondering if you should churn ice cream fast or slow – it depends on the texture you're after! Fast churning yields smaller crystals and a smooth texture, while slow churning incorporates more air for a lighter, fluffier treat.

How to Make the Best Quality Ice Cream?

To make the best quality ice cream, you're using high-quality ingredients, right? Fresh dairy, eggs, and real vanilla are a must for amazing flavor and texture.

How to Make Ice Cream Using an Ice Cream Machine?

You'll start by preparing your ingredients and freezing the canister, then mix and pour them in, churning for 30 minutes to an hour, and finally, transfer the creamy treat to a container and freeze to enjoy!

What are the best ice cream recipes for a homemade ice cream maker?

Looking for the best ice cream recipes with maker? Try classic flavors like vanilla or chocolate, or get creative with unique options like salted caramel or mint chocolate chip. Whichever recipe you choose, using a homemade ice cream maker will ensure a delicious and creamy treat for any occasion.

Advertisement

Conclusion

You've churned up a storm, and now your freezer is stocked with creamy, dreamy ice cream!

You've mastered the art of ice cream making, and your taste buds are doing the happy dance.

Just like a conductor leading an orchestra, you've harmoniously blended flavors and textures to create sweet symphonies.

Your ice cream maker has been your trusty sidekick, helping you create unforgettable treats.

Keep on churning, and remember, the possibilities are endless!

Advertisement
Continue Reading

Ice Cream Recipes

Avo-Licious Treat: Best Avocado Ice Cream Recipe Revealed!

Open the door to a world of creamy indulgence with a revolutionary avocado ice cream recipe that will change the game forever.

Published

on

By

avocado ice cream recipe

You are about to uncover the key to a rich, delicious, and healthy ice cream made with only three ripe avocados, one can of full-fat coconut milk, and a touch of sweetness. Simply blend the ingredients until creamy, pour the mixture back into the avocado shells, and freeze for a few hours. Sprinkle with dark chocolate chips for a luxurious treat. Prepare for a flavorful journey with refreshing mint notes, nutty surprises, and decadent desserts. There’s a whole world of avocado ice cream waiting to be explored, just a step away…

Key Takeaways

  • This avocado ice cream recipe requires three ripe avocados, coconut milk, honey or syrup, and dark chocolate chips for a creamy dessert.
  • Blend avocados with coconut milk and honey/syrup until smooth, then freeze the mixture in avocado peels for a few hours.
  • Customize the recipe with delicious variations like minty fresh twists, avocado chocolate mix, or nutty delight options for unique flavors.
  • Ensure a perfect texture by blending in batches, scraping down the sides, and freezing for at least 4 hours to achieve a smooth consistency.
  • This vegan and paleo-friendly dessert is a guilt-free treat that prioritizes health and the planet, with avocado's numerous nutritional benefits.

Avocado Ice Cream Recipe

To make this creamy and delicious Avocado Ice Cream, you'll need three ripe avocados, 1 can of full-fat coconut milk, 1/4 cup of honey or syrup (for vegan option), and 1 cup of dark chocolate chips. These ingredients will come together to create a unique and tasty treat that's both vegan and paleo-friendly.

First, blend the ripe avocados with the coconut milk and honey or syrup until smooth. You can use a blender or food processor to get the job done.

Once you've got a creamy mixture, spoon it back into the avocado peels and freeze them for a few hours. This will help the mixture to set and give it a fun, unique shape.

After freezing, scoop the avocado ice cream into bowls and top it with the dark chocolate chips. You can also add a chocolate mousse seed made with dark chocolate and cream for extra richness and flavor.

The result is a delicious and healthy dessert option that's perfect for those looking for a satisfying alternative to traditional ice cream.

Advertisement

Delicious Variations to Try

exciting salsa recipe ideas

Now that you've mastered the basic avocado ice cream recipe, it's time to get creative!

You can try adding different flavors and textures to create unique variations that suit your taste.

From invigorating twists to nutty delights, you're about to discover some amazing ways to take your avocado ice cream to the next level.

Minty Fresh Twists

You can easily shake up the classic avocado ice cream recipe by experimenting with a few invigorating twists. If you're not a fan of mint, you can skip the mint leaves altogether and explore other flavors. But if you're a mint lover, get ready to indulge!

Here are some minty invigorating twists to try:

  1. Mint to Be: Double the mint leaves and add chocolate chips for a revitalizing mint chocolate chip ice cream variation.
  2. Citrus Burst: Infuse a citrusy zing by blending in lemon zest or orange zest into the avocado ice cream mix.
  3. Nutty Delight: Fold in finely chopped pistachios or almonds before freezing for a crunchy texture and nutty flavor.
  4. Decadent Treat: Add 2 tablespoons of cacao powder to create a rich and indulgent Chocolate Avocado Ice Cream.

These twists will give your avocado ice cream a unique spin, and you can always experiment with different combinations to create your perfect flavor. So go ahead, get creative, and enjoy your delicious avocado ice cream!

Avocado Chocolate Mix

Combine the richness of avocados with the decadence of chocolate to create an indulgent treat that'll satisfy your sweet tooth.

Advertisement

You can make a chocolatey avocado ice cream by blending ripe avocados with coconut milk, honey, and chocolate chips. This creamy and rich dessert is a game-changer for anyone with a sweet tooth.

If you want to take it up a notch, try adding cacao powder to give it an intense chocolate flavor. You can also experiment with different types of chocolate chips, like dark or milk chocolate, to change the flavor profile.

Nutty Delight Options

Frequently, you'll find that adding a nutty element takes your avocado ice cream to the next level, and that's exactly what you can do with these delicious variations. If you're a nut lover, you'll adore these options!

Here are some nutty delight options to try:

  1. Pistachio Crunch: Fold in finely chopped pistachios before freezing for added crunch and a nutty flavor.
  2. Almond Delight: Blend in some chopped almonds for a creamy and nutty ice cream.
  3. Mint Chocolate Chip: Double the mint leaves and add chocolate chips for a rejuvenating twist on the classic mint chocolate chip flavor.
  4. Nutty Chocolate: Add some chopped nuts like almonds or hazelnuts to your Chocolate Avocado Ice Cream for a decadent treat.

These variations will take your avocado ice cream to new heights!

Feel free to experiment and combine different nuts and flavors to create your own unique recipes. With these nutty delight options, you'll never get bored of the same old avocado ice cream flavor again.

Advertisement

Tips for Perfect Texture

perfecting your baked goods

When it comes to achieving the perfect texture in your avocado ice cream, you'll want to pay attention to blending techniques and freezing times.

You'll need to blend your ingredients until they're silky smooth, and then freeze the mixture at the right pace to avoid ice crystals from forming.

Blending Techniques Matter

How do you achieve a silky, smooth texture in your avocado ice cream, devoid of any unwanted chunks or graininess? The secret lies in your blending techniques.

When using a blender or food processor, make sure to:

  1. Blend in batches: Divide your avocado mixture into smaller portions to make certain everything gets fully incorporated and smooth.
  2. Scrape down the sides: Stop the blender and scrape down the sides every 10-15 seconds to prevent any chunks from hiding out.
  3. Blend on low: Start with a low speed and gradually increase as necessary to avoid introducing air into the mixture.
  4. Don't over-blend: Stop blending once you reach your desired consistency – excessive blending can lead to an icy texture.

Freezing Times Crucial

Now that you've mastered the art of blending, it's time to focus on freezing your avocado ice cream to achieve that perfect creamy texture. You'll want to freeze it for at least 4 hours to secure a smooth consistency.

To get started, chill a loaf pan in the freezer before transferring the ice cream mixture. This will help the mixture freeze more evenly. Once you've transferred the mixture, get it into the freezer as quickly as possible to minimize the formation of ice crystals.

When you're ready to serve, take the ice cream out of the freezer and let it soften for 10-15 minutes. This will allow the flavors to meld together and the texture to become even creamier. Using ripe avocados in your recipe will also contribute to a silky smooth texture.

Advertisement

Easy Vegan Dessert Options

simple plant based sweet treats

You can indulge in a variety of easy vegan dessert options that are both delicious and guilt-free, and avocado ice cream is one of them. As a vegan, you don't have to sacrifice taste for dietary restrictions. With avocado ice cream, you can enjoy a creamy, smooth, and rich dessert that's free from animal products.

Here are some easy vegan dessert options you can try:

  1. Avocado Ice Cream: Made with avocados, coconut milk, and a sweetener of your choice, this dessert is a game-changer.
  2. Fruit-based Desserts: Use seasonal fruits to create delicious and invigorating desserts like sorbets, crisps, or simply enjoy them as is.
  3. Chocolate Chia Pudding: Mix chia seeds with almond milk, cocoa powder, and a sweetener to create a rich and indulgent dessert.
  4. No-bake Energy Balls: Combine rolled oats, nuts, and dried fruits to create bite-sized treats that are perfect for snacking on the go.

The best part? You can learn how to make these vegan desserts from the comfort of your own home through online classes.

Avocado Nutrition Benefits

healthy fats and vitamins

Avocados bring a wealth of nutritional benefits to the table, boasting an impressive array of vitamins, minerals, and healthy fats that can greatly enhance your overall well-being. As you indulge in this creamy avocado ice cream, you'll be treating your body to a nutrient-dense snack. Rich in vitamins C, E, K, and B-6, as well as folate, potassium, and fiber, avocados provide a boost to your immune system and support healthy digestion.

The healthy fats in avocados, primarily monounsaturated fats, can help lower bad cholesterol levels and reduce the risk of heart disease. Plus, the antioxidants like lutein and zeaxanthin promote eye health and reduce the risk of age-related macular degeneration. With only 3 grams of net carbs per serving, avocados are a great choice for those following low-carb or ketogenic diets.

Sustainable Lifestyle Choices

promoting eco friendly living habits

By incorporating eco-friendly practices into your daily routine, you're not only reducing your carbon footprint but also promoting a healthier planet for future generations.

One way to do this is by making conscious food choices, like opting for vegan and sustainable products. When making avocado ice cream at home, you're already taking a step in the right direction by using natural ingredients like avocados and coconut milk.

Here are some simple ways to further incorporate sustainable lifestyle choices into your daily routine:

  1. Choose eco-friendly products: Opt for vegan and sustainable products like Ombar chocolate bars and UpCircle Beauty skincare to support eco-friendly practices.
  2. Select natural ingredients: When cooking or baking, choose natural and organic ingredients whenever possible to reduce your impact on the environment.
  3. Reduce food waste: Plan your meals and make a grocery list to avoid buying too much food that may go to waste.
  4. Support local farmers: Buy from local farmers' markets or through community-supported agriculture programs to promote sustainable agriculture.

Indulge in Guilt-Free Treats

healthy and delicious snacks

Making sustainable lifestyle choices doesn't mean sacrificing indulgent treats, and with avocado ice cream, you can satisfy your sweet tooth without compromising your values. This creamy dessert is a game-changer for those who want to indulge in guilt-free treats. As a vegan and paleo-friendly option, avocado ice cream is a healthier alternative to traditional ice cream. You can customize it to your taste by adding different flavors like mint, citrus, or dark chocolate chips.

Imagine indulging in a rich and creamy dark chocolate avocado ice cream, knowing that you're making a conscious choice to prioritize your health and the planet. The best part? You can make it from the comfort of your own home using avocados, coconut milk, and natural sweeteners like honey or maple syrup.

Advertisement

With avocado ice cream, you can have your cake and eat it too – literally! So go ahead, indulge in this guilt-free treat and savor every bite, knowing you're treating yourself and the planet with kindness.

Frequently Asked Questions

Is Avocado Ice Cream Healthier Than Regular Ice Cream?

You're wondering if avocado ice cream is healthier than regular ice cream, and the answer is yes! It's lower in sugar and saturated fats, providing healthy fats, fiber, and vitamins, making it a nutritious dessert option.

How to Make Avocado Ice Cream Like Tom Brady?

You're curious about Tom Brady's avocado ice cream, right? To make it like him, you'll need ripe avocados, coconut milk, honey, and chocolate. Blend until creamy, then freeze and enjoy your guilt-free dessert!

What Are the Benefits of Avocado Ice Cream?

You're probably wondering what makes avocado ice cream so special, and the benefits are numerous! You'll love that it's rich in healthy fats, vitamins, and minerals, making it a nutritious alternative to traditional ice cream.

What Is Avocado Ice Cream Made Of?

You'll typically combine ripe avocados, coconut milk, and sweeteners like honey or syrup to make avocado ice cream, with optional add-ins like chocolate chips, mint leaves, or chopped nuts for extra flavor and texture.

Advertisement

Is it Possible to Make Avocado Ice Cream Without Eggs?

Yes, it is possible to make a delicious avocado ice cream without eggs. This unique and creamy dessert can be made using a simple strawberry ice cream recipe without eggs. The combination of ripe avocados and sweet strawberries creates a refreshing and guilt-free treat for anyone looking for an alternative to traditional ice cream.

Conclusion

You've made it! Now, go forth and indulge in your creamy, dreamy avocado ice cream, guilt-free and proud. Your taste buds will do the happy dance, and your body will thank you for the nutritious treat.

Just like a symphony conductor expertly blending harmonious notes, you've orchestrated the perfect balance of flavor and health. Savor each spoonful, and let the sweet satisfaction linger, knowing you've made a delicious choice that's as cool as an invigorating summer breeze.

Continue Reading

Ice Cream Recipes

Homemade Bliss: Discover the Best Ice Cream Recipes for Your Ice Cream Maker!

Awaken your taste buds to a world of creamy indulgence with the ultimate guide to crafting unforgettable homemade ice cream flavors.

Published

on

By

ice cream maker recipes

You are on the verge of uncovering the secret to creamy, dreamy, and completely addictive homemade ice cream with your reliable ice cream maker. Begin with essential ingredients such as heavy cream, whole milk, and cane sugar, then perfect the churning process to introduce air and evenly distribute fat for the ideal texture. Experiment with a variety of toppings and mix-ins, ranging from fruity compotes to decadent chocolate chips. However, this is just the start – you will also discover how to fine-tune your ice cream’s texture and consistency, and experiment with unique flavor combinations that will excite your taste buds. So, take the next step and explore the limitless possibilities that lie ahead.

Key Takeaways

  • Master the churning process to achieve the perfect texture, incorporating air and distributing fat with ideal speed and duration.
  • Balance essential ingredients like heavy cream, whole milk, cane sugar, and vanilla extract for a rich and creamy base.
  • Explore unique flavor combinations and seasonal ingredients to tantalize taste buds and add variety to your homemade ice cream.
  • Perfect texture and consistency by controlling temperature and ingredients, including the use of egg yolks to maintain small ice crystals.
  • Get creative with toppings and mix-ins like fruity compotes, nutty peanut butter, or rich chocolate chips to personalize your ice cream creations.

Essential Ice Cream Ingredients

You'll need five vital ingredients to craft a rich, creamy, and deliciously sweet ice cream base: heavy cream, whole milk, cane sugar, vanilla extract, and salt. These ingredients work together to create a well-balanced flavor profile that's necessary for making delicious homemade ice cream.

Heavy cream adds a rich and luxurious texture, while whole milk contributes to the creaminess you crave. Cane sugar provides the sweetness you need, but be careful not to overdo it, as too much sugar can make your ice cream taste icy.

The combination of these ingredients is essential, as they work together to create a smooth and velvety texture. When you mix them together, you'll get a base that's perfect for adding your favorite flavors and mix-ins.

Mastering the Churning Process

perfectly churning butter daily

Mastering the churning process is vital, as it directly impacts the final texture and consistency of your ice cream. When you churn your ice cream mixture, you're incorporating air and distributing fat molecules evenly for a smooth mouthfeel. The speed and duration of churning are pivotal, as they affect the final consistency of your ice cream.

Churning TimeResult
Too shortIce cream may be too soft and lacking in texture
Just rightLight, creamy, and smooth ice cream
Too longIce cream may become too airy or develop ice crystals
Over-churningGrainy or icy texture due to excessive air incorporation

As you churn, your ice cream maker is mixing in any added flavors or mix-ins, ensuring a well-balanced taste experience. Be careful not to over-churn, as this can introduce ice crystals and ruin the texture. By mastering the churning process, you'll be able to create a wide range of delicious ice cream flavors with your ice cream maker.

Creative Toppings and Variations

flavorful and inventive treats

Now that you've perfected your ice cream base, it's time to get creative with a world of toppings and variations that can elevate your frozen treats to new heights.

With your homemade ice cream as the canvas, you can add a pop of color and flavor with fruity toppings like compotes or fresh fruit. If you're in the mood for something crunchy, try adding nutty toppings like peanut butter or almonds.

Advertisement

For a rich and decadent experience, indulge in chocolate toppings like chocolate chips or crumbled cookies. Classic toppings like caramel sauce or a dollop of whipped cream can add a traditional touch to your ice cream.

But why stop there? Get creative with mix-ins like strawberries or chocolate chips to personalize your homemade ice cream to your liking. The possibilities are endless, and the fun is in experimenting with different combinations to create unique flavors that are all your own.

Perfecting Texture and Consistency

balancing ingredients for pasta

Achieving a smooth texture and perfect consistency in your homemade ice cream requires careful attention to the formation of small ice crystals and the strategic use of ingredients like fat, milk protein, and sugar.

You can achieve this by creating an ice cream base that's rich in these essential components. Adding egg yolks to your base, for instance, will help maintain small ice crystals and guarantee a velvety texture in your finished ice cream. But it's important to cook the egg mixture to the ideal temperature of 170-180°F to get the best results.

Temperature management is also key during the chilling and freezing processes, as it greatly impacts the final texture and consistency of your ice cream. By keeping your base at the right temperature, you'll prevent the growth of large ice crystals, which can lead to an icy or grainy texture.

With these tips in mind, you'll be on your way to crafting creamy, dreamy ice cream that's sure to impress.

Advertisement

Exploring Flavor Combinations

creating unique taste profiles

You can access a world of creative possibilities by experimenting with unique flavor combinations that tantalize your taste buds. With your ice cream maker, you're not limited to traditional flavors. Try combining lavender with honey, matcha with green tea, or salted caramel with a hint of sea salt.

Seasonal ingredients like fresh berries, citrus zest, or pumpkin spice can add variety to your ice cream creations. Balance your flavors by pairing sweet, salty, and savory elements, like chocolate with sea salt or caramel with crispy bacon.

Take your ice cream to the next level by incorporating mix-ins like cookie dough chunks, toasted nuts, or homemade marshmallows. Explore cultural influences for inspiration, such as Thai tea, Turkish delight, or Mexican hot chocolate flavors.

The possibilities are endless, and the fun lies in experimenting with different combinations. Don't be afraid to try new things and adjust flavors to your taste. With your ice cream maker, you're the master of your own ice cream universe, and the possibilities are limitless!

Frequently Asked Questions

What Is the Secret Ingredient to Ice Cream?

You're wondering what the secret ingredient to ice cream is? It's a combo of fat, milk protein, and sugar that prevents water from freezing solid, giving you that creamy texture you love so much!

How Do You Make High Quality Ice Cream?

You make high-quality ice cream by using a high-fat base, incorporating egg yolks, and chilling it properly before churning. Then, agitate the mixture during churning to control ice crystal formation and achieve a smooth texture.

Advertisement

How to Make Homemade Ice Cream Smooth and Creamy?

As you dip your spoon into the velvety darkness, you crave that silky smoothness. To achieve it, you'll want to focus on incorporating air, using the right ratio of fat to water, and tempering your mix-ins to prevent ice crystals from forming.

How to Make Ice Cream in a Magic Ice Cream Maker?

You'll love making ice cream with your Magic Ice Cream Maker! Simply freeze the bowl, add your ingredients, and let the machine do the churning for you – it's that easy!

Can I Use Homemade Ice Cream in the Dessert Recipes?

Yes, you can absolutely use homemade ice cream in the best ice cream dessert recipes. In fact, homemade ice cream adds a unique and delicious touch to dessert recipes. Whether you’re making sundaes, floats, or ice cream sandwiches, homemade ice cream elevates the flavors and overall quality of the dessert.

Conclusion

As you savor the last bite of your latest ice cream creation, remember that the real magic happens in the making. With every churn, you're weaving a tapestry of flavors, textures, and memories. Your ice cream maker is more than just a machine – it's a tool to reveal a world of sweet possibilities, where every spoonful is a taste of pure bliss.

So go ahead, take another scoop, and let the sweet symphony of flavors sing its song of joy and contentment.

Advertisement
Continue Reading
Advertisement
Advertisement

Affiliate disclaimer

As an affiliate, we may earn a commission from qualifying purchases. We get commissions for purchases made through links on this website from Amazon and other third parties.

Vetted

top ice cream machines top ice cream machines
Vetted2 minutes ago

15 Best Ice Cream Machines for Homemade Treats Like Never Before

Hungry for the best homemade ice cream experience?

diy ice cream makers diy ice cream makers
Vetted9 hours ago

15 Best DIY Ice Cream Makers to Satisfy Your Sweet Tooth

Tempt your taste buds with the top 15 DIY ice cream makers—discover the perfect one to indulge your sweet tooth.

adventure dad gift ideas adventure dad gift ideas
Vetted9 hours ago

11 Best Adventure Dad Gifts for the Outdoorsy Father in Your Life

Mystery and excitement await with these 11 best adventure dad gifts for the outdoorsy father in your life.

affordable beverage fridges list affordable beverage fridges list
Vetted4 months ago

15 Best Beverage Fridges Under $300 to Keep Your Drinks Cool and Refreshing

Hunting for a budget-friendly beverage fridge under $300 to keep your drinks chilled and ready to enjoy?

chilled drinks at hand chilled drinks at hand
Vetted4 months ago

15 Best Beverage Fridges to Keep Your Drinks Chilled and Ready to Serve

Yearning for the perfect beverage fridge to keep your drinks chilled and ready to serve?

top camping fridge picks top camping fridge picks
Vetted4 months ago

15 Best Dometic Fridges for Camping Adventures – Keep Your Food Fresh Anywhere

Breeze through your camping trips with the top 15 Dometic fridges to keep your food fresh - adventure awaits!

top fridges for freshness top fridges for freshness
Vetted4 months ago

11 Best Denki Fridges to Keep Your Food Fresh and Your Kitchen Stylish

Kickstart your kitchen upgrade with the top Denki fridges for freshness and style, setting the stage for a perfect blend...

secure your beer storage secure your beer storage
Vetted4 months ago

15 Best Beer Fridges With Lock for Keeping Your Brews Safe and Cold

Get ready to safeguard your favorite brews with these 15 top-rated beer fridges featuring locks - the ultimate solution for...

top fridge freezer deals top fridge freezer deals
Vetted4 months ago

15 Best Deals on Fridge Freezers You Need to Check Out in 2024

Need a new fridge freezer? Discover top deals like the RCA Mini Refrigerator and Galanz Retro Fridge in this list...

affordable beer fridge options affordable beer fridge options
Vetted4 months ago

15 Best Beer Fridges Under $200 – Keep Your Brews Chilled Without Breaking the Bank

On the hunt for an affordable beer fridge?

fridge freezer deals galore fridge freezer deals galore
Vetted4 months ago

15 Best Deals for Fridge Freezers That Will Keep Your Food Fresh and Your Wallet Happy

Prepare for freshness and savings with these top 15 fridge freezers that will keep your food fresh and your wallet...

top beer fridge picks top beer fridge picks
Vetted4 months ago

15 Best Beer Fridges to Buy for Keeping Your Brews Chilled and Ready to Enjoy

Find the ultimate beer fridge with the top 15 picks, from Frigidaire's colorful options to Velieta's under-counter gem – your...

Advertisement

Trending

Copyright © 2024 Dri Dri Gelato Affiliate disclaimer As an affiliate, we may earn a commission from qualifying purchases. We get commissions for purchases made through links on this website from Amazon and other third parties.